This is another re-post from the old forum. This project has been long since abandoned,
but I thought you'd all be interested to see how far I got anyway. It was abandoned
because the wooden rig just wasnt rigid enough and even the slightest fraction of a
wobble could ruin a shot. That said the basic ideas & mechanisms were all sound and
I did draw up plans for a scaff-pole version which would have worked. The wood rig
in total cost about £60 (+ Lego), The scaff-pole version would have worked out many
times that price but I didn't have a pile of money to spend on starting from scratch
so it got put on the back burner, then I moved onto other projects, later the wood
from the rig was used for other things
I am making a lego stop-motion animation version of evil dead. the final size of the whole
cabin/forest area i'm building (to scale) is around 8ft by 6ft but this will not include the
bridge or (most of) the path to the cabin (as you can see in the plans below) these will
need to be built seperately (or it would get stupidly big!). In case anyone wants to know
the rig has cost me about £60 for the parts (including the table base), so abit more than
i thought originally but that still gives me a £400 budget for the lego (if it could ever cost
that much?) also i can re-use this rig if i decide to give dawn of the dead lego a go.
-later-
I went to legoland, even though its supposed to have the biggest selection of pic-a-brick
in the UK, i couldnt get the vast majority of the sizes or colours i wanted (but i know
you can get these) so i just bought a pile of lego bits, and used it to build the sets
you can see below. i'll use these to give me a more exact figure of each of the bits I'll
need then use
www.bricklink.com to order the bits (which will be alot more expensive
than pic-a-brick)
Below you can see the construction process of the table camera rig along with some
lego cabin tests.

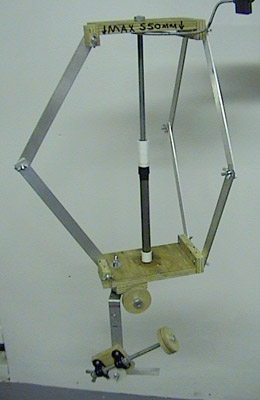
This is the top portion of the rig (resting on a bin) (the bottom bit in the next
picture fits to the threaded bar you can see in the bottom right hand corner)
this allows the the camera to track forward/backward by rotating the threaded
bar so it can be moved in tiny amounts 4ft & left/right 3ft and any combination,
this whole thing fits to a wooden frame which is fixed to the table which the
lego will be built on.
This is the main body of the rig, the top bit allows the camera to move up and
down by rotaing the centre tube up and down on the threaded bar,
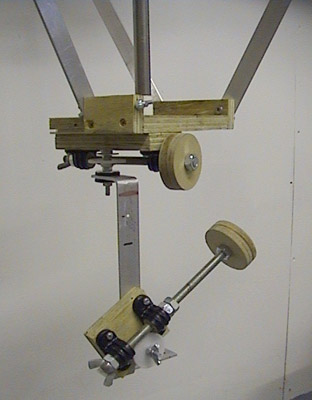
this bit allows the camera (mounted on the bottom plate which you can just see)
to rotate 360 degrees in any direction in tiny increments, (ie facing up/down &
backward/forwards) by winding either of the threaded bars, which turns the each
of the gears (cogs)
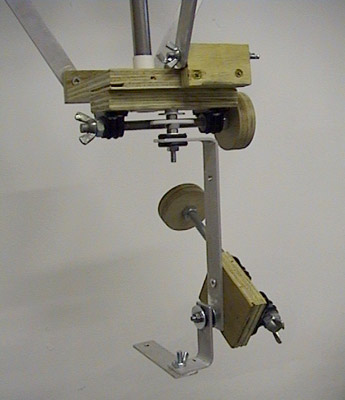
The opposite view of the camera mount, the camera is fixed to the flat bar you
can see at the bottom left of the photo and would be facing towards you.

This is the finished camera rig. With all the above movement combined the
camera can sit level with the ground, or upto 50cm above it. I can track 4ft
forward & back, 3ft side to side. The camera mount itself can rotate horizontally
or vertically 360 degrees in a full circle. The whole lower portion of the rig (shown
in the first photo) can slide to one end of the table or the other to allow shooting
over the whole length of the set. You can also use any combination of the above
at the same time and all moving in tiny increments via turning the various threaded
bars to achieve complex camera moves.
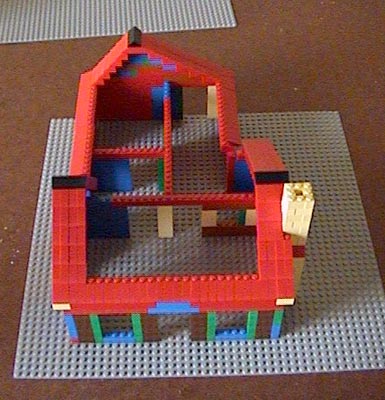
This is the cabin layout, although the bricks are the wrong colour at the moment.
As I animate it I'd remove the outer walls as needed to get the camera in close,
then replace them for outside shots.
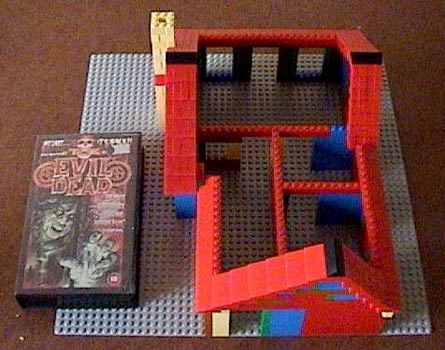
In this photo you can see the scale of the cabin next to a VHS tape box
The scale is dictated by the lego men, everything is built up from that, so this
is the same scale as any set you'd buy from lego, ie a castle or star wars sets,
etc... it would be difficult to do anything bigger or smaller, with most items
like doors, windows, etc at the same scale. plus I'm building a set big enough
to cover an 8' x 6' (2.5 metres x 1.8 metres) sheet (this includes the surrounding
forest back as far as the starting point for the final shot of the film, and around
1/4 of the driveway at the front), any bigger and i would find it hard to reach
over to anymate anything.
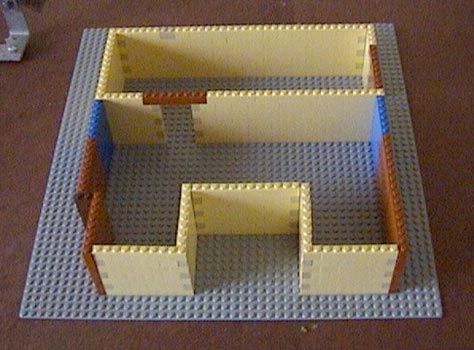
This is the cellar layout, again the bricks are in the wrong colour. In the finished
set, the BOTD would be located on a table in the top room at the top right
corner and the 8mm projector would be in the centre of the bottom room, with
the stairs upto the cabin in the bottom room left bottom alcove. You can see all
this on the GIF layout plans below.
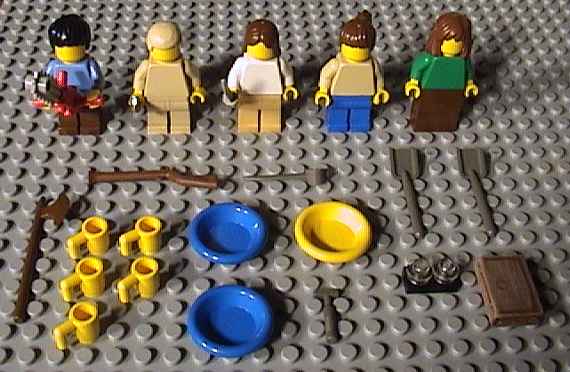
This is some of the first installment if lego i have; figures left to right you have
Ash (with the chainsaw), Scotty (With his hunting knife), Linda (Holding the
dagger), Shelly, and Cheryl. down in the bottom right had corner is the tape
recorder and the book of the dead (Unfinished)
Before starting this project I designed complex plans to allow me to work out
the exact layout of the cabin, exactly what parts I would need and how all
they would all fit together, along with the locations of things like the trees,
workshed, barn and the graves dug outside in respect to the position of the
cabin, and their scales in relation to each other. You can download those plans
here if you want to build your own lego cabin. You'll need WinRAR to unzip the
files which are all in GIF picture format. Although all the plans are designed using
lego parts, the basic layout and orientation of the real cabin is identical, so they
may be useful for other things too.
http://www.evildeadchainsaws.com/website/deadites/evil_dead_lego_cabin_plans.rar