|
|
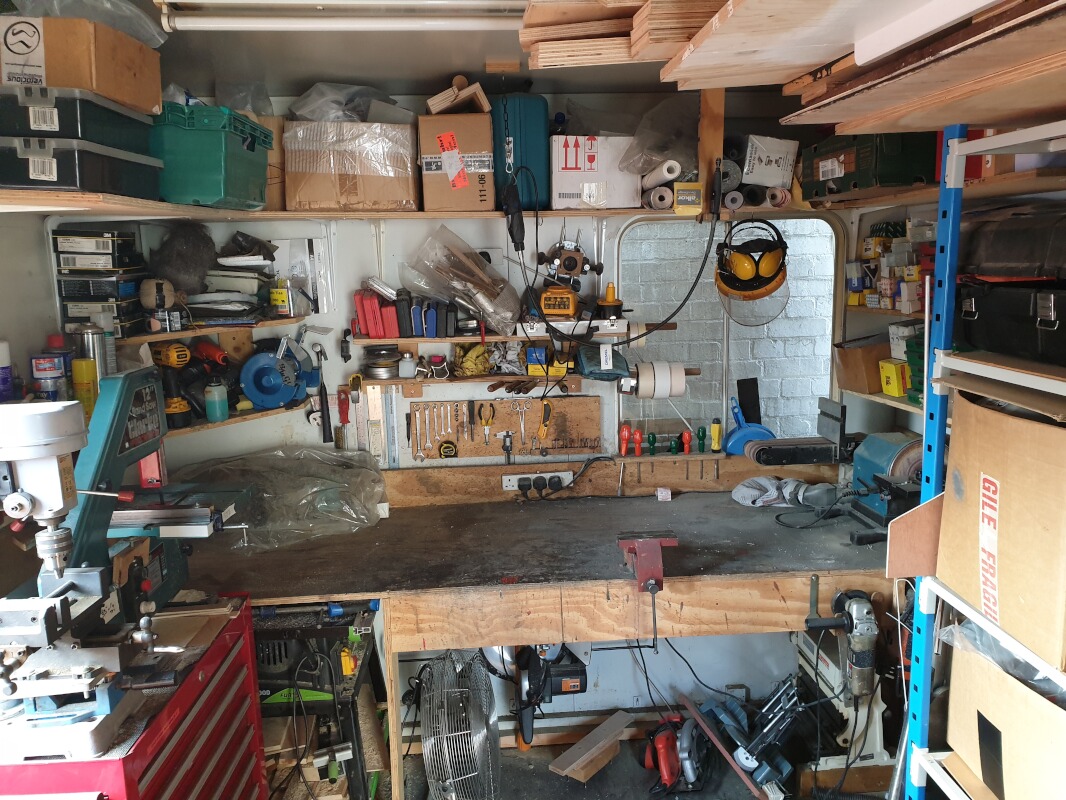
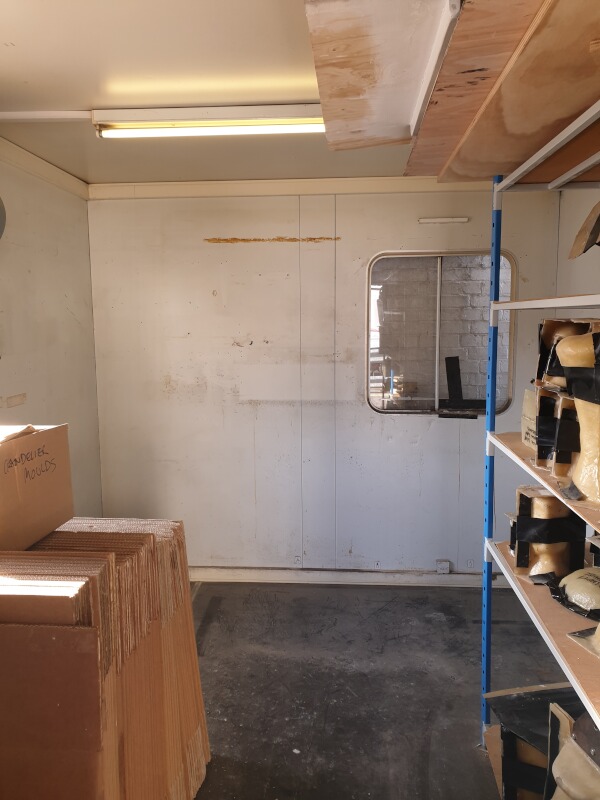
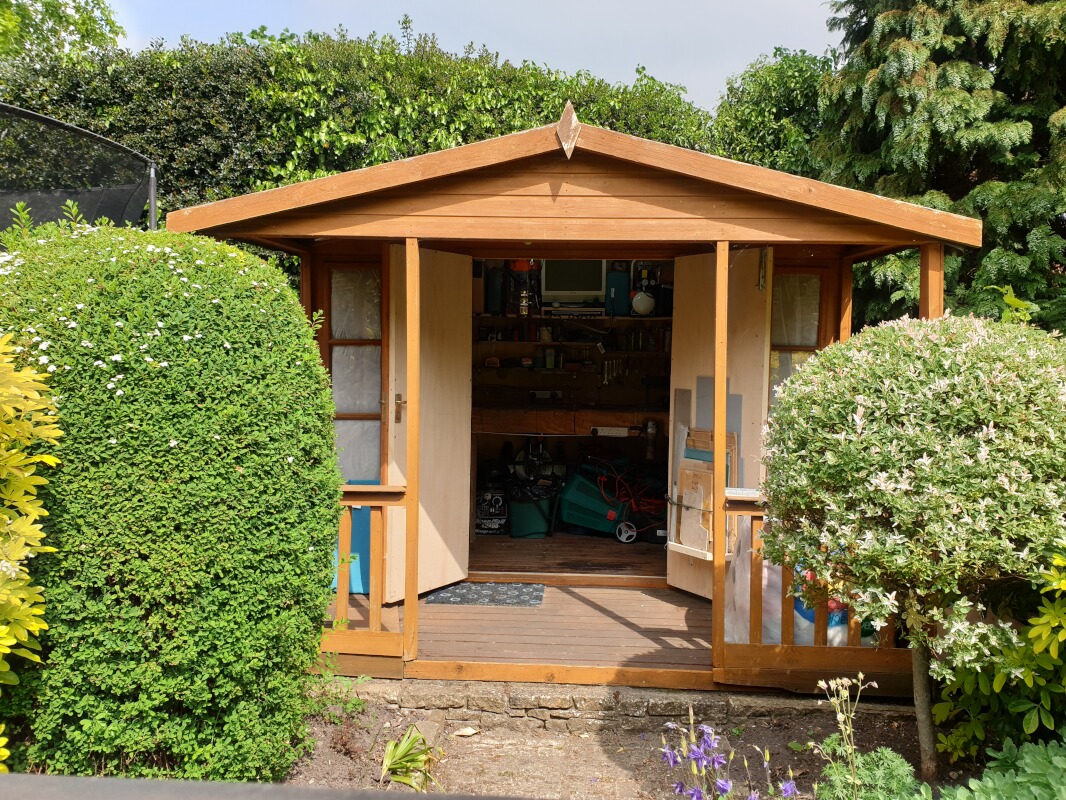
This page covers the period from February 2020 to the present. Back when I was running EvilDeadChainsaws.com pre-2009, I had a workshop adjoined to the house I was renting. Then I moved to a flat, and a Portakabin next to my work became my workshop. Once closed for the second time in 2015, the whole Portakabin workshop was no longer needed, so my workshop was scaled down to the top 1/3, with the rest being used for company storage. That's how it remained until February 2020, when I finally bought a house with a 'summerhouse' in the garden, having been a renter for the last twenty years!

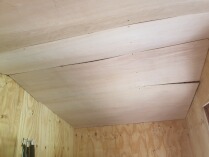
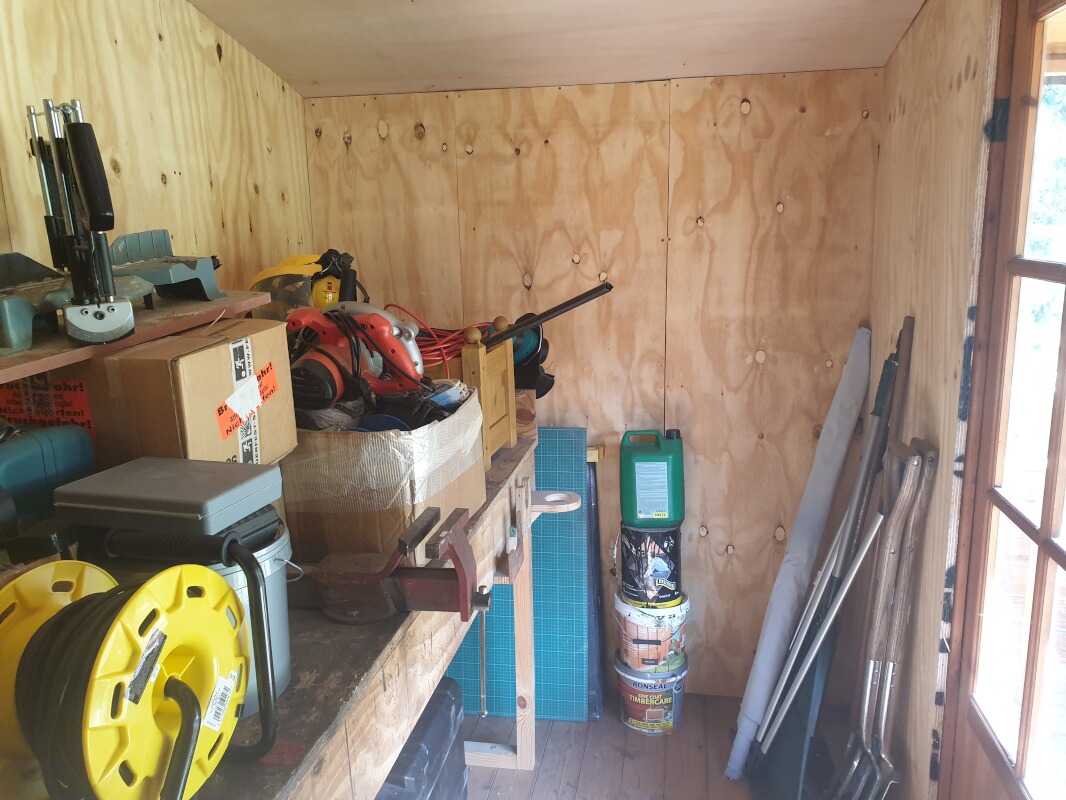
Converting the existing 'summerhouse', in to a home-workshop, was done just before & during the first national COVID19 lockdown here in the UK. I began around March 20, cladding the inside of the 'summerhouse' with 100mm loft insulation and 3/4" shuttering plywood to make it as soundproof as was feasible. I had only just completed this, when the lockdown was called on the evening of March 23. I drove into work that night and crammed as much of my tools, machinery & assorted boxes of items into my car, as I could, not knowing when I might be able to come back, or how long I would be stuck at home. As it turned out, I was back at work the following week, but the week off gave me the spare time to finish arranging my workshop, completing it around April 1.
 Converting the 'summerhouse' cost around £200 in materials. It was just a little bigger than my old Portakabin workshop, so everything more-or-less went back in the same place at home. The interior noise insulation & cladding worked pretty well. My bandsaw was roughly the noisiest machine I had at around 75db standing next to it. Outside with the doors shut, at the patio door around ten metres away, that goes down by about half to 38db. which is pretty good going, and more than reasonable neighbour-wise. I've kept the net curtains hanging over the windows, so you can't see the insulation from the outside. That does mean there is no natural light inside, so I wired up three 100w lightbulbs inside, with a fourth over the porch outside. It was nice to finally have a home-workshop again, having been without one for ten years. I'd no wish to formerly start re-start EvilDeadChainsaws.com, but it did give me the option of turning out DIY chainsaw part for people here and there, in-between other projects.
Through 2020 to 2021, I actually put in far more work on EvilDeadChainsaws.com, than I had every intended, and that was in addition to turning out a standard run of DIY parts orders every few months. It began in April 2020. I had one customer who had been asking about getting a mechanical arm for a few years. I finally decided to make two last arms; one for the customer, and one for my own collection (I'd never owned one myself up to that point). While that customer wasn't in a financial position to buy it at that time, I offered it online and it was snapped up by a customer in Taiwan, and took four weeks to complete.
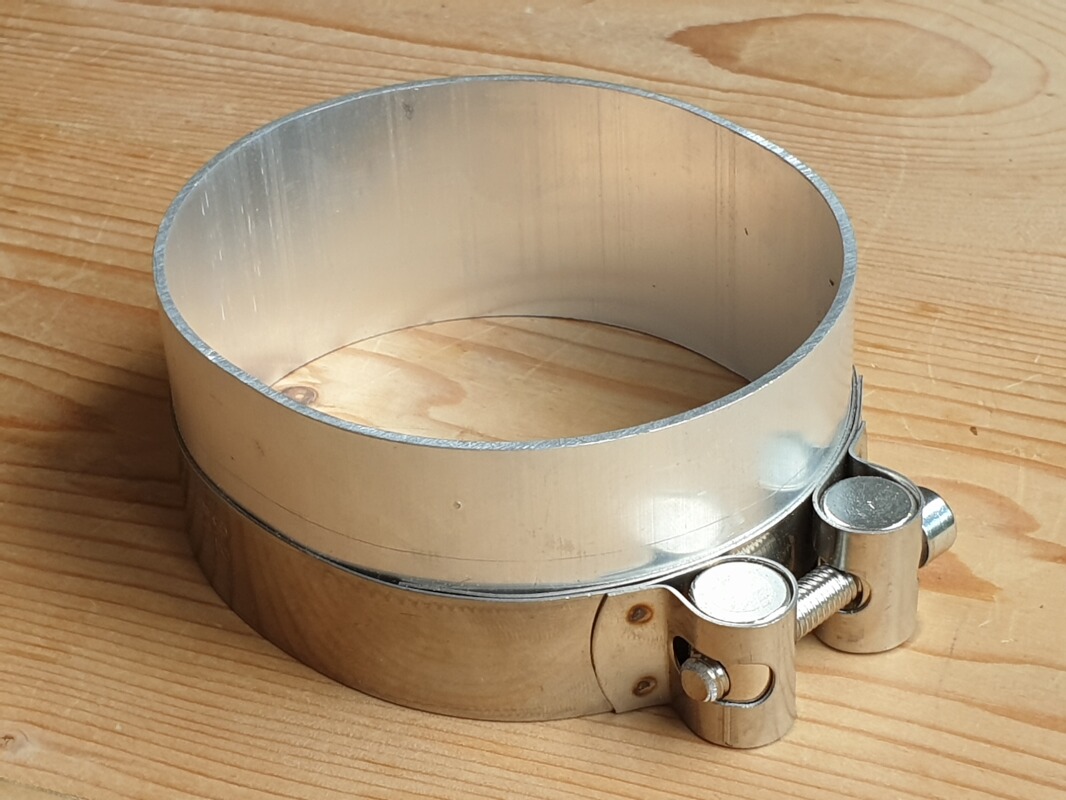
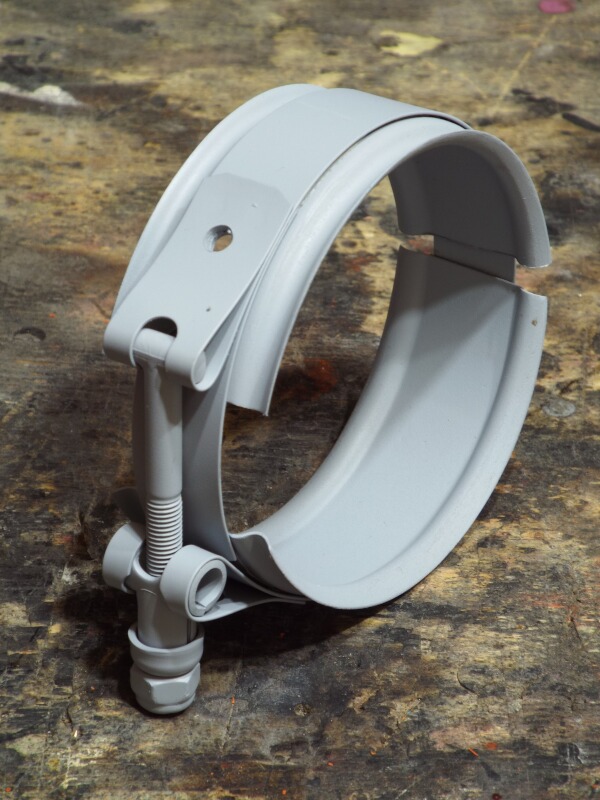
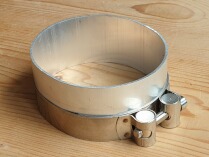
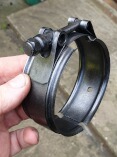
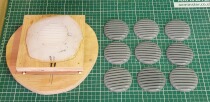
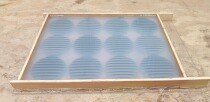
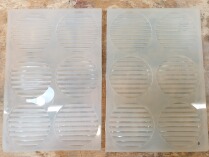
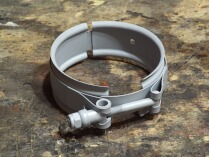
 My next project was to make a more accurate 'Cabin' wrist clamp. The ones I had been using were made from a ridged plastic drinks bottle, and the ridges weren't as accurate as they could be; they were too narrow. 36mm is roughly the correct overall width, mine were much to narrow. After US chainsaw maker Chris Pollock started making ones which were not only more accurate, but also all metal, I thought I should try a bit harder! In June 2020, I tried making a vac-former from a YouTube video tutorial, and while it did work; using a little toaster oven to heat the plastic within an aluminium frame and forming it using a box connected to a vacuum cleaner, the oven was too hot and it would wrinkle & burn the surface of the plastic before it was soft enough to form. I tried taking one of the two elements out to reduce the heat, but it stopped working and I was back to square one. While I had wanted to find a workable solution and do my own vac-forming, I just decided it would be much simpler to use a proper vac-former owned by a company next to my work. I cast a rough former in resin using half a drainpipe, then carved that into the right shape. Then moulded that and made six resin copies. I used these in the proper vac-former and make six vac-formed shapes per plastic sheet, with three sheets in total (eighteen wristbands' worth). After a little work, I had my completed revised wristband just over a month after starting in July 2020. The revised version does look better and more accurate than the old ones, but Chris Pollock still has the edge with his fantastic metal ones!
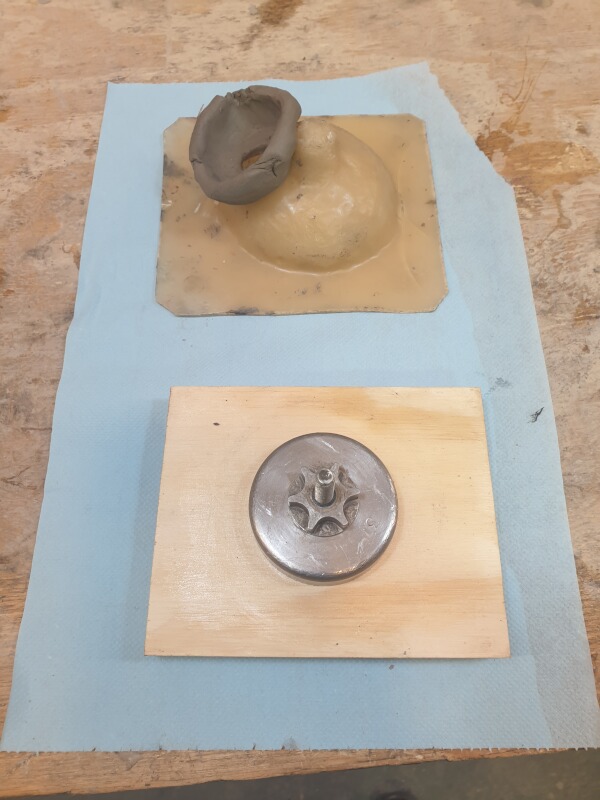
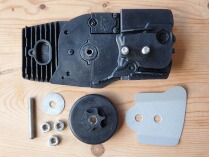
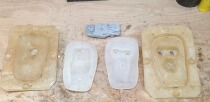
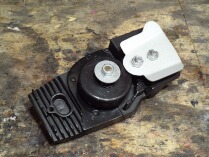
After doing a number of DIY parts runs; one in April 2020, and a second in July, in January 2021 I came to do the next and discovered that the silicone of the lid and engine plate moulds were just disintegrating after the first cast. This can happen as silicone ages (they had lasted seven years and probably over fifty castings up to that point), or with repeated/heavy use, as well as exposing silicone to freezing temperatures. Anyway, luckily I still had the original prototype pieces I made my moulds from, so I was able to re-make the moulds from scratch using a different stronger tougher silicone, slightly re-orientating how they're cast. This meant I could still make spare parts years into the future.
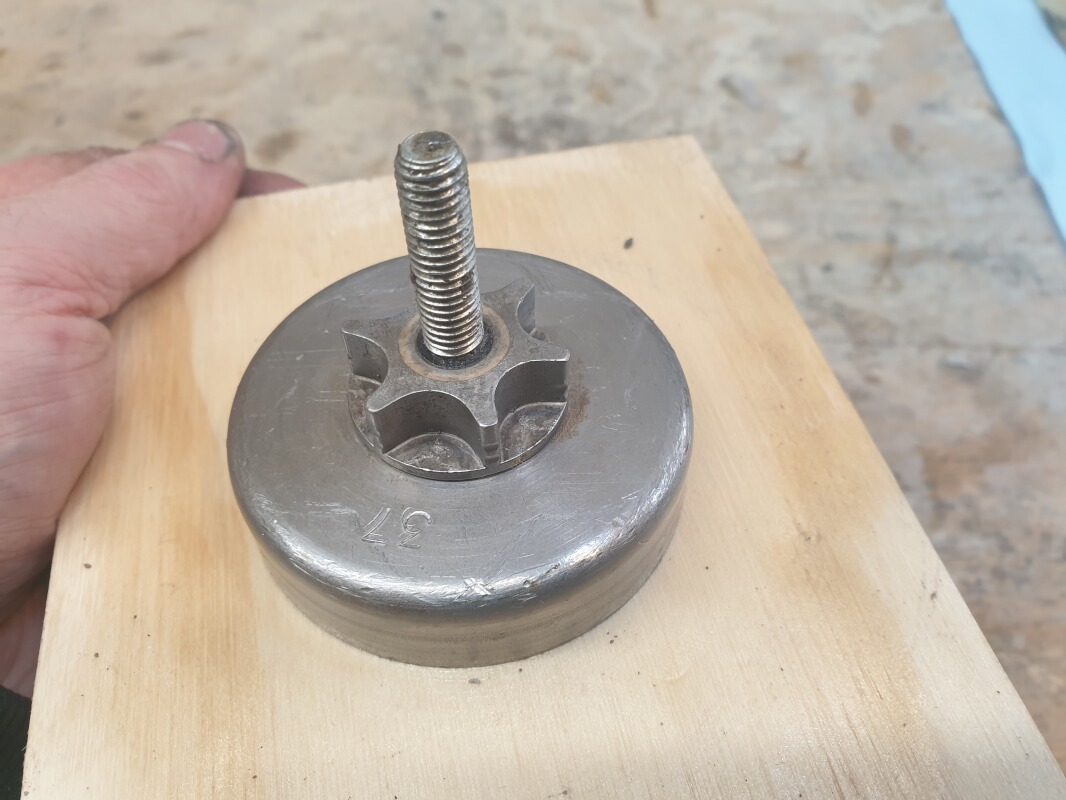
 The process for making the replacement moulds for the top lid, engine plate, sprocket, fuel lids, and the side grill, the same as before for the most part; making fibreglass shells, then pouring a one or two part silicones within that. I put some fair time & care into restoring parts before starting. Back when they were moulded in 2013, I just stored all the prototype moulded parts and spare bits of original chainsaw in a cardboard box. Over the years I'd rummaged around in it a fair few times leaving these parts with some dings and scratches. The restoration involved a cycle of filling any imperfections with P38 bodyfiller, sanding with Wet & Dry and water, washing & drying, then spraying with grey primer and leave for 30mins. Once I had a piece with no imperfections, I then polished certain parts to a smooth glossy shine with Brasso and a yellow duster. It's quite a process, but the results are fantastic.
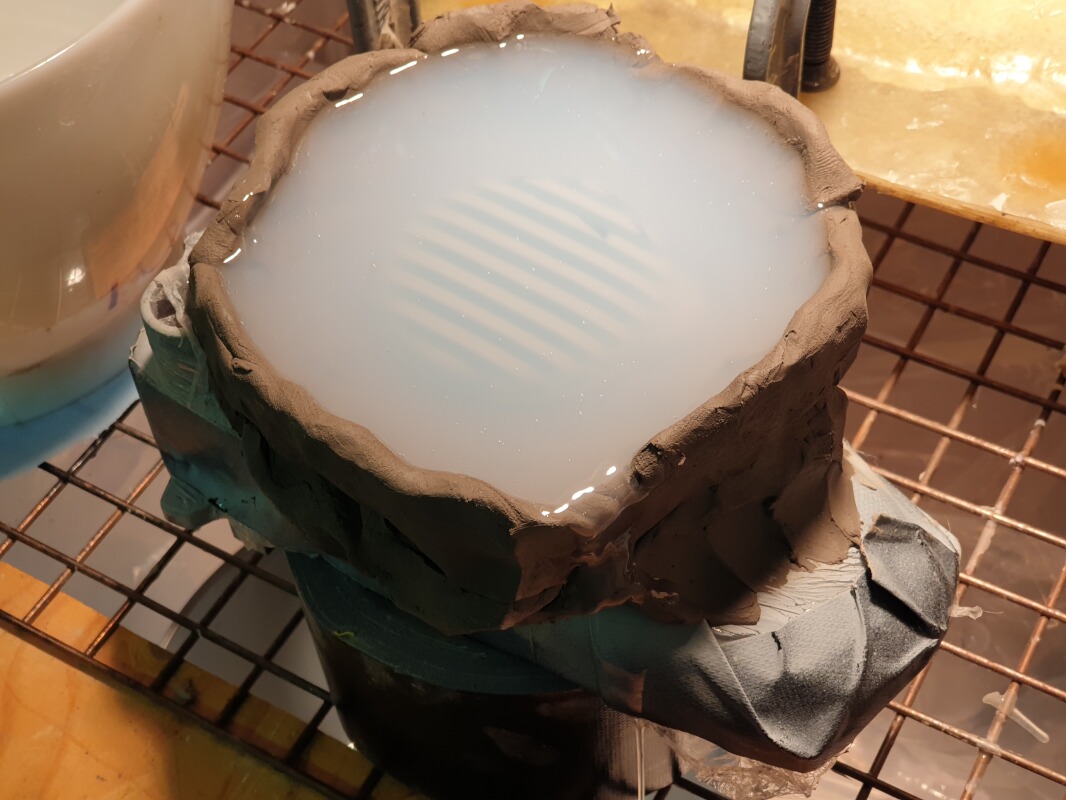
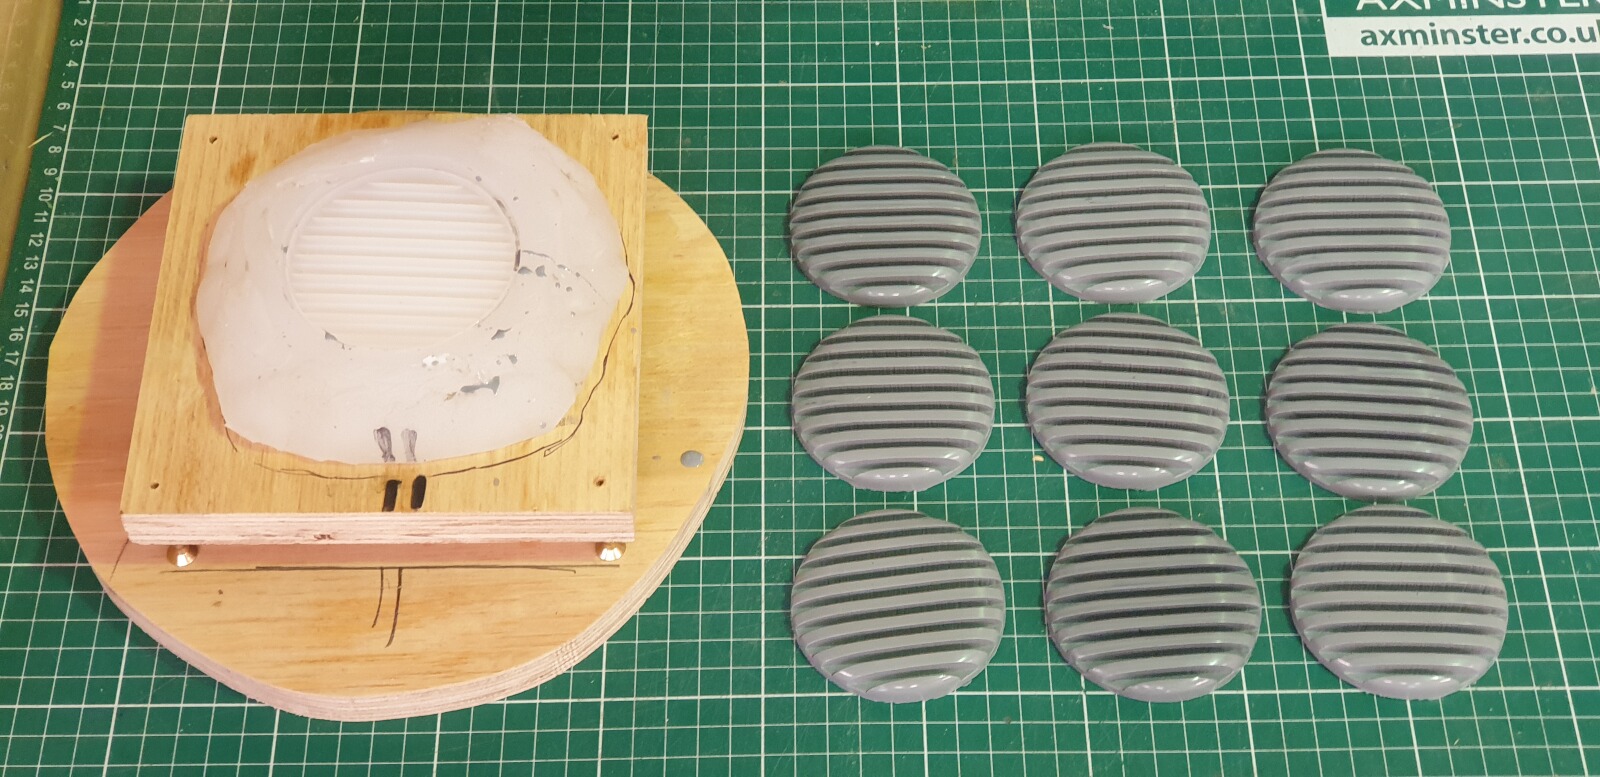
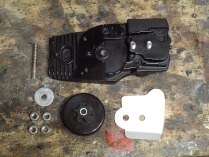
The side grill is probably the item I sell most of. They're cheap, but quite difficult to make from scratch. Up to 2020, I poured my side grills using the grill side of the chainsaw body mould. In June 2020, I re-moulded one of those grill castings to make a little grill mould so I could pour them from their own little mould. While that worked okay enough, I thought I could do better, so I restored and polished the grill section of my original prototype body piece, made a little rough mould of that. Then I used that single mould to pour a pile of grills, chose the best twelve and stuck to a piece of perspex. I built a box around it and poured a silicone in to create a sheet silicone mould of twelve grills. I spotted some bubbles in my first silicone mould, soI poured a second one. That one still had some bubbles in despite a lot of extra effort. The side grills were superglued flat to a piece of perspex, but there were still some tiny hairline gaps underneath each grill, creating air pockets and bubbles in the silicone. Between the two sheets, the right six were perfect bar-one grill, so I chopped them both in half leaving me eleven perfect grill moulds.
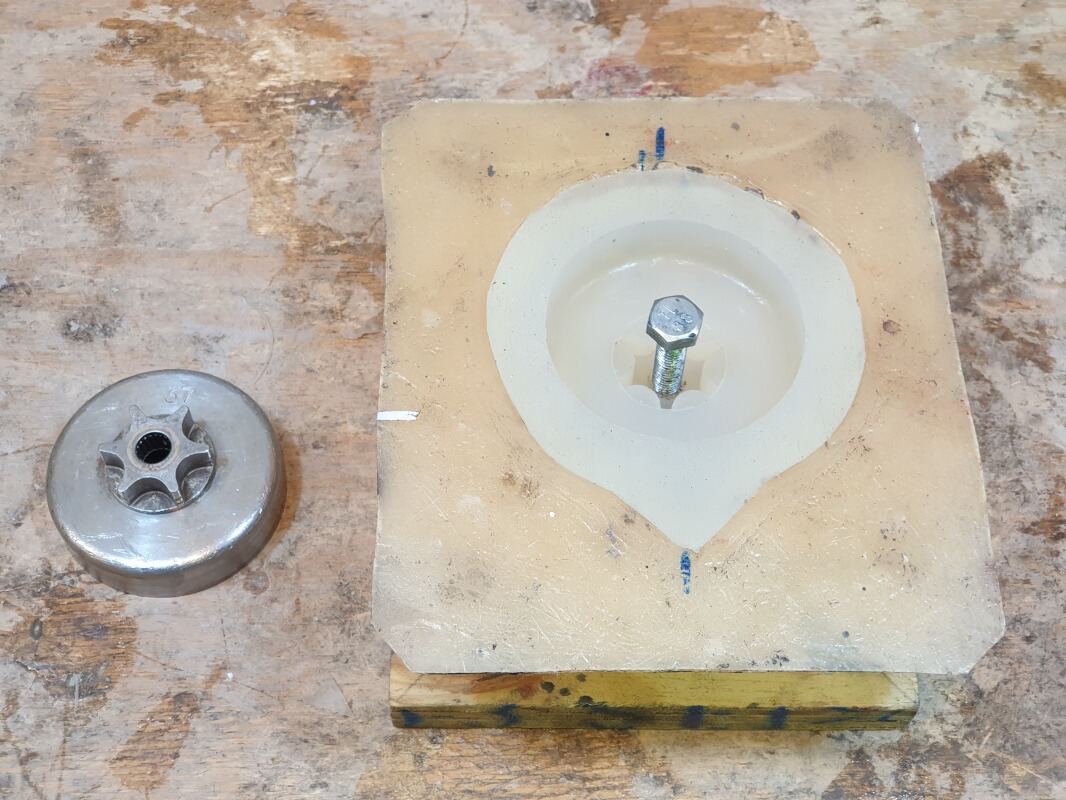
 I also had to pour the engine plate silicone twice. I used a spray release agent on this, but on nothing else, and it left a rough texture in both sides. It wasn't a major issue, but I figured if this was going to be my engine plate mould for the next 10 years, it was worth putting in a few more hours to get it right. One difference this time round was de-gassing my silicone once mixed. This removes all the air bubbles in the mixture. It both makes the finished silicone stronger (as it's solid silicone, not full of bubbles), but also if you were to look at parts from my old 2013 moulds, you'll see 'pimples' on some pieces. This was down to air bubbles trapped in the silicone against the cast surface, a problem which I no longer had on the new moulds which just look perfectly smooth.
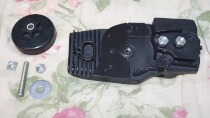
By the end, I had entirely new top lid & engine plate moulds, and old fibreglass shells with new silicones on the sprocket & fuel lids, plus two sheet moulds of six side grills each. The castings are virtually identical to the old ones, but with a better finish, and finer detail. I haven't tried to use either of the body moulds since 2015, but it would seem likely that they would also need replacing if they were to be used again. I still have the two prototype body sides, although re-moulding them would be no small task as they were sprayed with a gloss varnish before being moulding in 2013, which has now taken on a crackle texture and would need to be thoroughly sanded back cleanly before I could even start restoration. In addition, there would also be the two half muffler moulds, and the side 'C' handle mould to replace as well, which is a fair amount of work. I'm still happy enough spending a weekend or two doing runs of DIY parts every few months, then gradually selling them for spare money here and there.
Each time I do a run of parts, I make a post on the chainsaw makers KOS Facebook Group. The items & prices (in GBP each, plus shipping) are normally as follows;
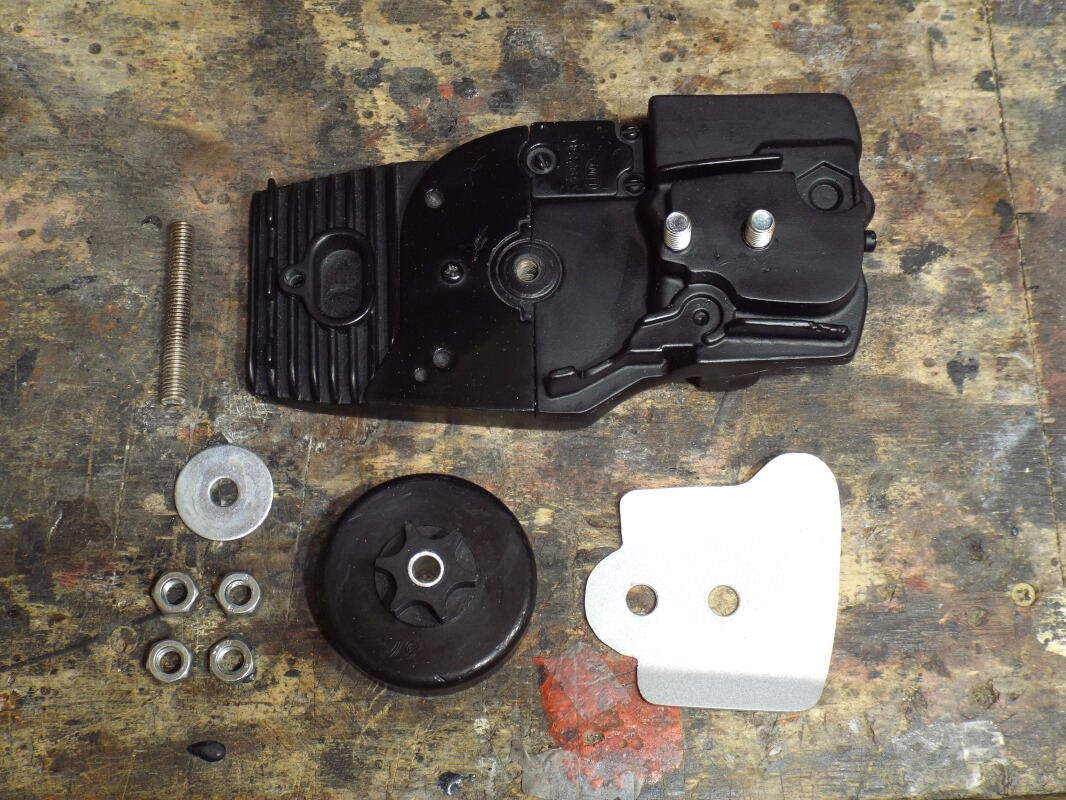
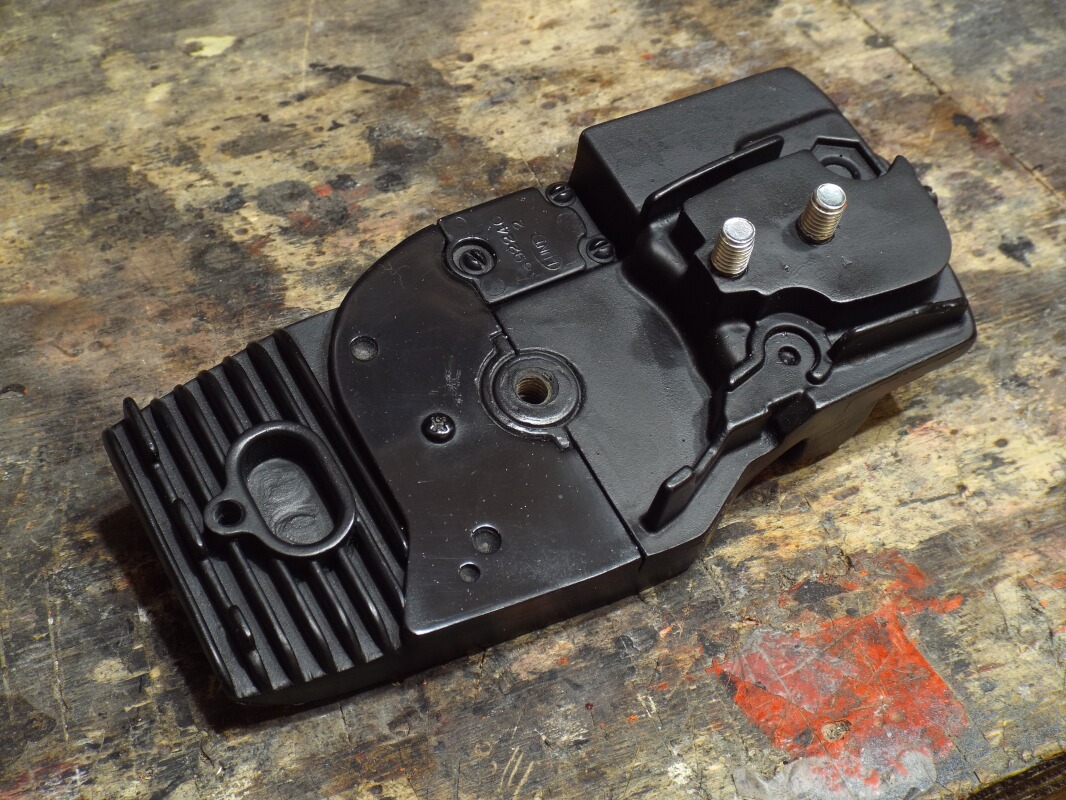
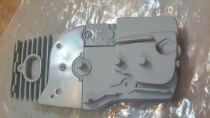
1 x Engine plate = £45
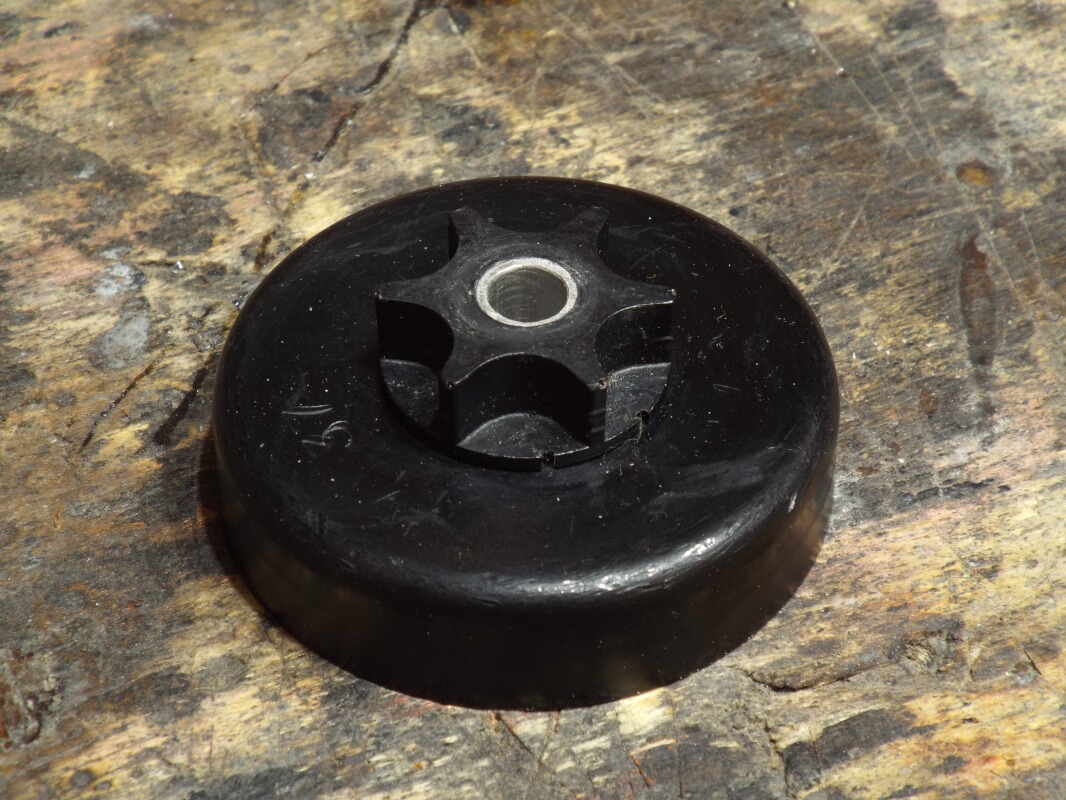
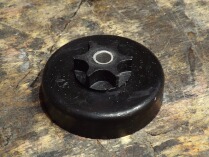
1 x Sprocket = £5
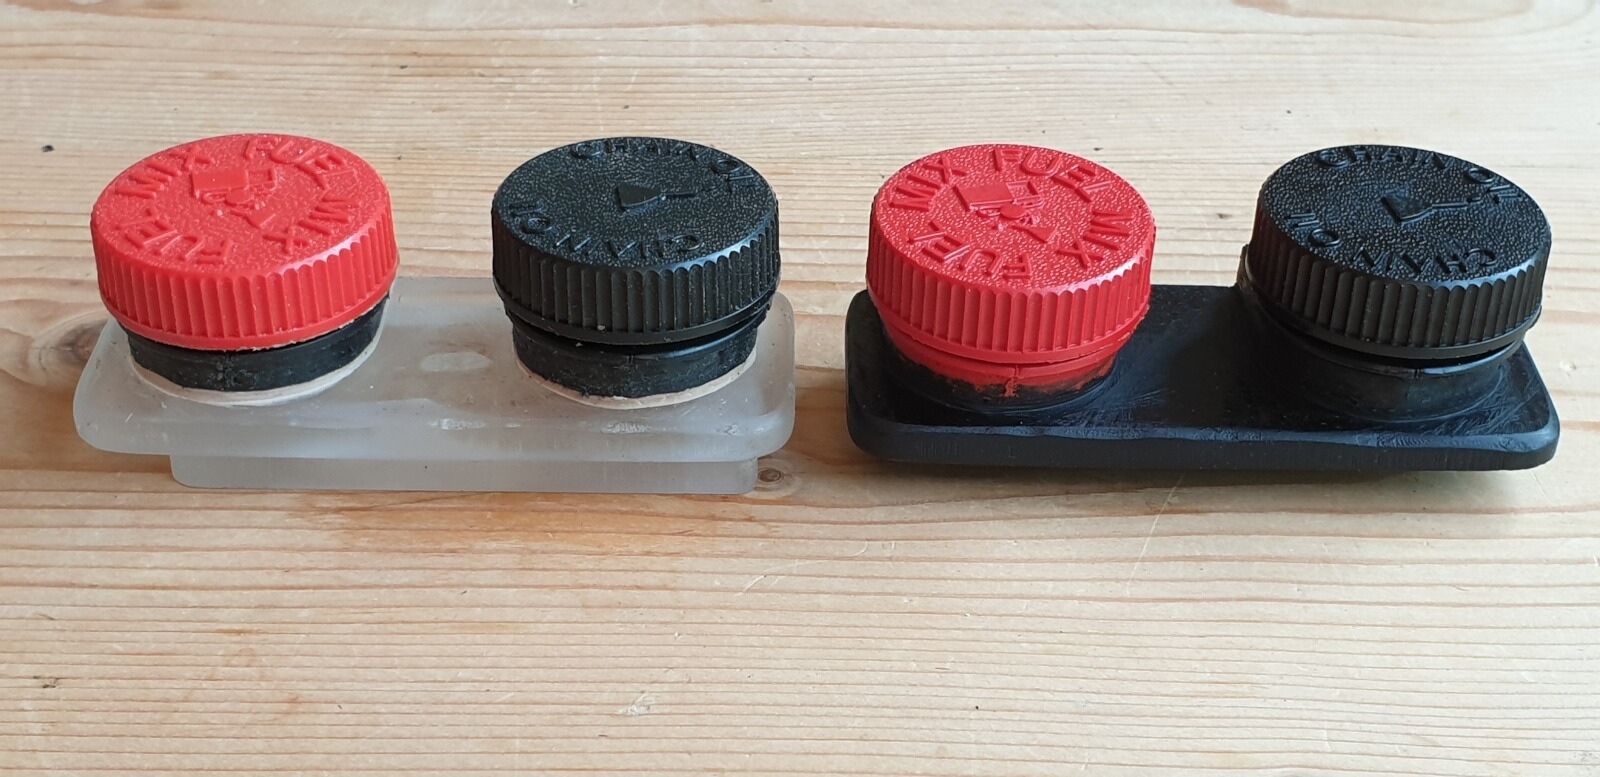
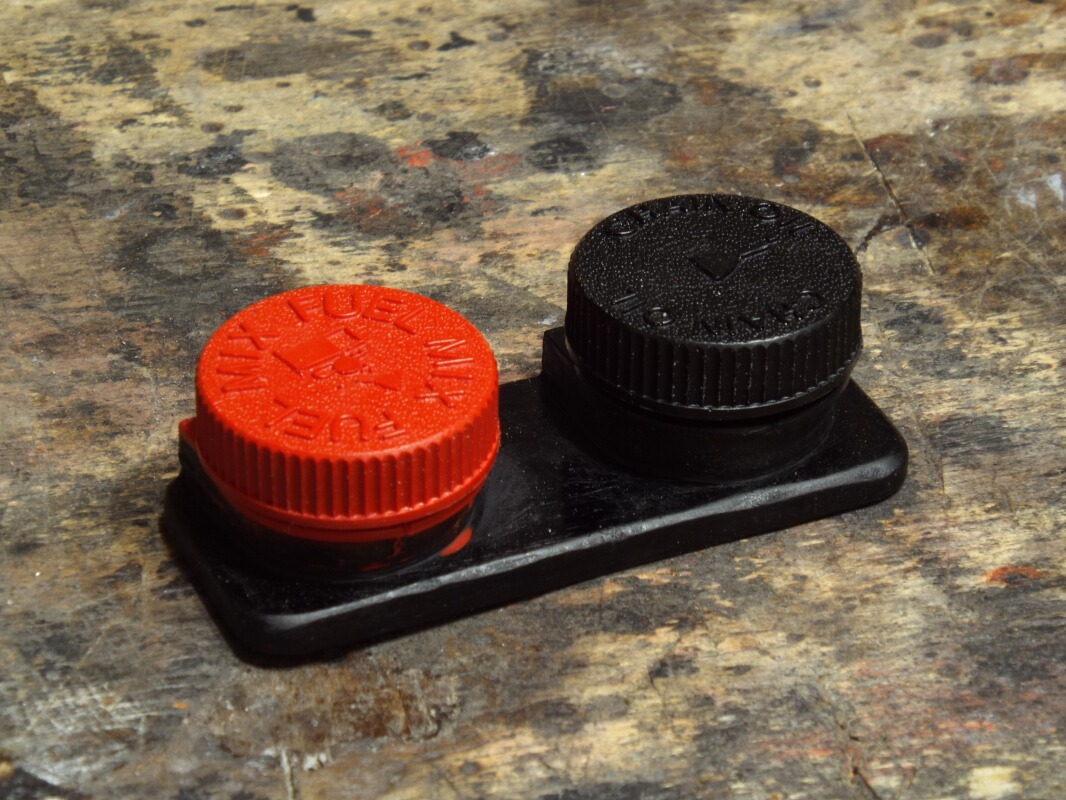
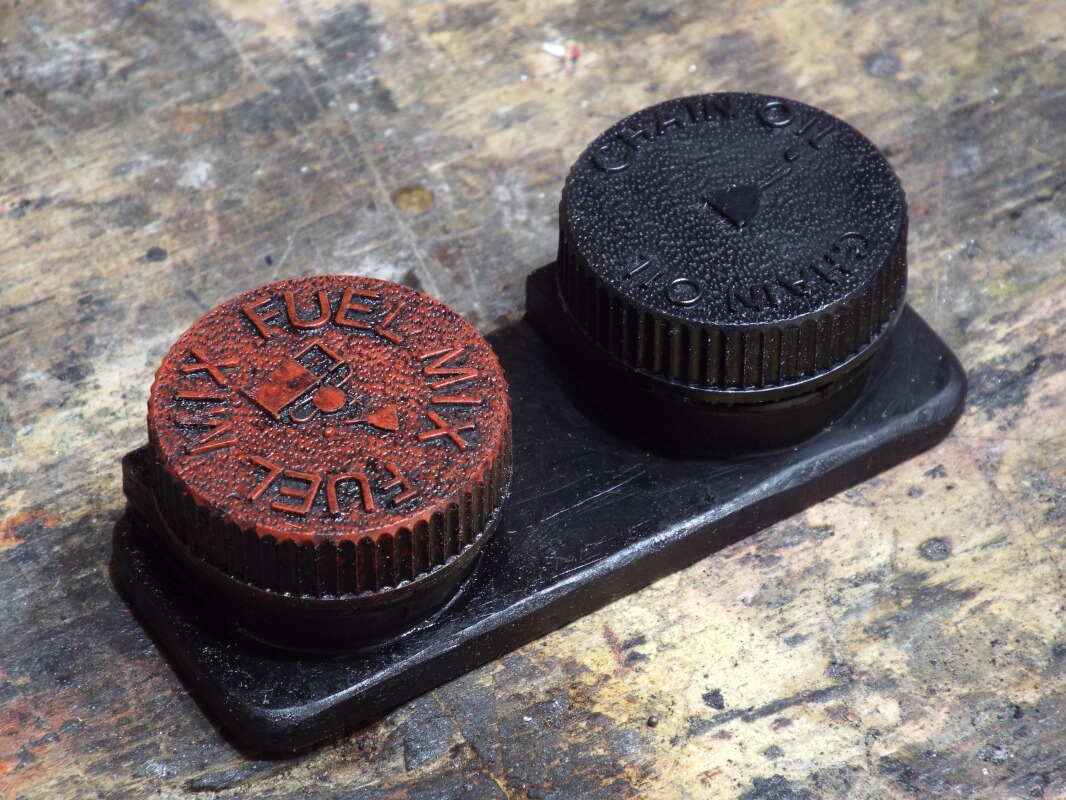
1 x Oil/Fuel Lid set = £20
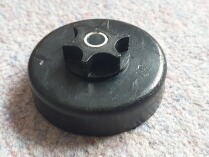
1 x Side Grill = £10
1 x Pull Start Handle = £15
1 x Evil Dead II Wristband = £25
1 x Evil Dead II Top Handle = £60
1 x Evil Dead II & Army Of Darkness Top Lid = £40 (Burgundy colour)
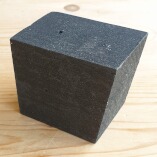
1 x Army Of Darkness Muffler Block = £10
1 x Army Of Darkness & Ash Vs Evil Dead Wristband = £25
1 x Army Of Darkness & Ash Vs Evil Dead Top Handle = £60
1 x Ash Vs Evil Dead Top Lid = £40 (Orange colour)
I don't always have everything above available. It depends on what stock I have. If it's not listed above, it's not generally available, but might be able to do it as a special request if I'm already doing a run of parts. Between the above DIY parts (or at least some of them), and an original Homelite XL chainsaw, you would have just about all the parts you'd would need to make your own replica saw.
In May 2021, this site moved to a new host and I decided to retire the EvilDeadChainsaws.com domain name & 'info@' email address, as the new hosing only allowed two domain names per webhosting package. The site was really just an online archive, so paying for the domain name & email every year seemed unnecessary. The site will remain online exactly as it was before, but can be accessed directly at BookOfTheDead.ws/EvilDeadChainsaws/, or through the main BookOfTheDead.ws root menu. The email address on the order page there has been swapped, so please delete the 'info@' email from your address books as it no longer works.
My Portakabin Workshop (April 2015)
This was the Portakabin workshop as it was in 2016, shortly before closing EvilDeadChainsaws.com and compressing my workshop into the top 1/3 so the remaining 2/3 could be used for company storage.
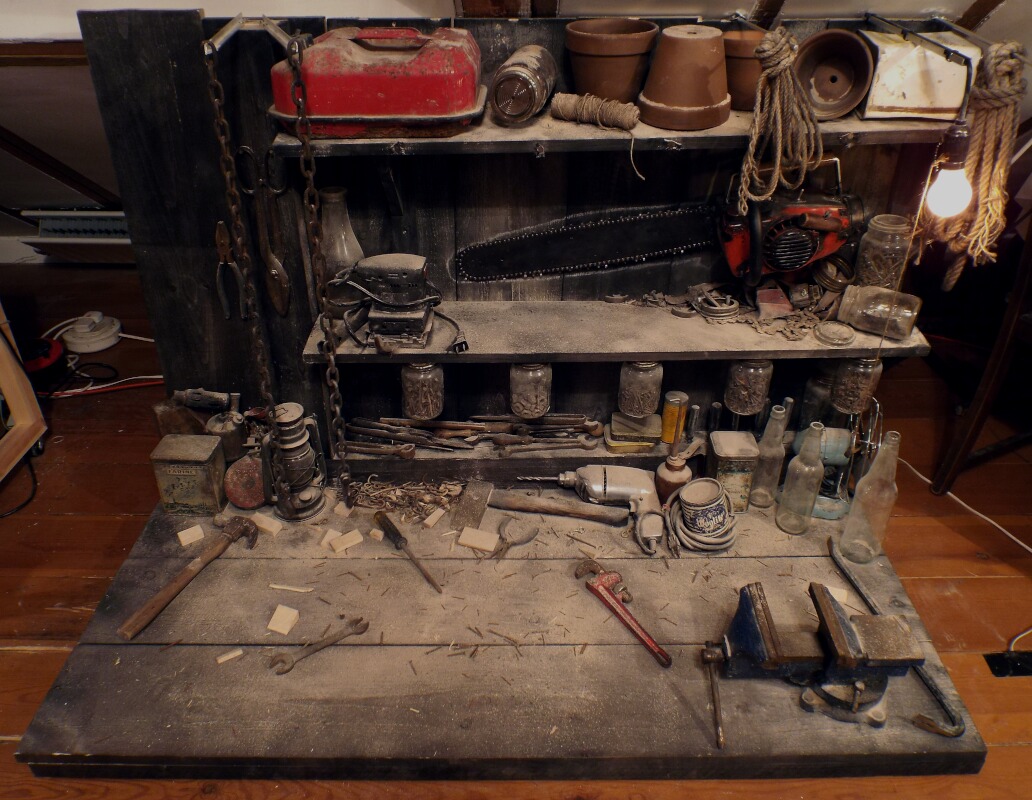
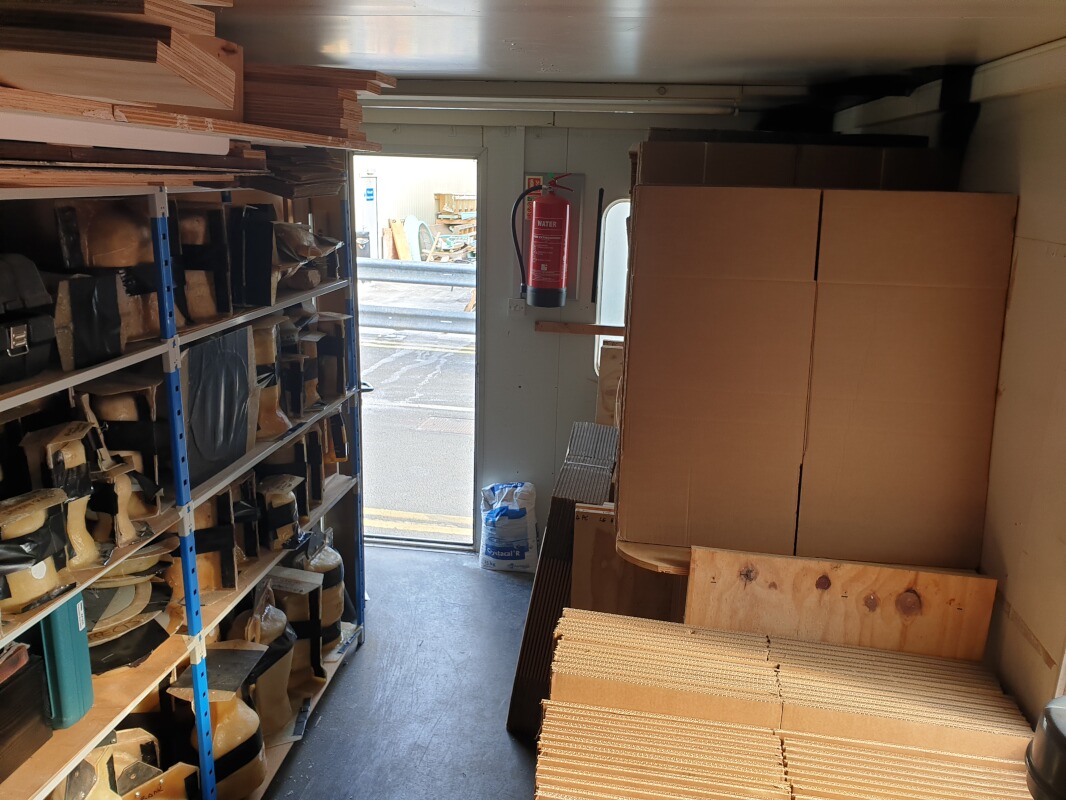
Downsizing My Workshop & Relocating The 'Workshed' Display (September 2015)
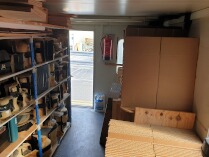
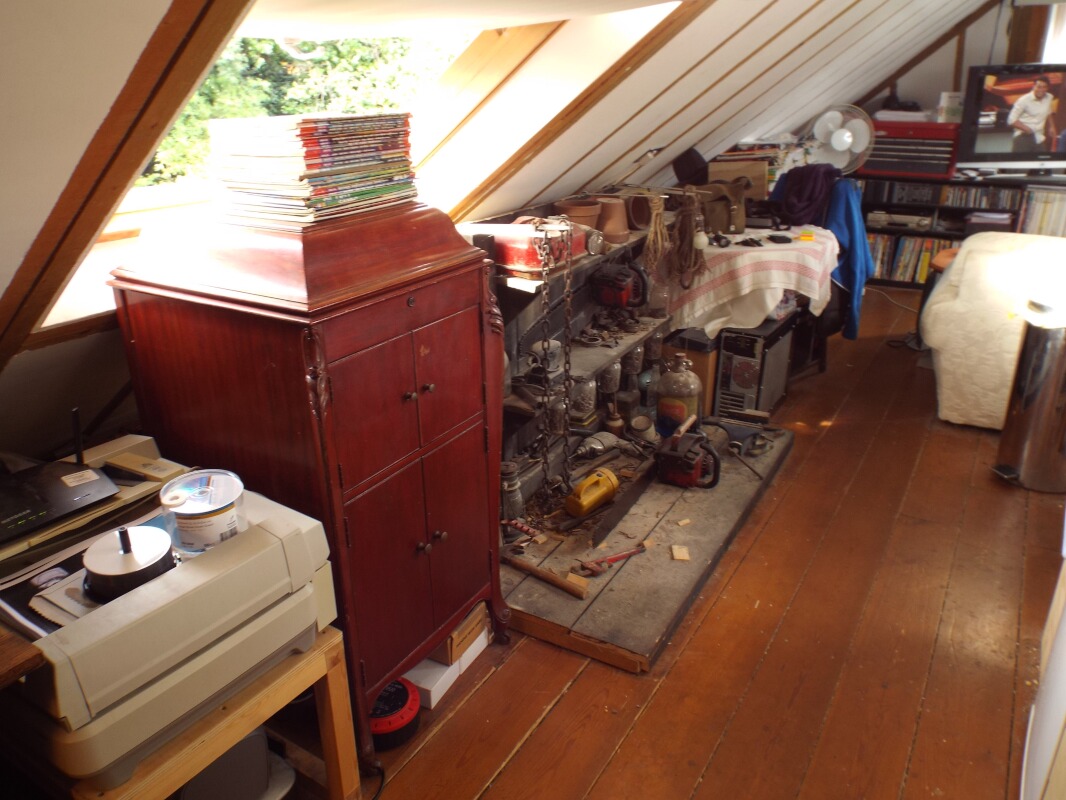
Compressing down the Portakabin workshop, meant I no longer had space for the 'Workshed' photo backdrop display. Rather than trash it, I modified it into a free-standing display in my then-flat, where it remained for a further five years. You can also see two photos of my smaller workshop, and four photos of all the related bits & pieces I put into storage.
 007 007 |
|
 008 008 |
|
 009 009 |
| |
 010 010 |
|
 011 011 |
|
 012 012 |
| |
 013 013 |
|
 014 014 |
|
 015 015 |
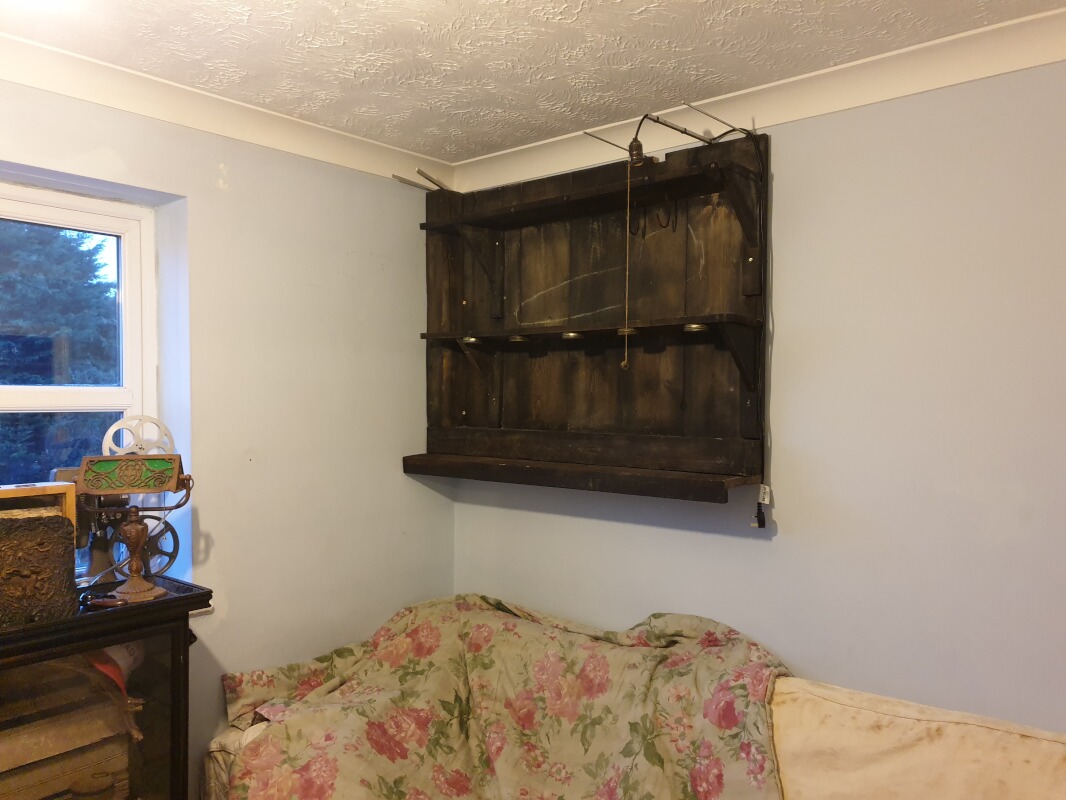
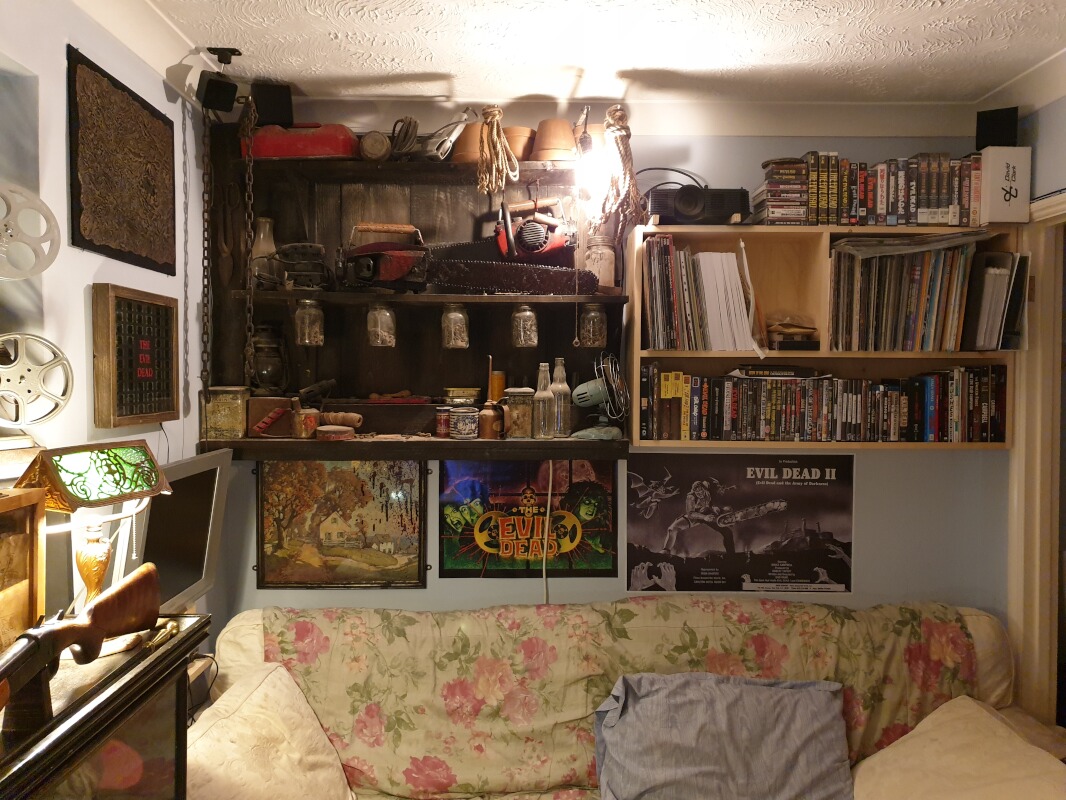
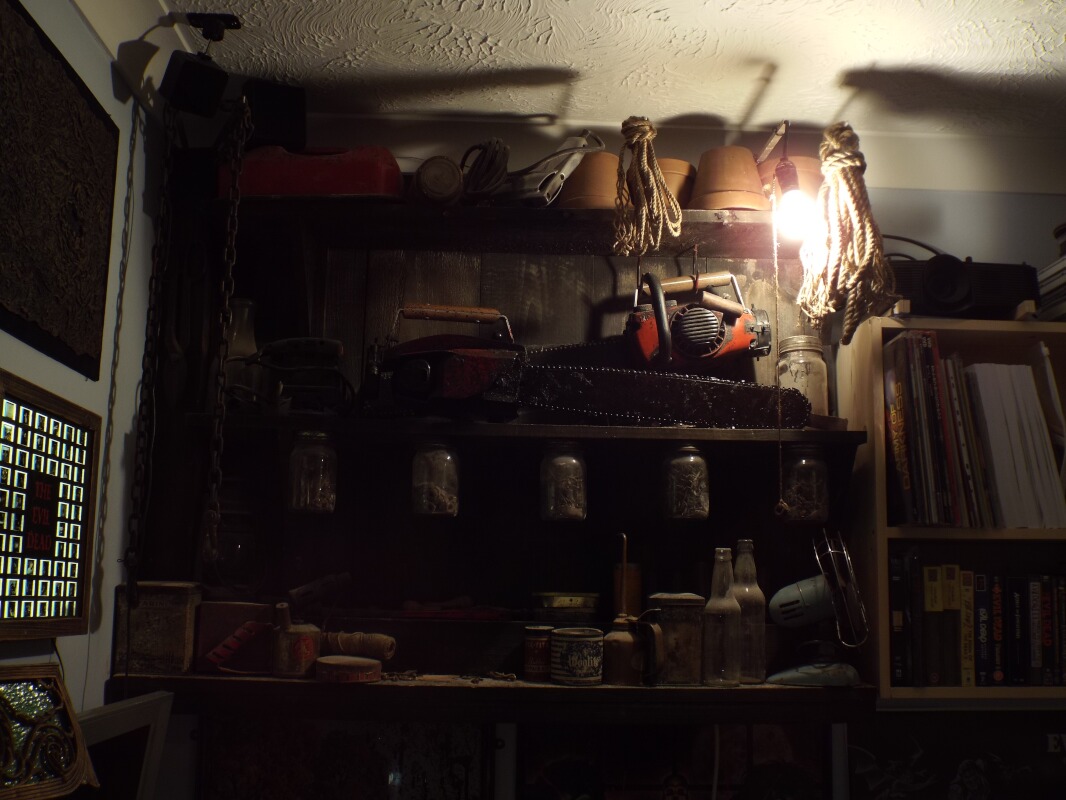
Moving House & Wall Mounting The 'Workshed' Display (February 2020)
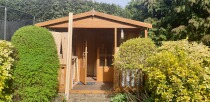
One of the first things I did just after moving house, was to start setting up my Evil Dead Room. Modifying and fixing the 'Workshed' display on the wall was an early task. I put a huge amount of work into first creating it in 2015, it would have been a huge shame not to keep it after closing EvilDeadChainsaws.com for the second time. The back wall and dressing are identical, although the depth of the table-top has been reduced by around 2/3 so it doesn't stick out from the wall too much.
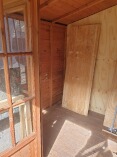
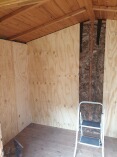
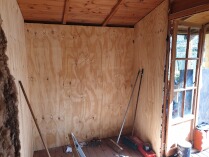
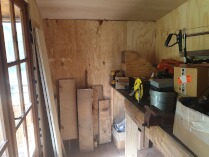
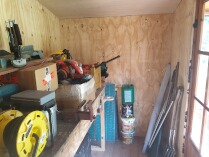
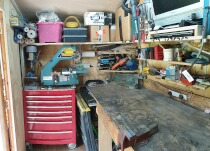
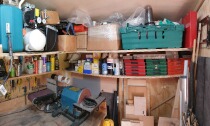
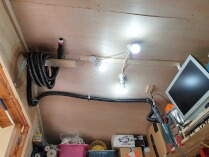
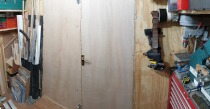
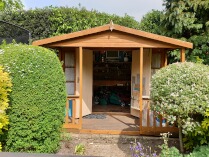
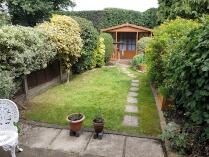
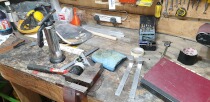
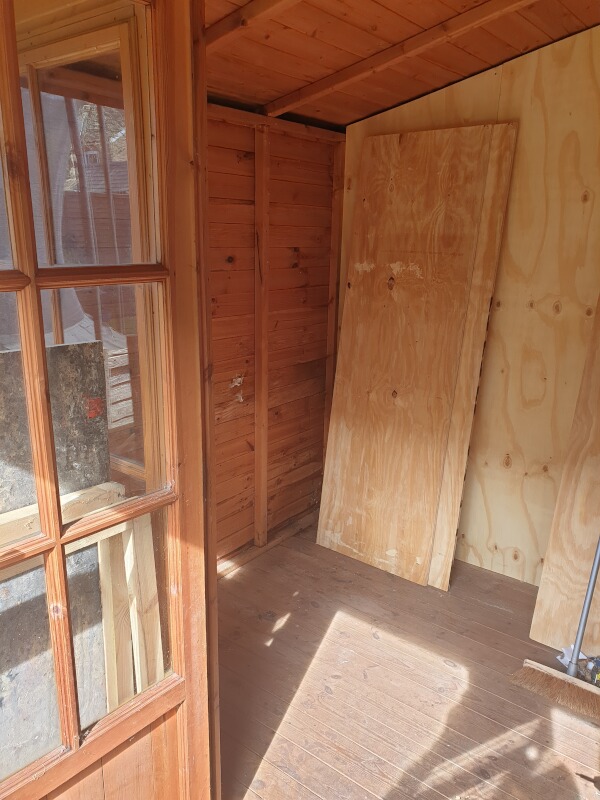
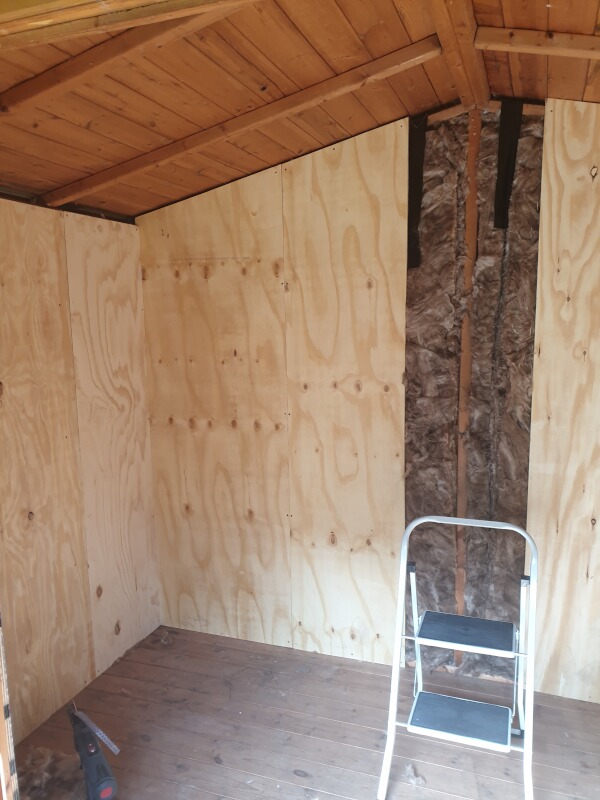
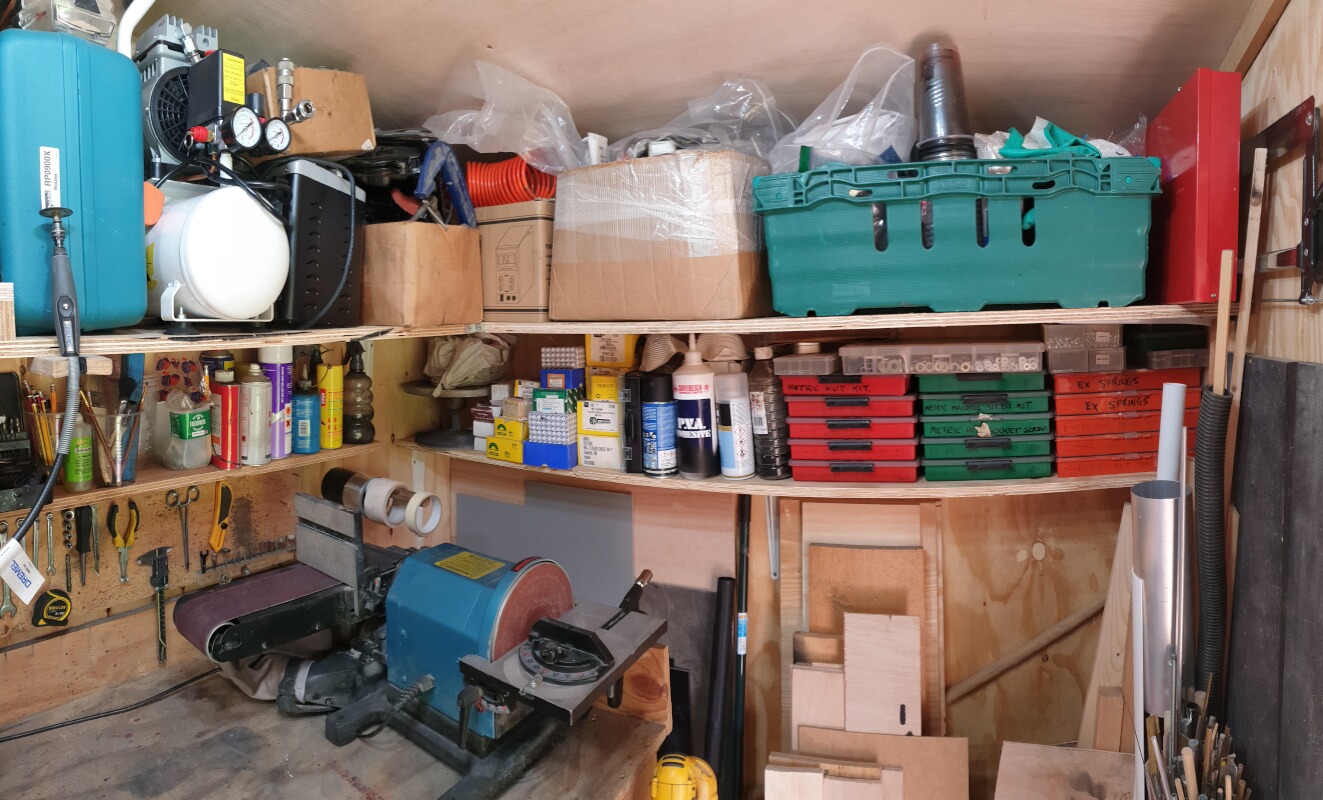
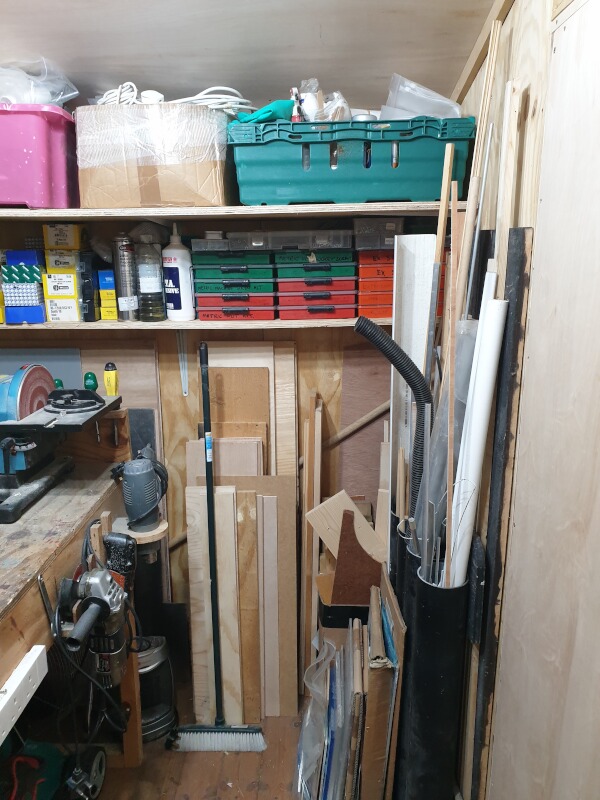
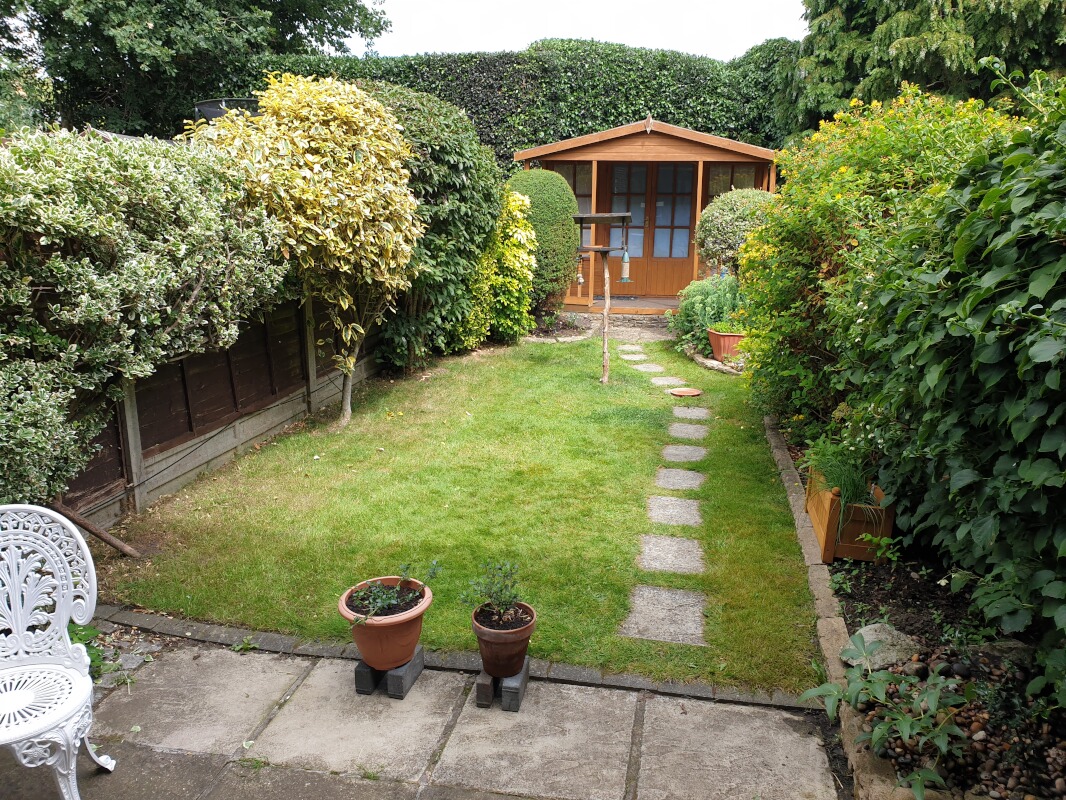
Converting The 'Summerhouse' (March 2020)
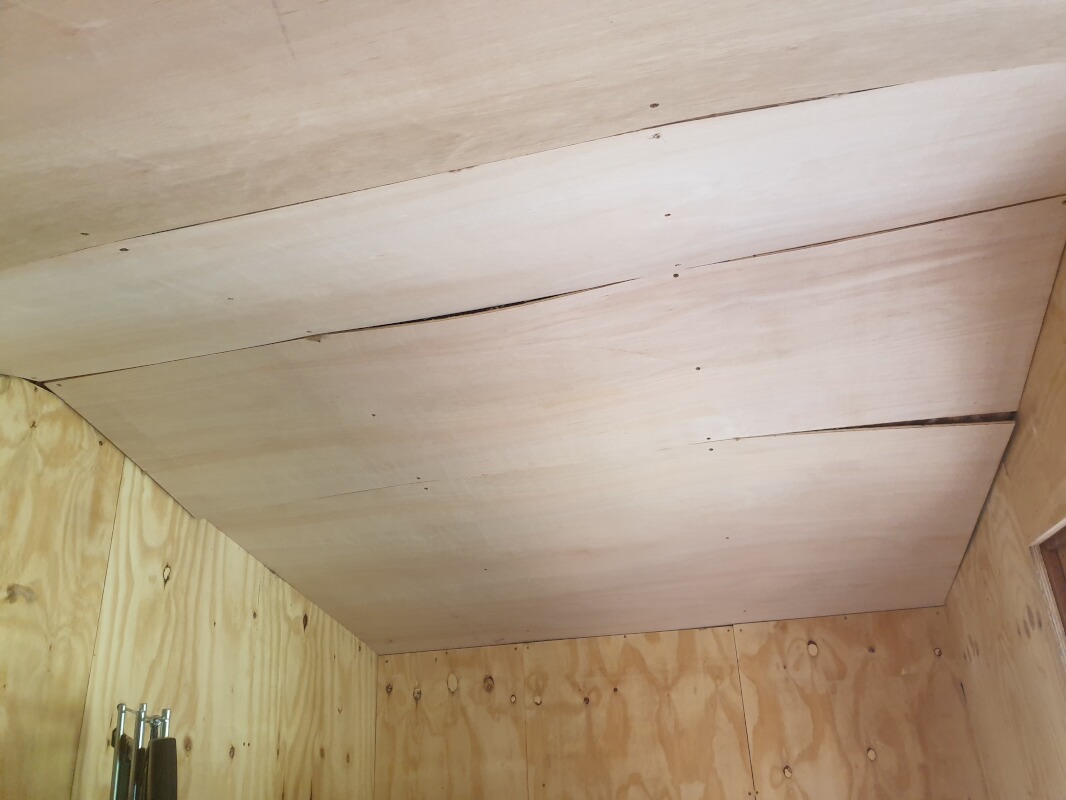
I converted my existing 'summerhouse', in to a home-workshop; cladding the inside with 100mm loft insulation and 3/4" shuttering plywood to make it as soundproof as was feasible. A week off due to the UK COVID19 lockdown gave me the spare time to finish arranging my workshop, completing it around April 1.
 019 019 |
|
 020 020 |
|
 021 021 |
| |
 022 022 |
|
 023 023 |
|
 024 024 |
| |
 025 025 |
|
 026 026 |
|
 027 027 |
| |
 028 028 |
|
 029 029 |
|
 030 030 |
| |
 031 031 |
|
 032 032 |
|
 033 033 |
| |
 034 034 |
|
 035 035 |
|
 036 036 |
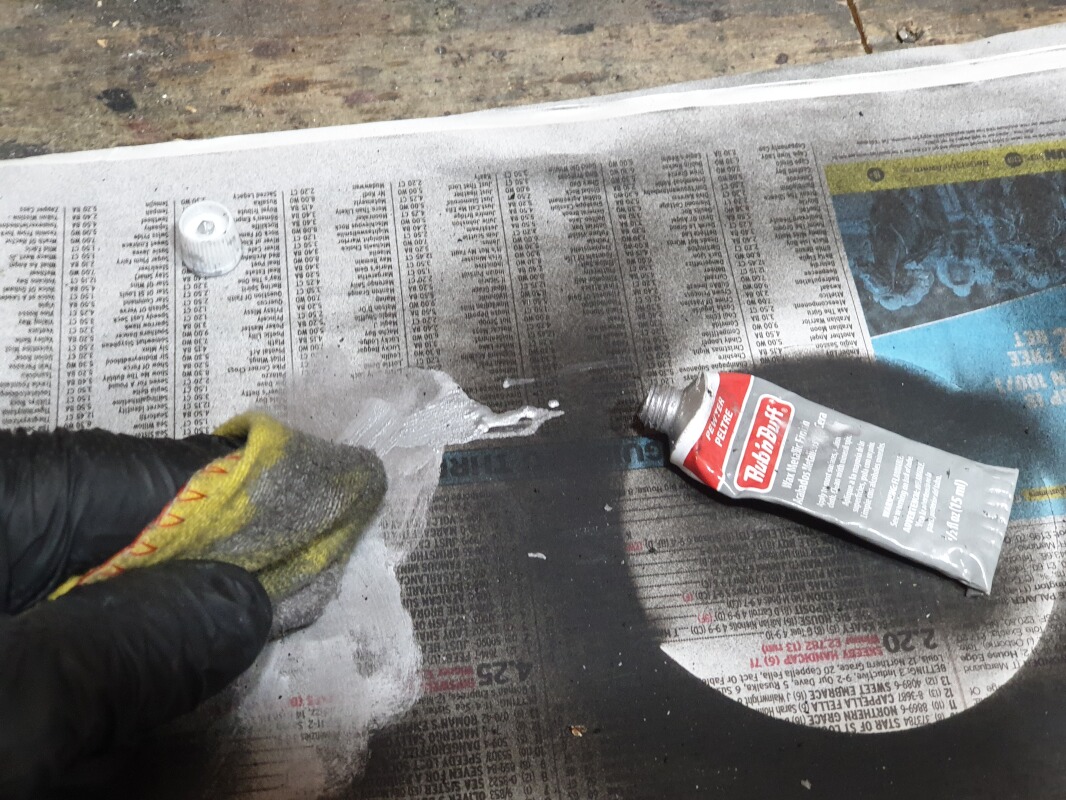
Developing A Metallic Effects Painting Process (April 2020)
Once I had decided to make two last Mechanical Arms, the major element I wanted to revise was the paint effect. Prior to this, they were just primed, sprayed silver, then aged using Humbrol paints. Wherever there was friction between two plastic pieces, the paint would wear over time, especially around the finger plates. I knew I needed to work out something far more hard-wearing and realistic. These DIY parts were the first test. You can read a write-up of that Metallic Effect Painting Process here.
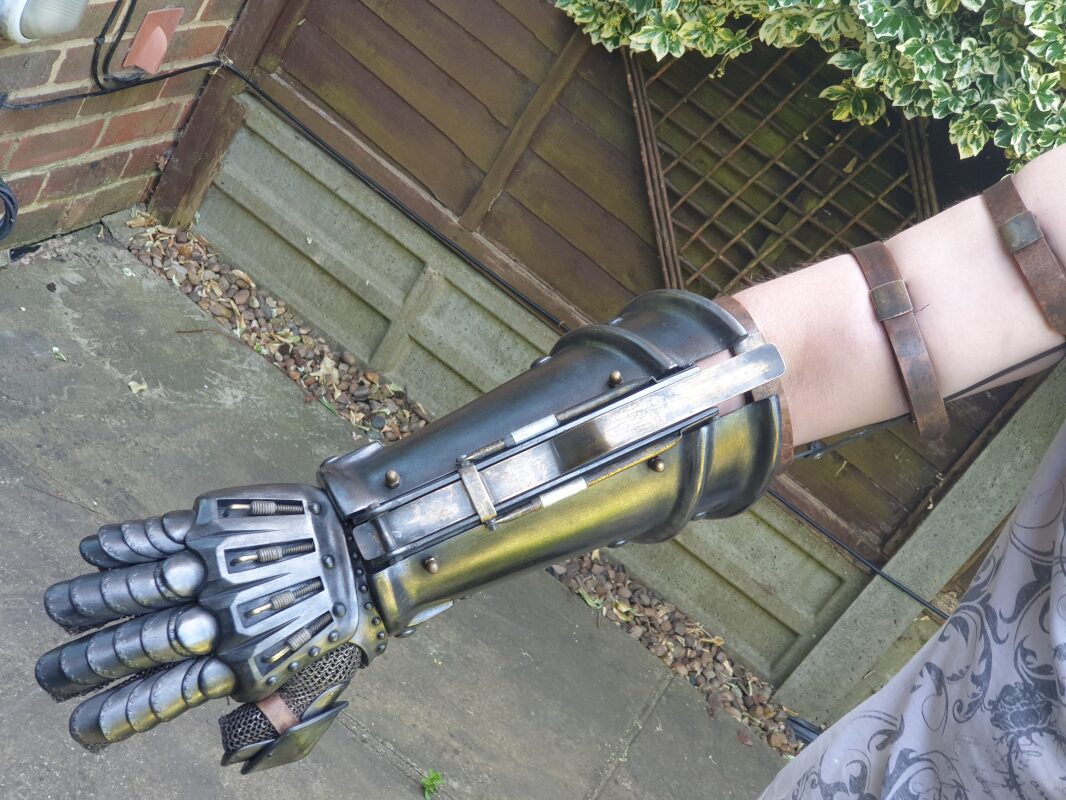
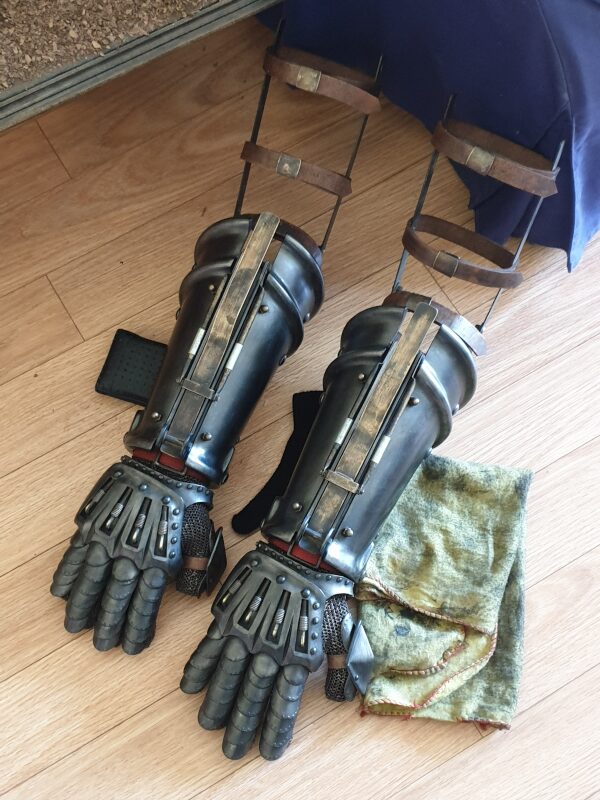
The Final Two Mechanical Arms (April to May 2020)
While the final two mechanical arms are covered in great detail on the Mechanical Arms page, I made two between April to May 2020, one for my own collection and a second for a customer in Taiwan.
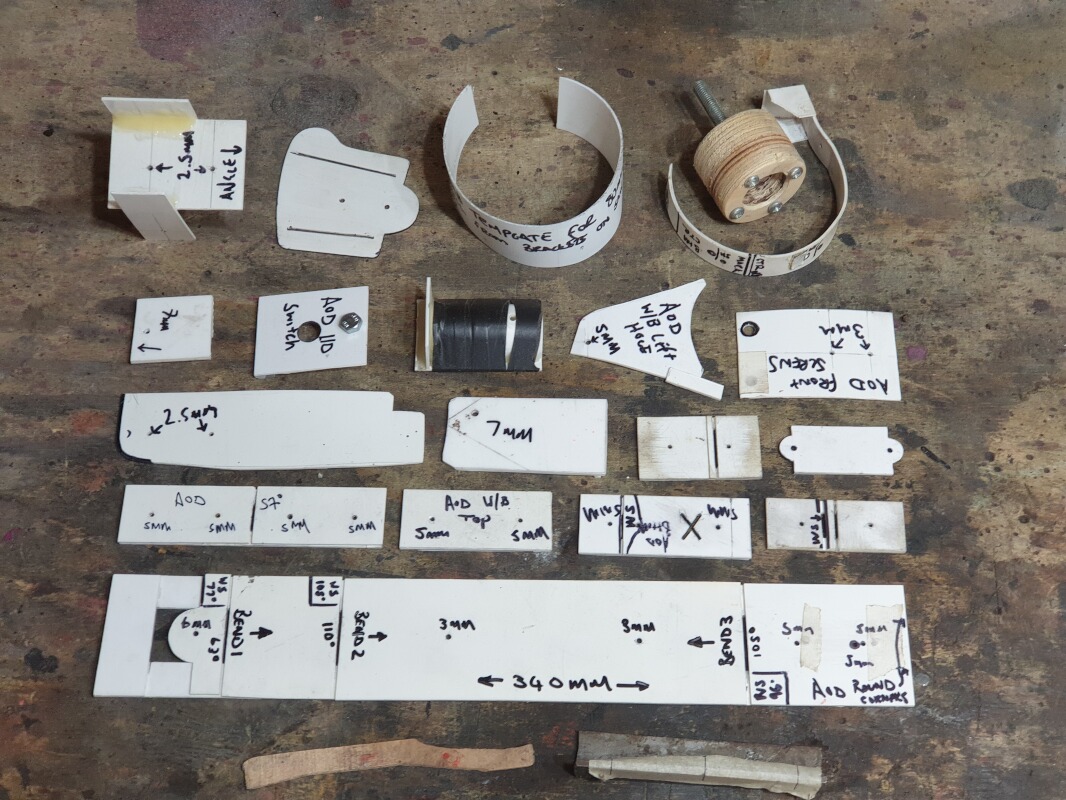
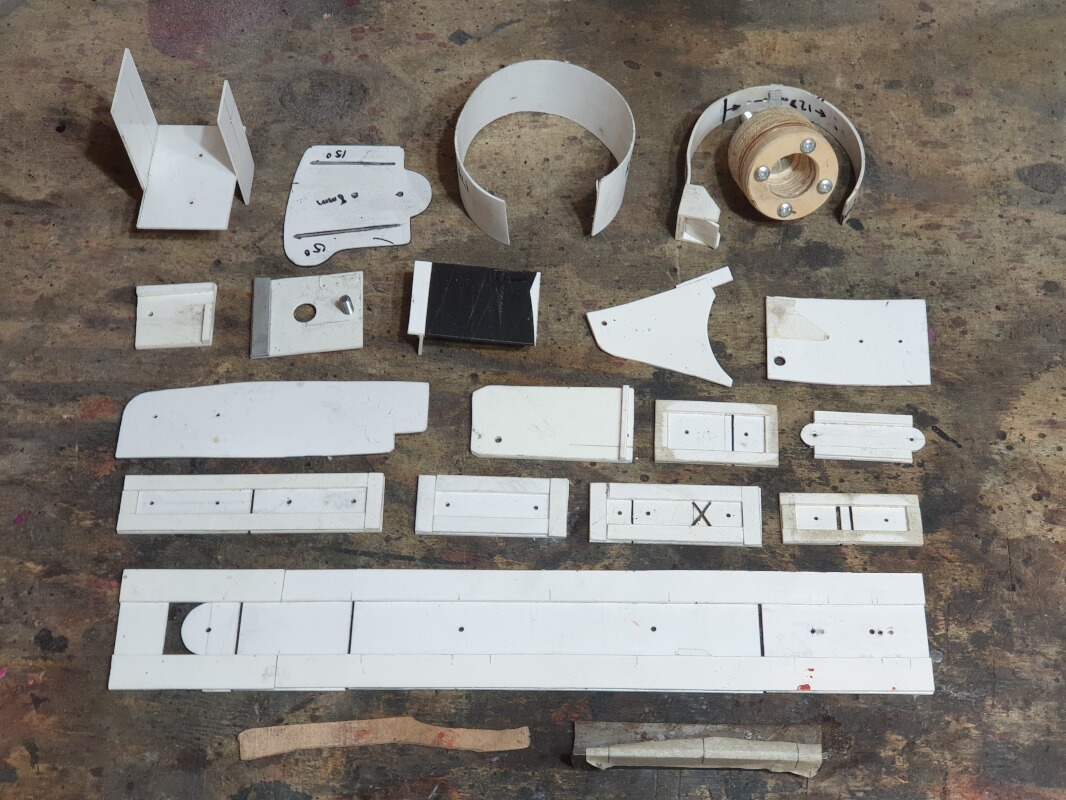
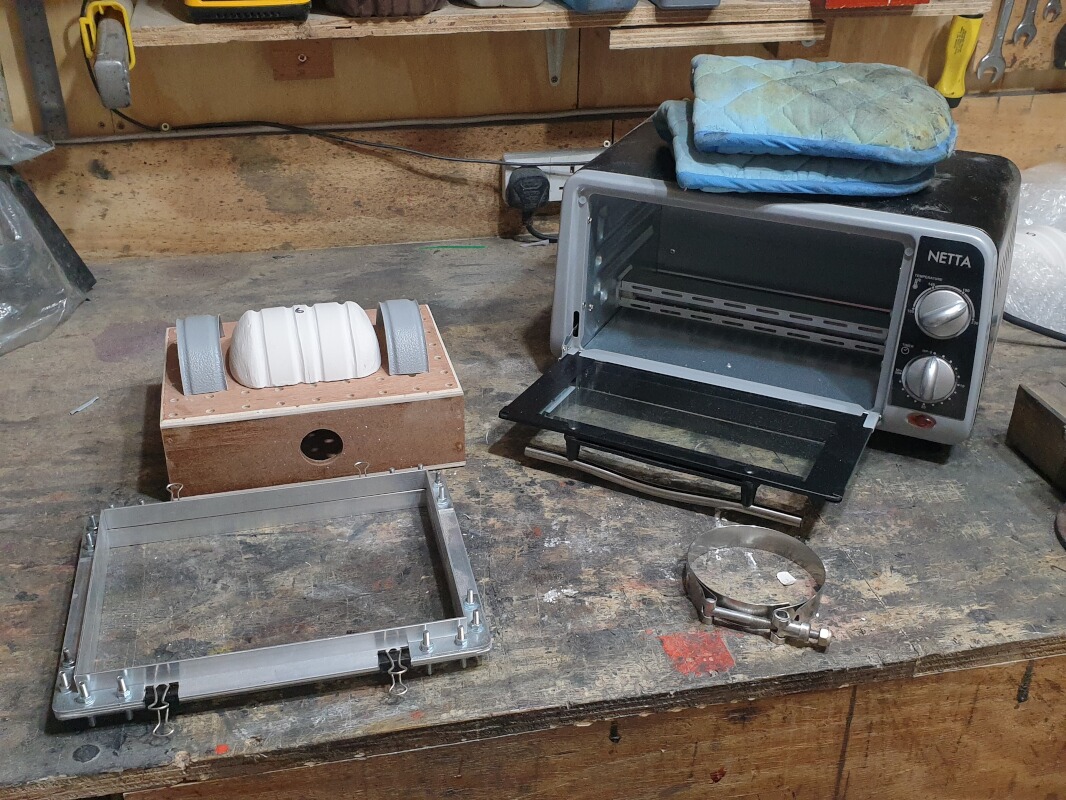
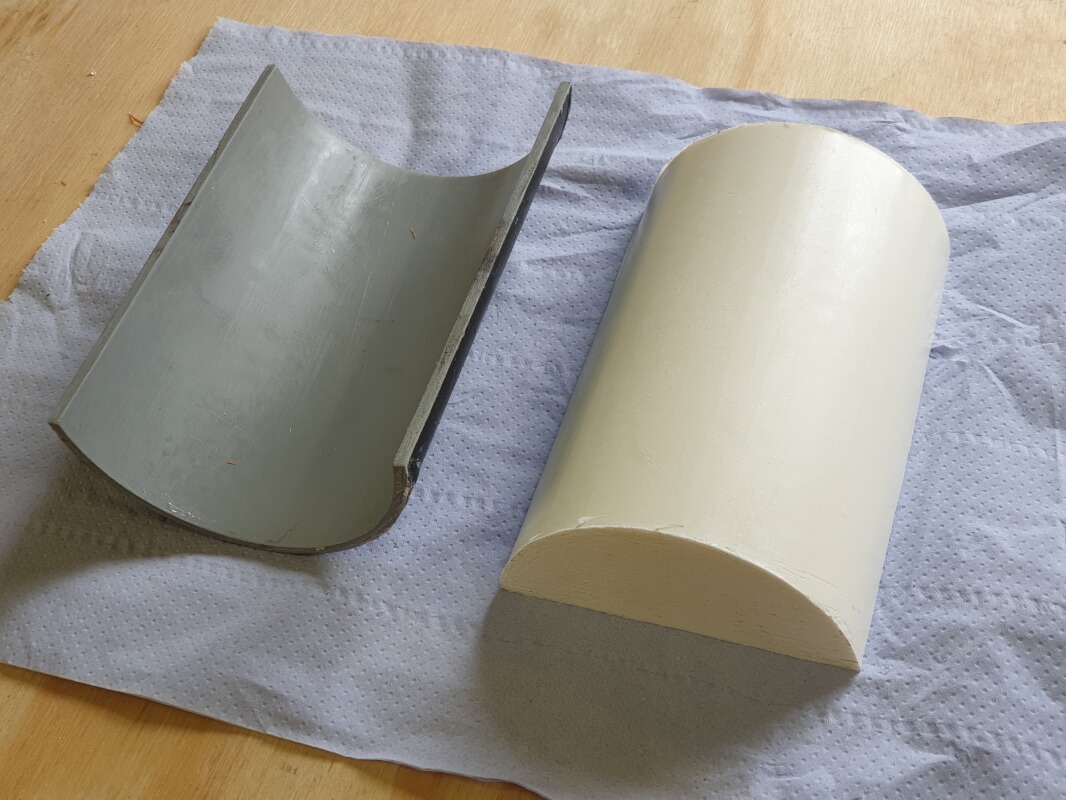
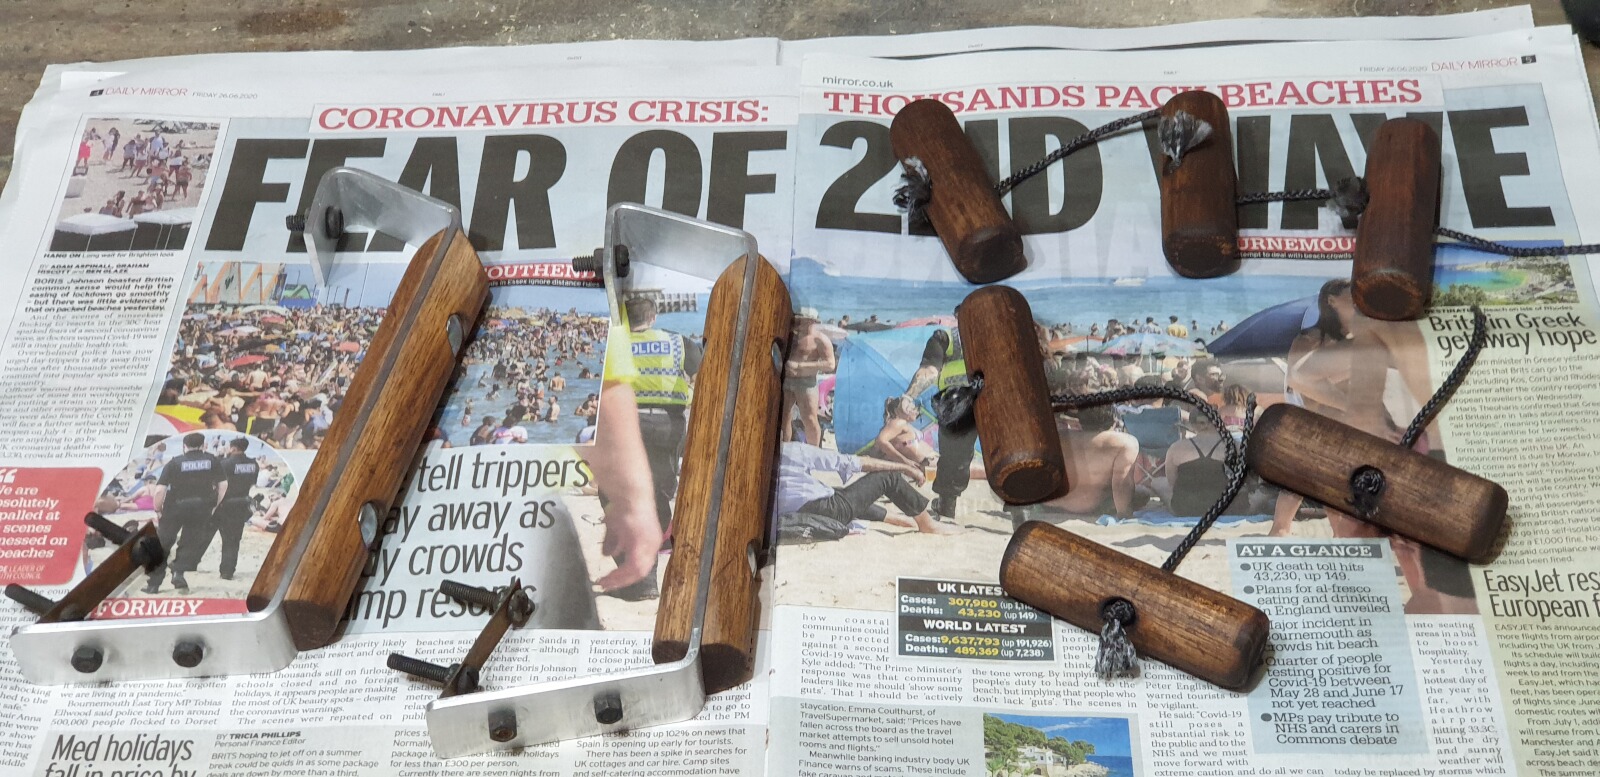
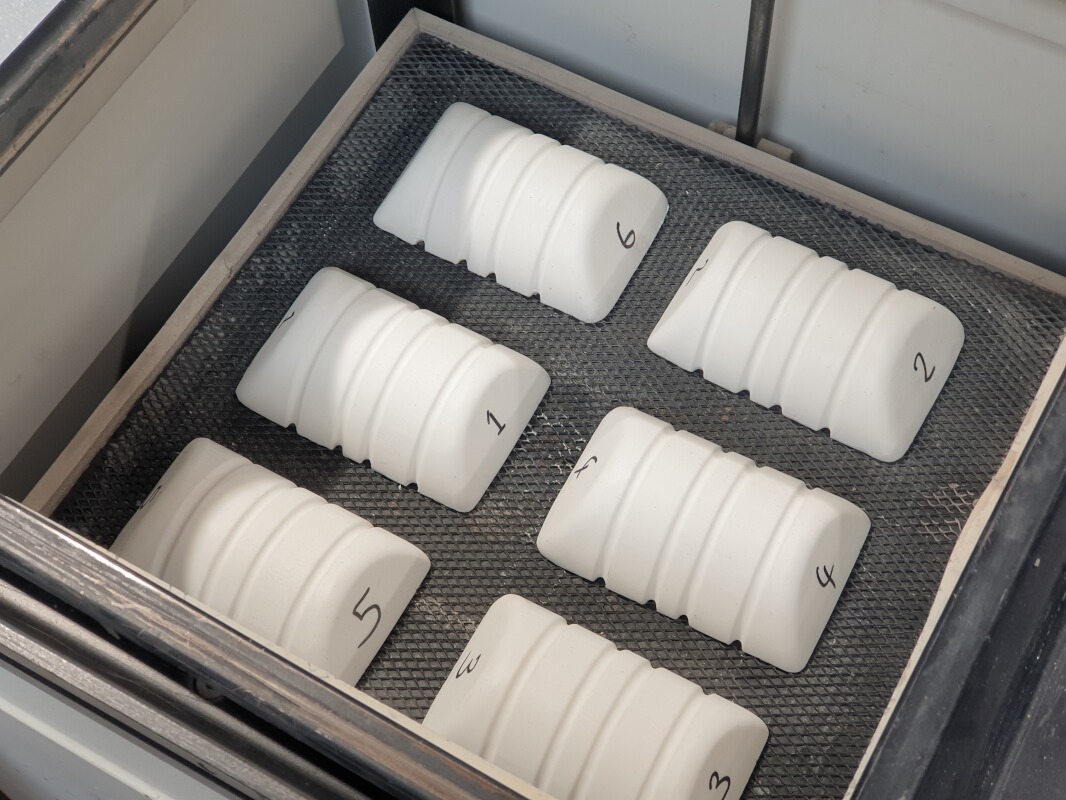
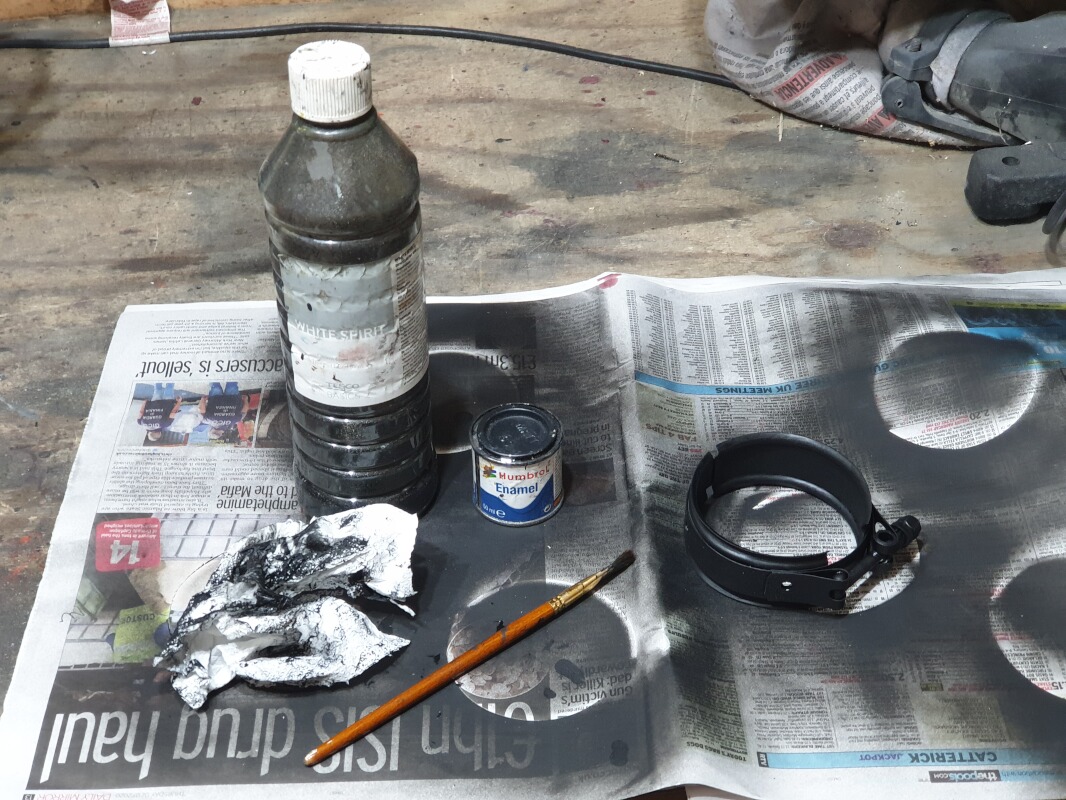
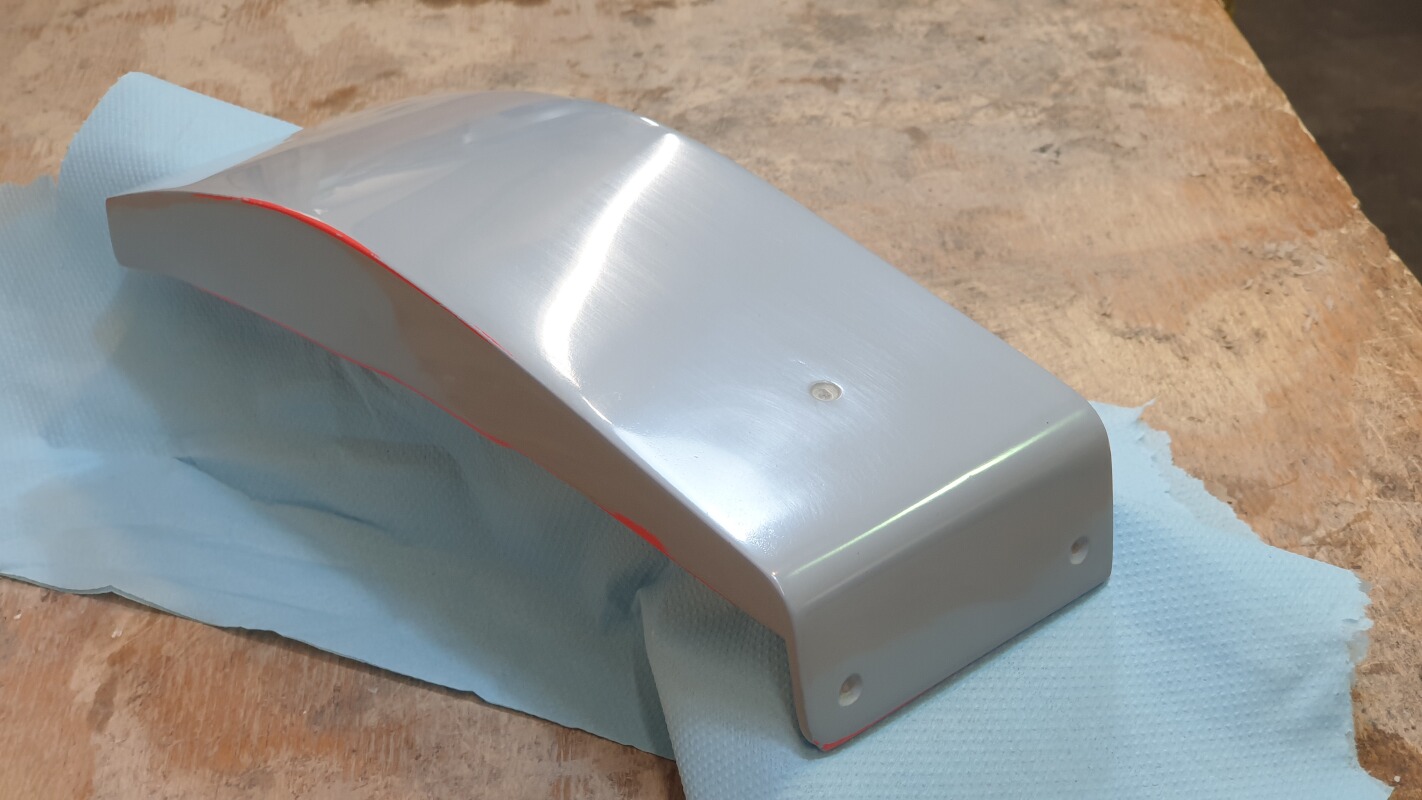
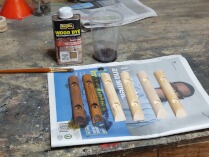
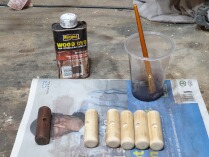
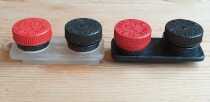
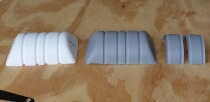
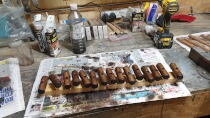
Upgrading The Wristband, Pt1 (June 2020)
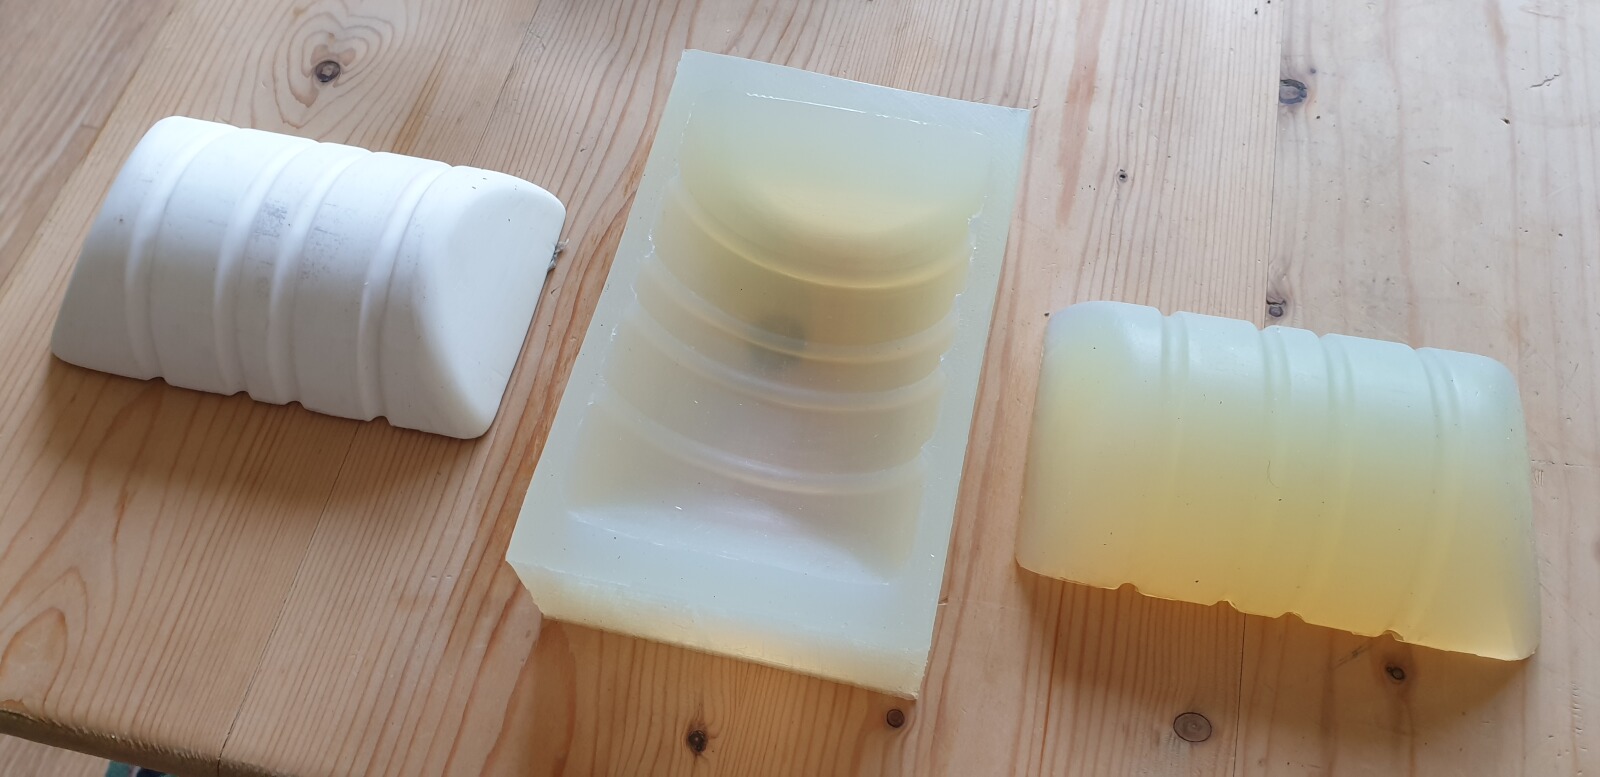
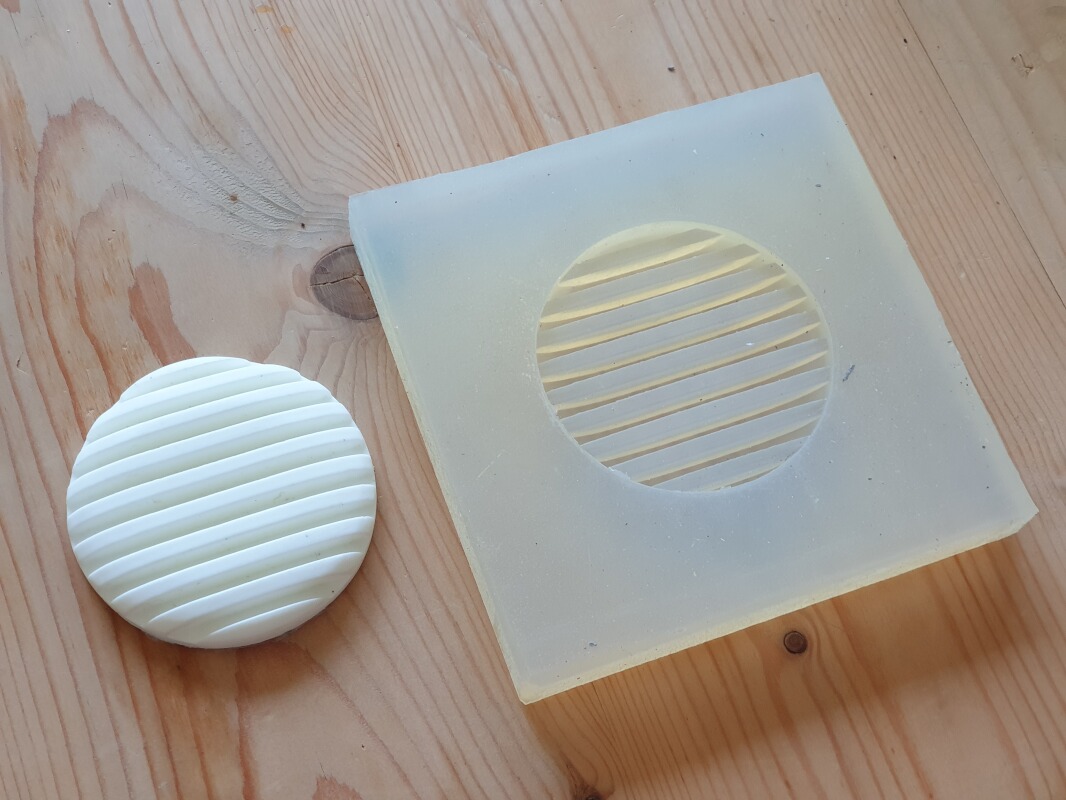
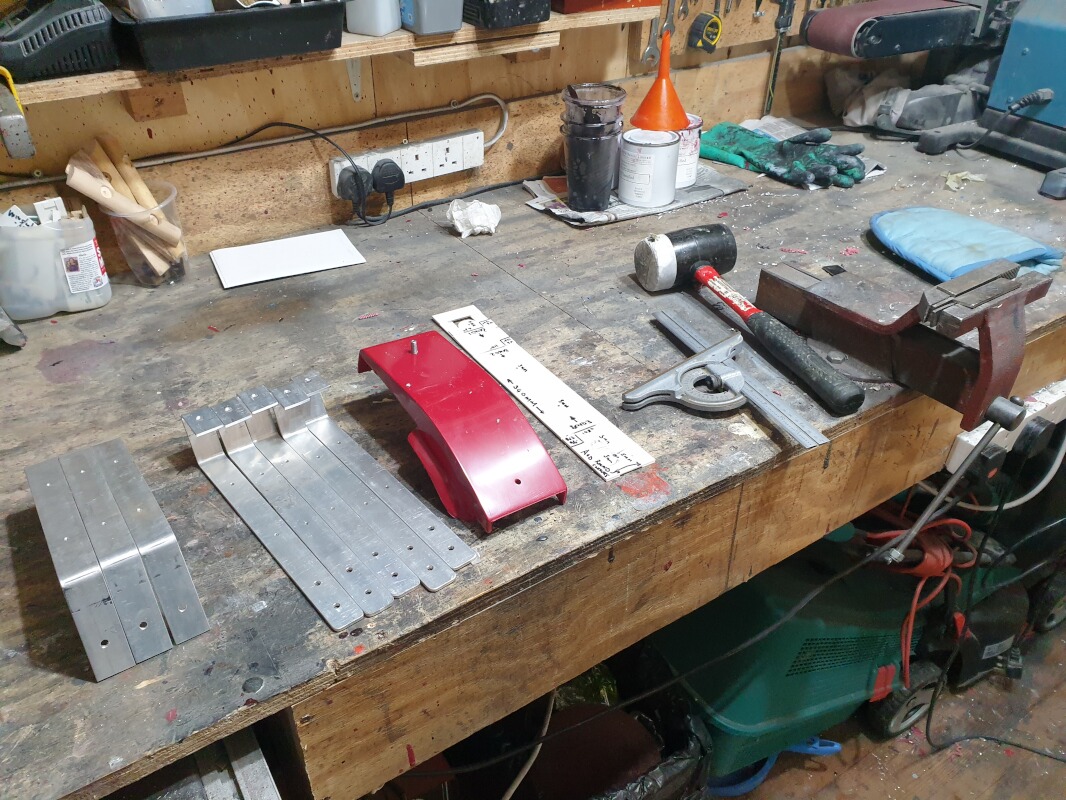
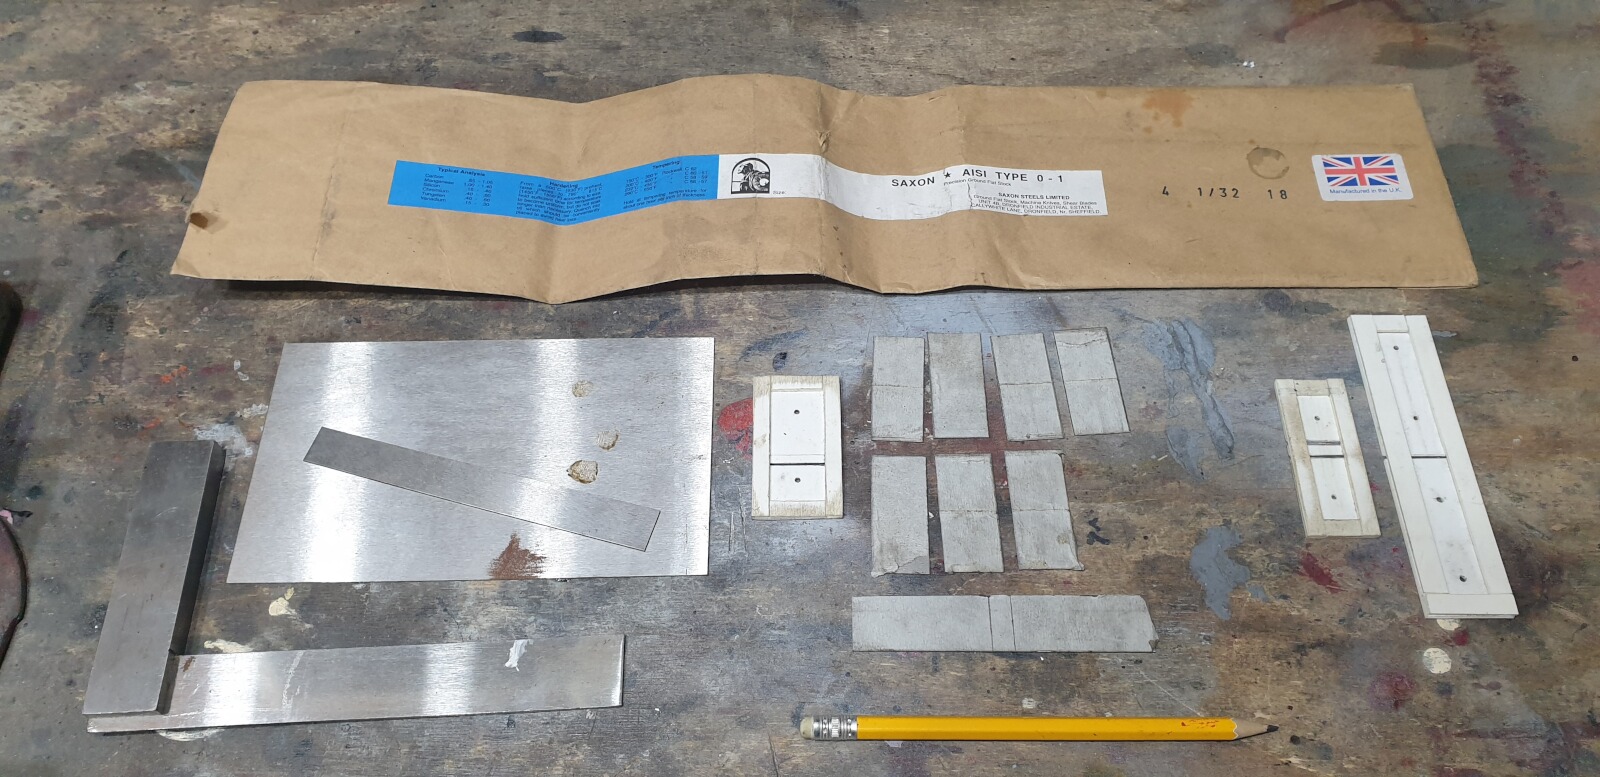
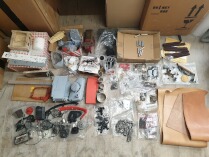
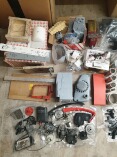
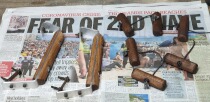
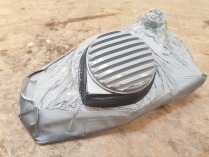
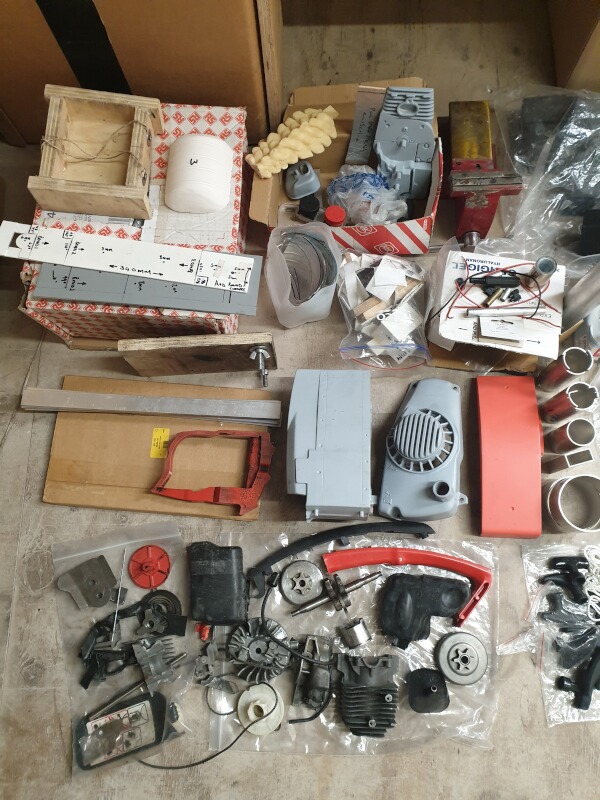
The first photos here show all the templates I use in making chainsaw parts & full chainsaws. They're among the few items I kept after closing back in 2008, along with my design notebook. The next three photos show my first attempt at vac-forming my own wristband insert. I found that either by the time the plastic was pliable enough to form, it was also burning. Less heat and it wouldn't form properly. You can see the rough surface on the wristband insert I did manage to make. The last photo shows my standalone side grill re-moulding.
July DIY Parts Run (July 2020)
This was July 2020's run of parts. I took the additional time to make three top handles, six pull starts, and two wristbands for customers, as well as making a number of each DIY part for general sale on the KOS Facebook Group
 049 049 |
|
 050 050 |
|
 051 051 |
| |
 052 052 |
|
 053 053 |
|
 054 054 |
| |
 055 055 |
|
 056 056 |
|
 057 057 |
| |
 058 058 |
|
 059 059 |
|
 060 060 |
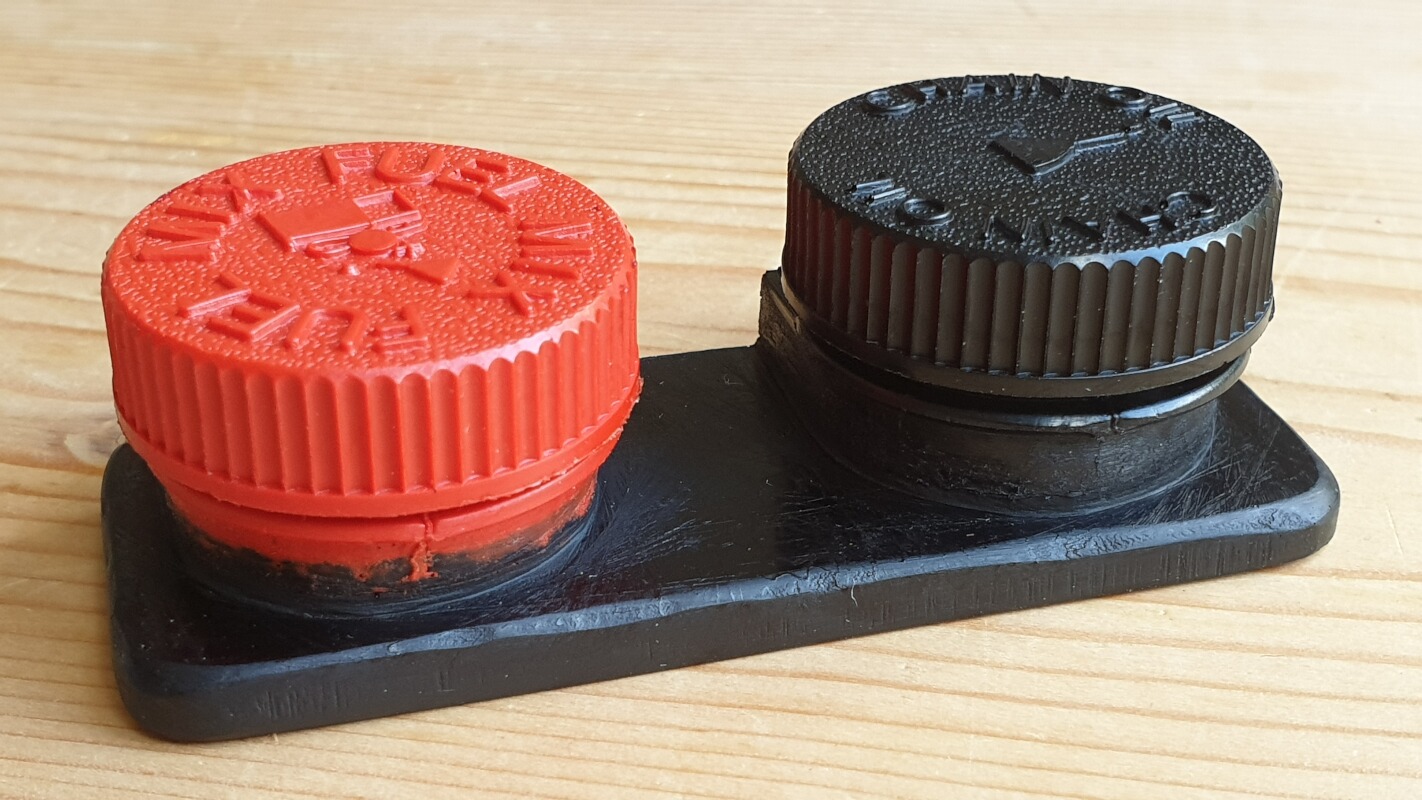
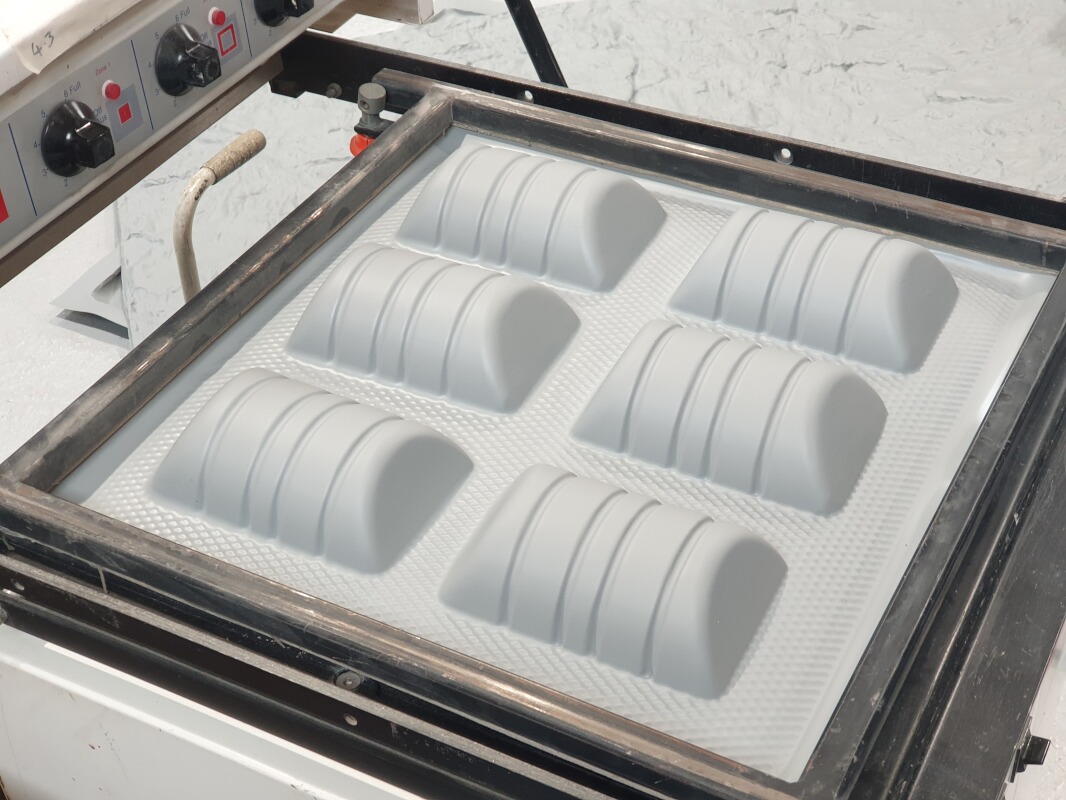
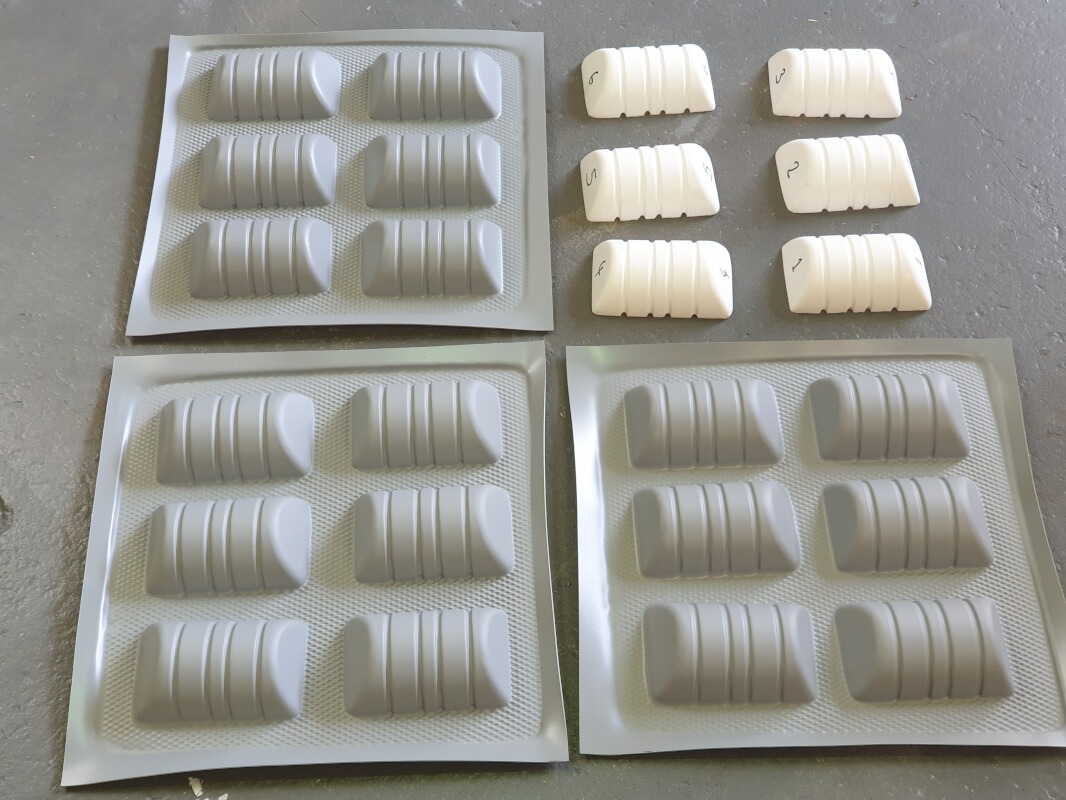
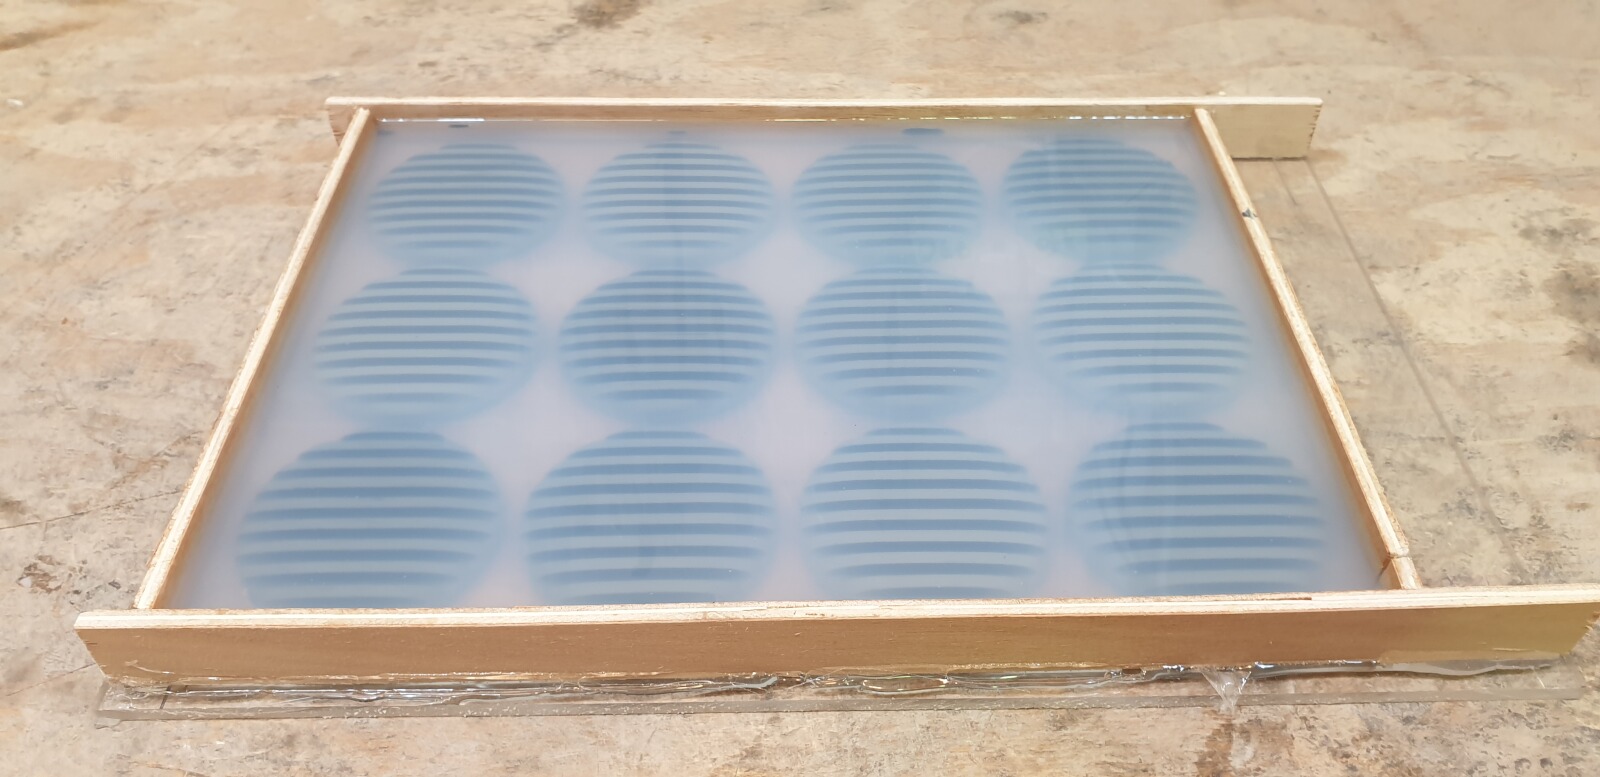
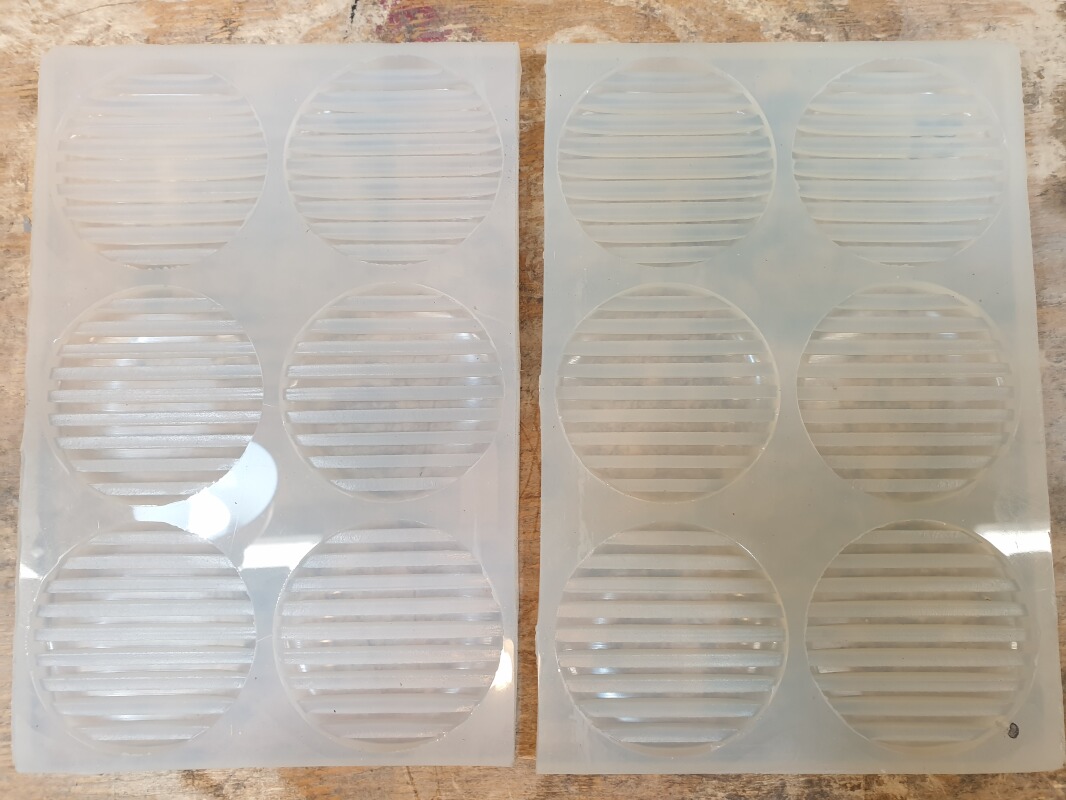
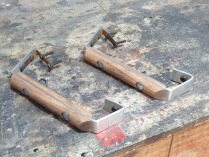
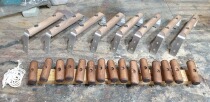
Upgrading The Wristband, Pt2 (July 2020)
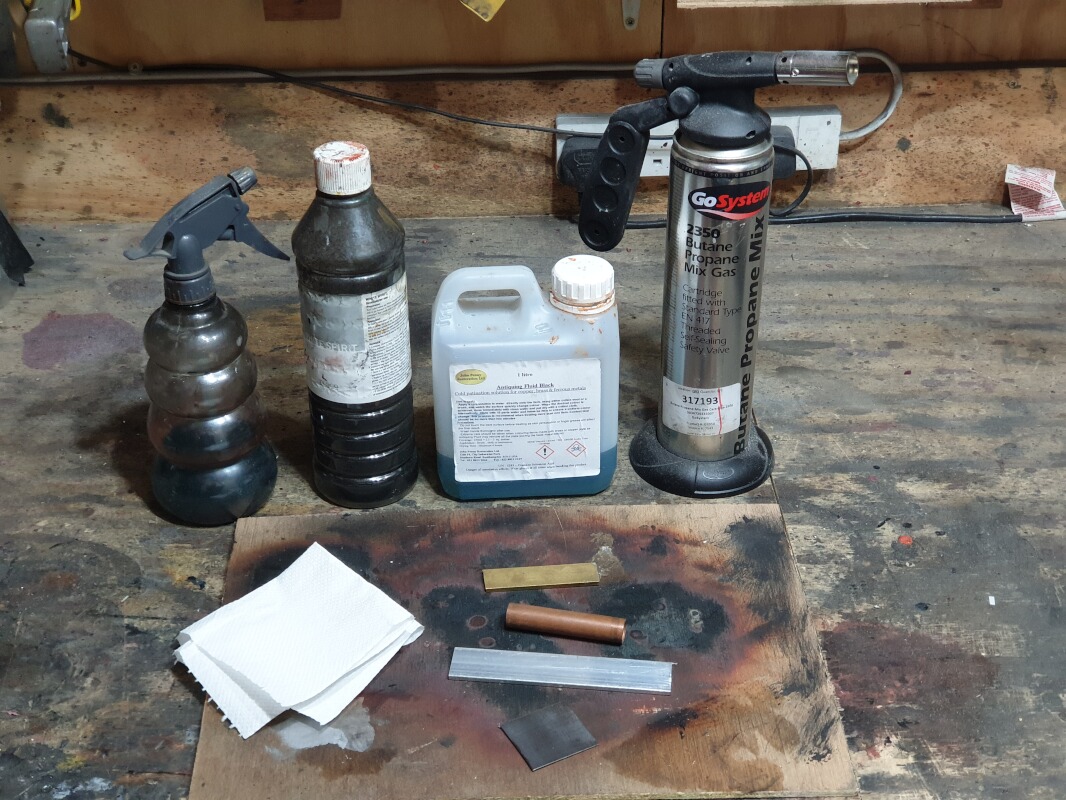
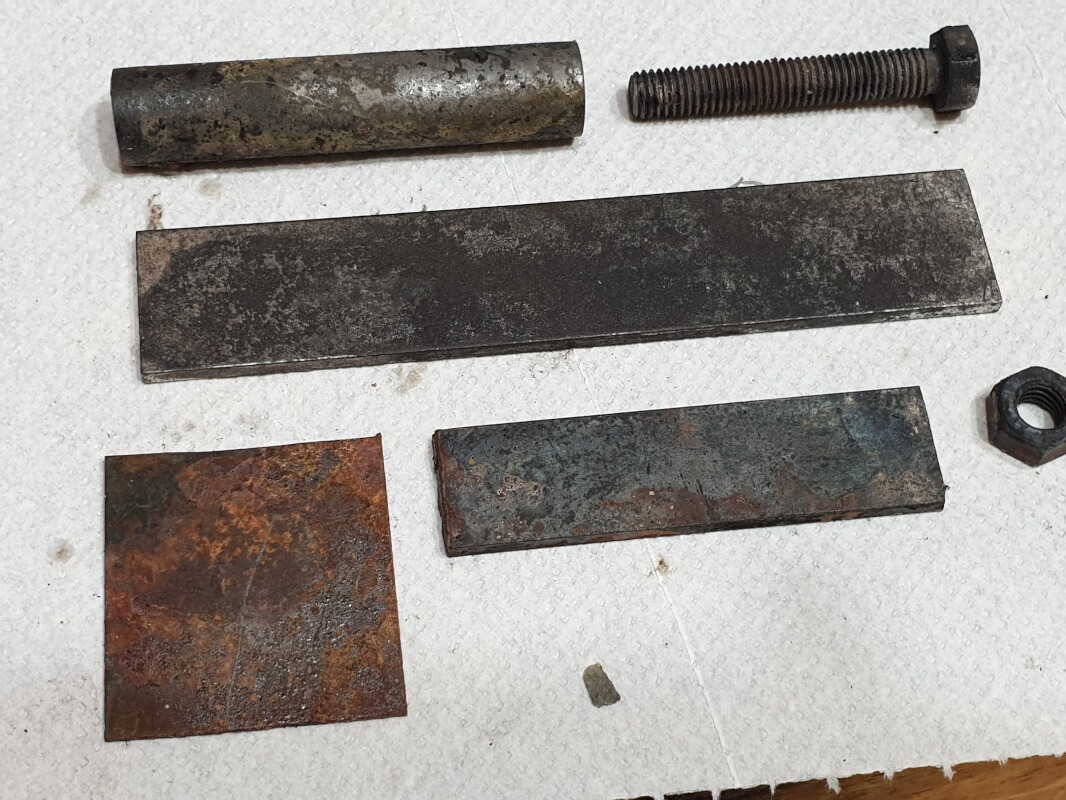
Using the resin formers, I vac-formed three sheets of six wristband inserts (eighteen wristbands' worth), then trimmed and sanded all thirty-six pieces so I had them ready-made for orders. I used the metallic paint effect to show what one could look like when properly painted up. At the bottom you can also see two photos showing my instant Metal Chemical Ageing Process too.
 061 061 |
|
 062 062 |
|
 063 063 |
| |
 064 064 |
|
 065 065 |
|
 066 066 |
| |
 067 067 |
|
 068 068 |
|
 069 069 |
| |
 070 070 |
|
 071 071 |
|
 072 072 |
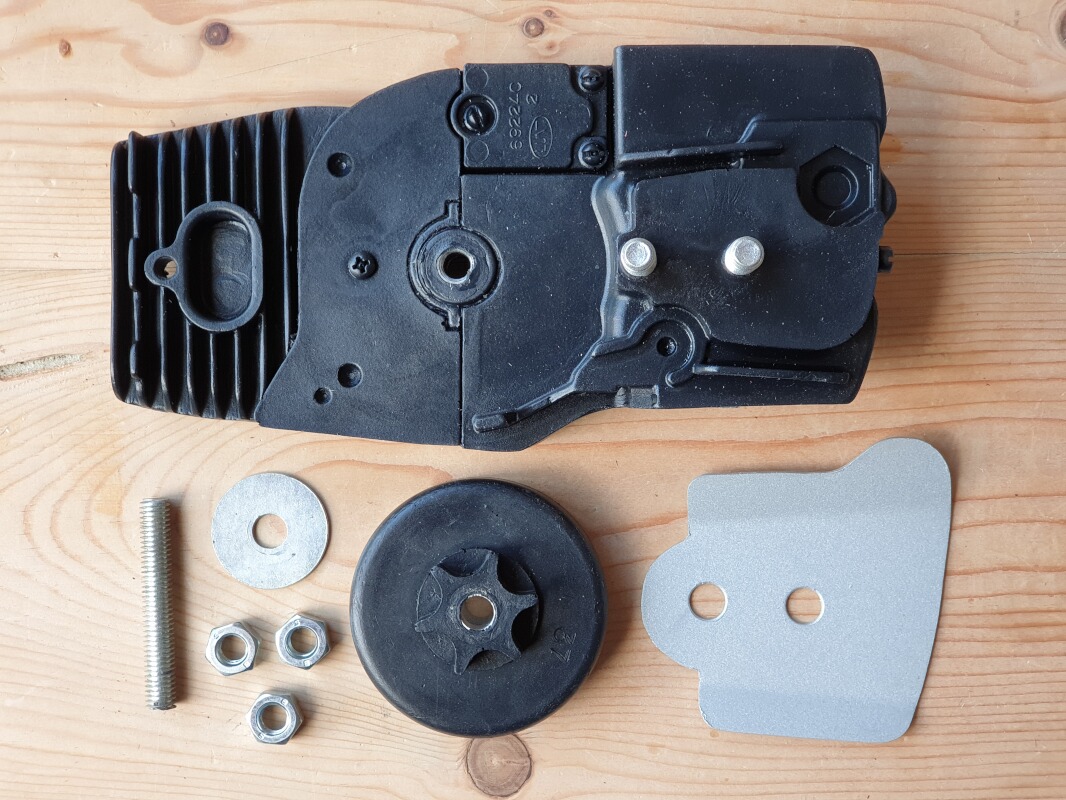
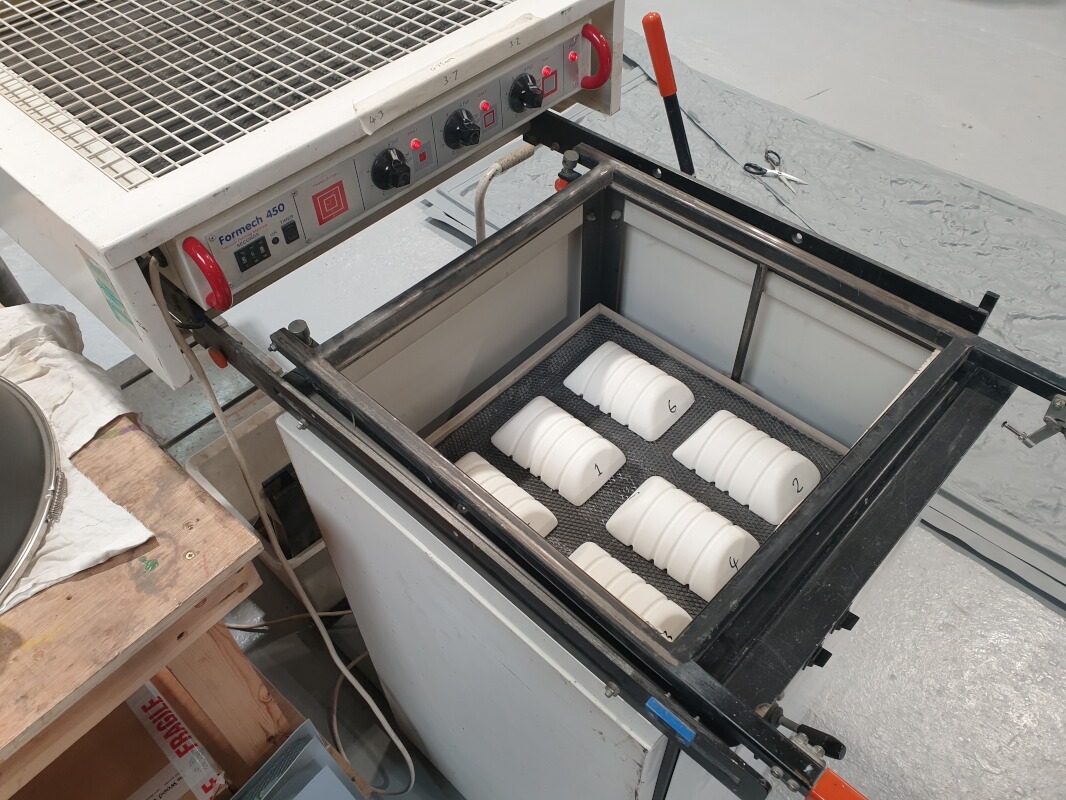
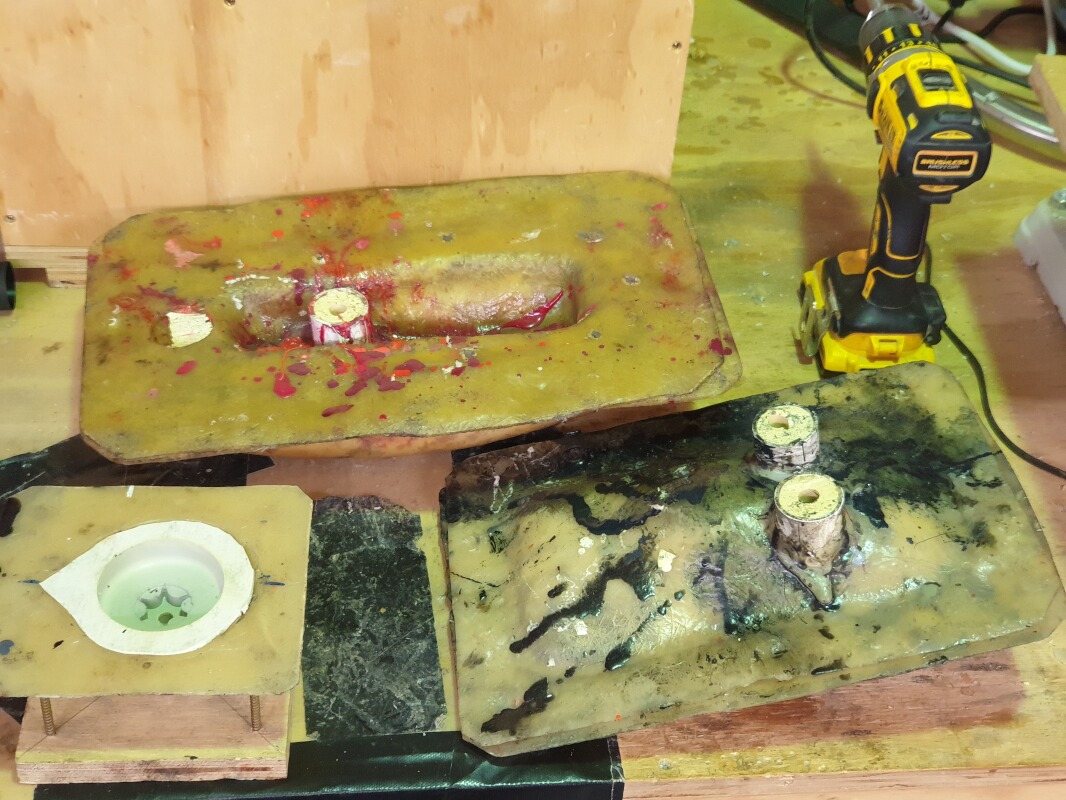
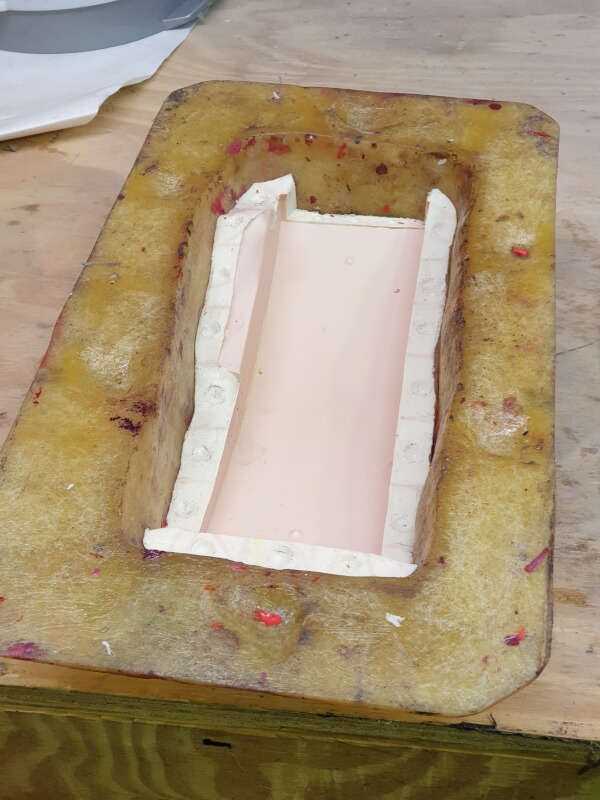
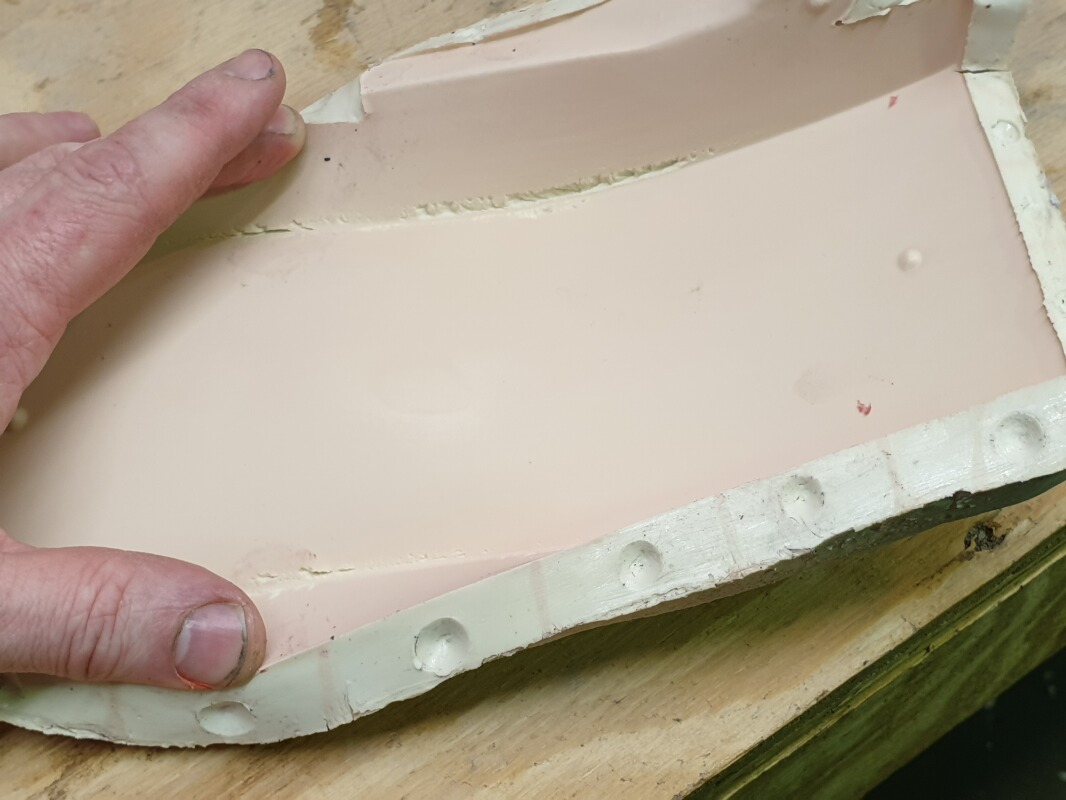
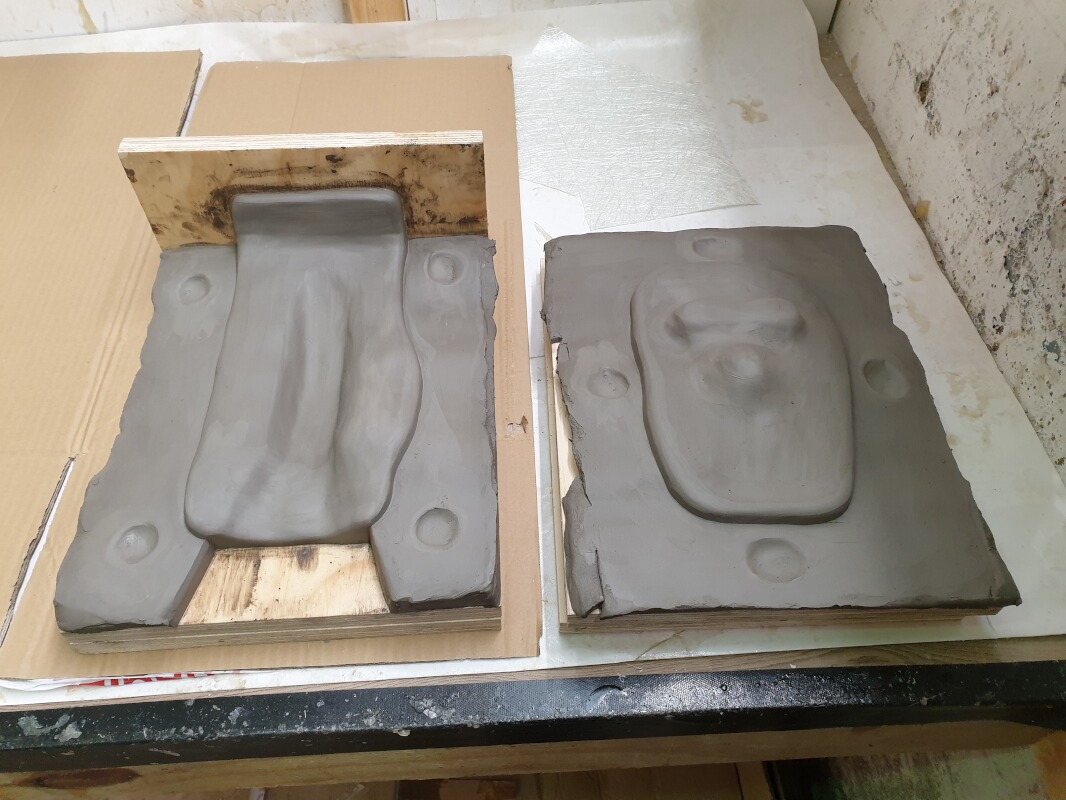
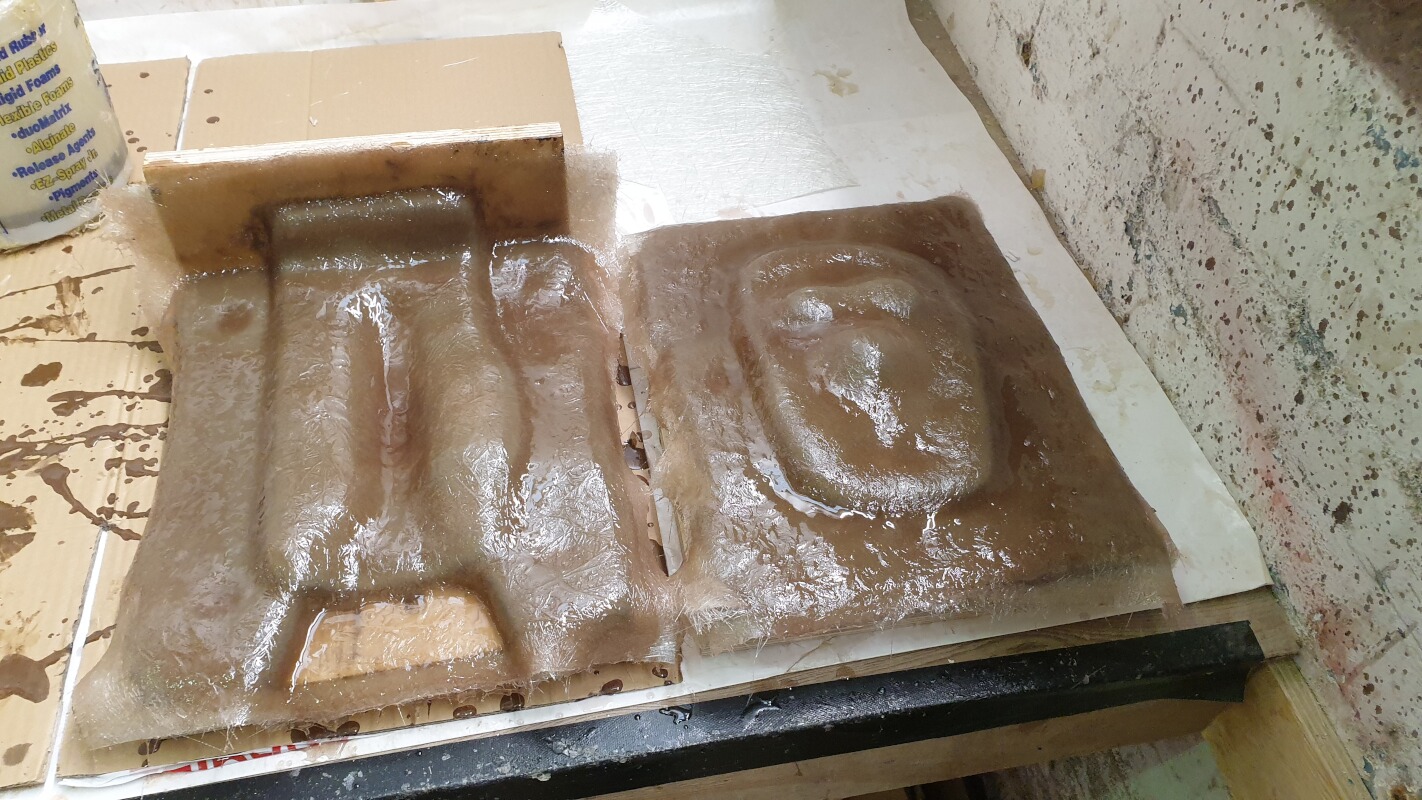
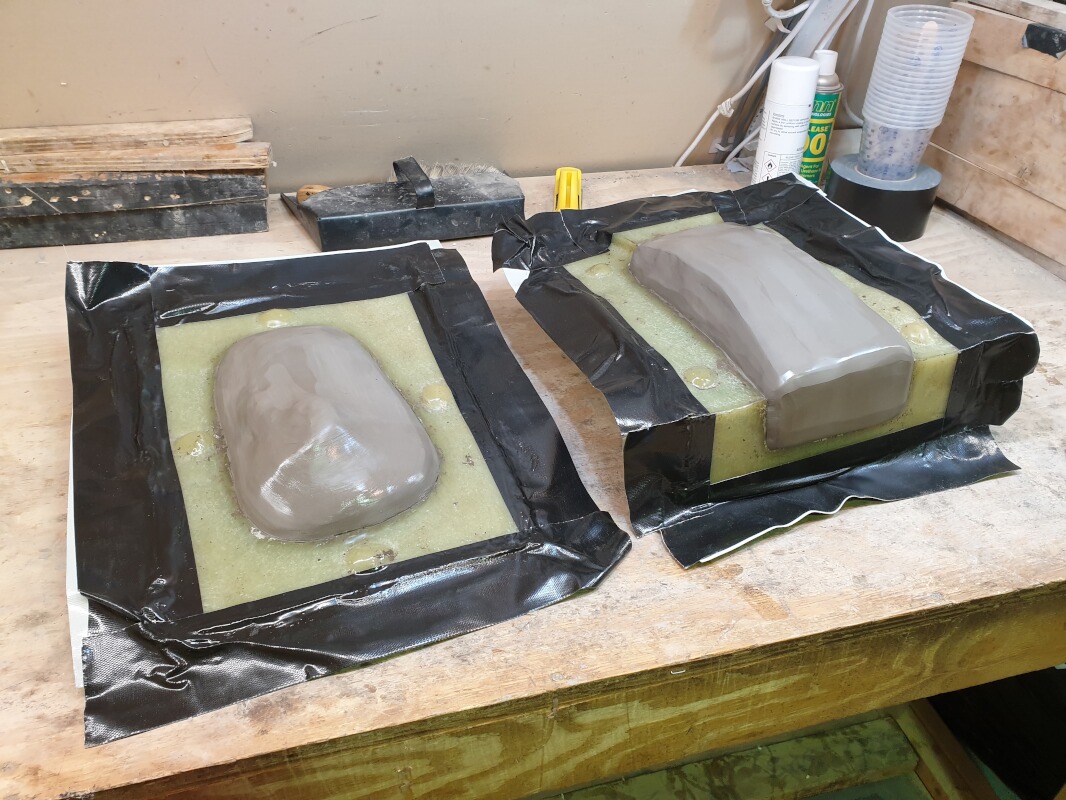
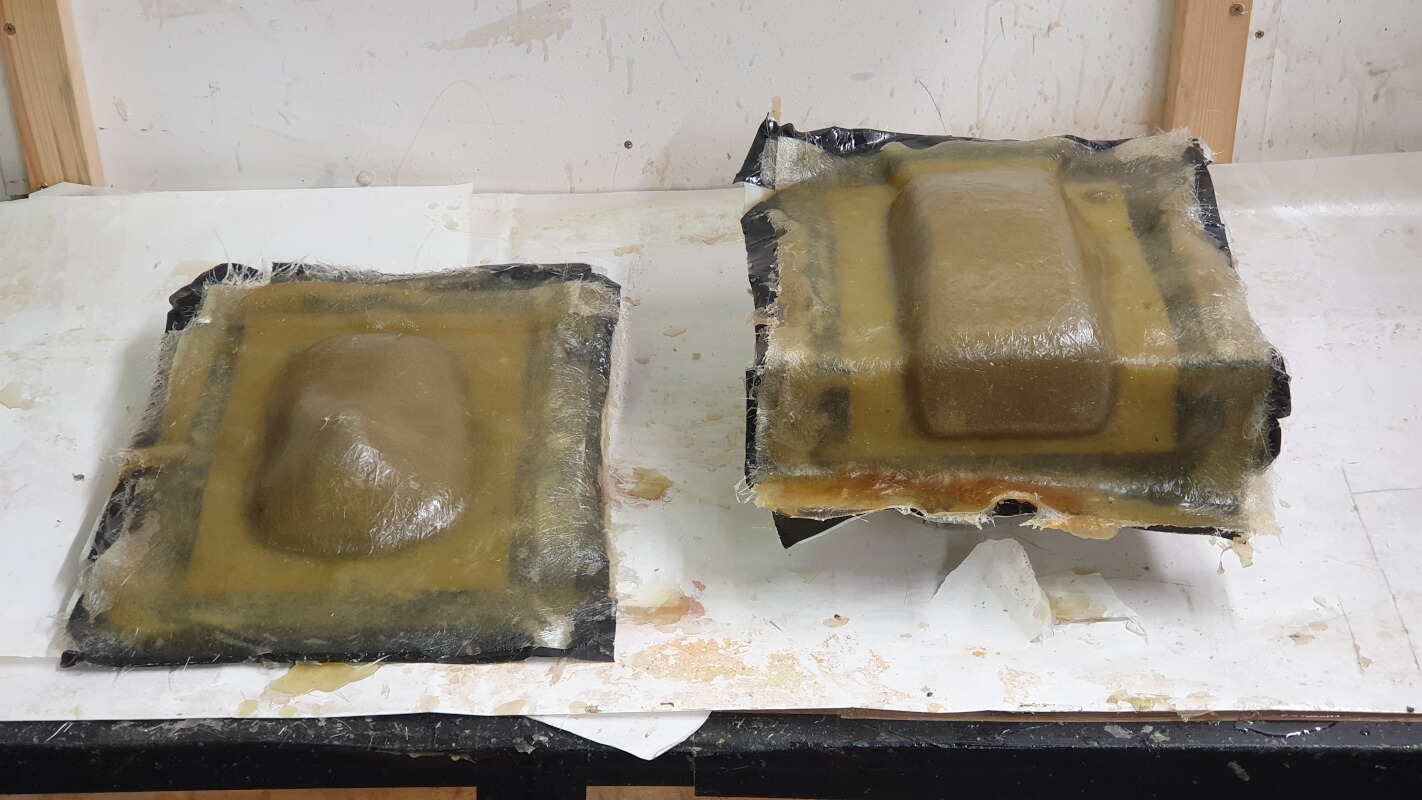
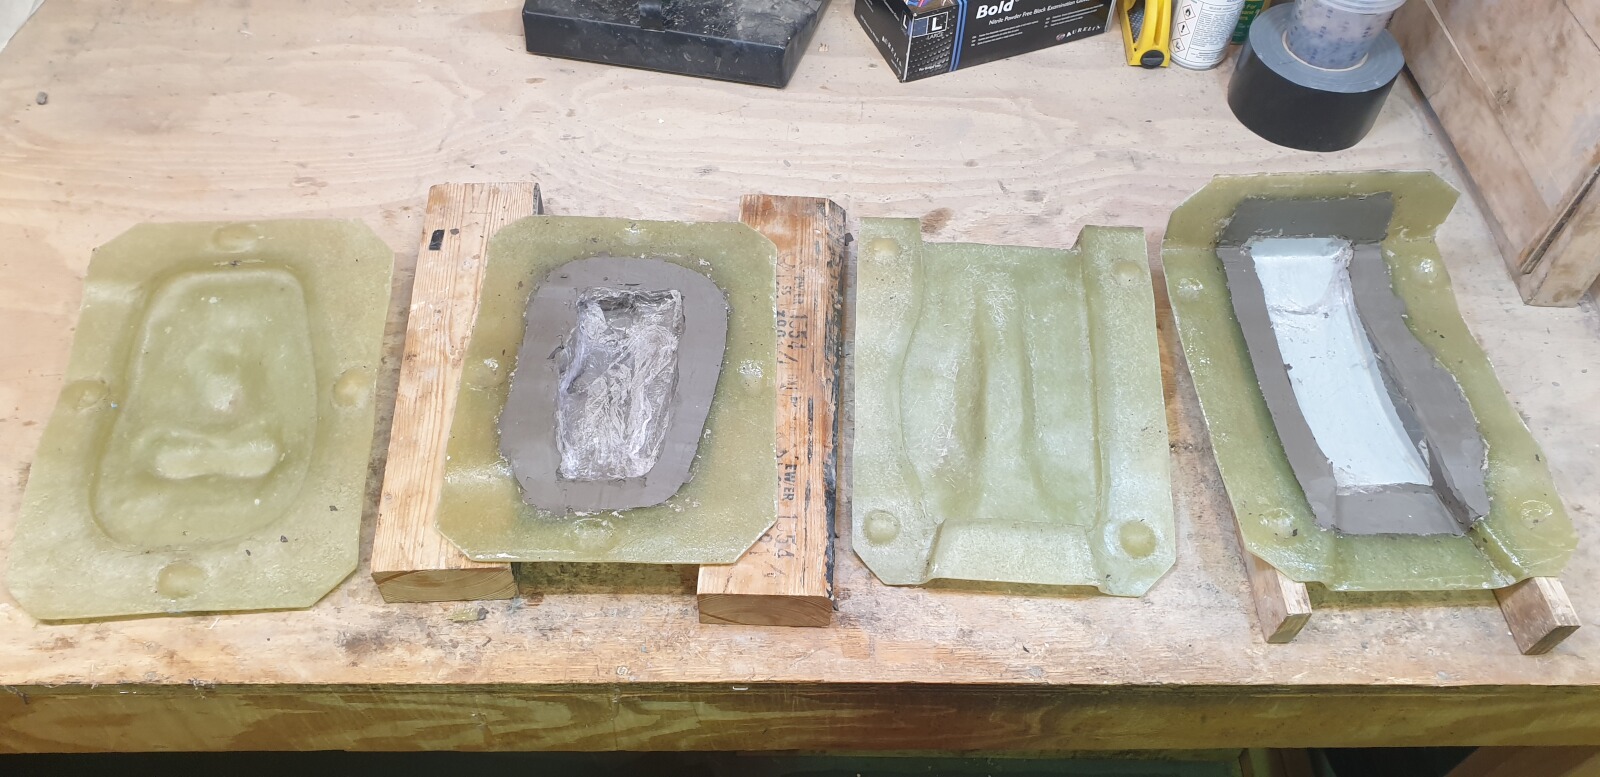
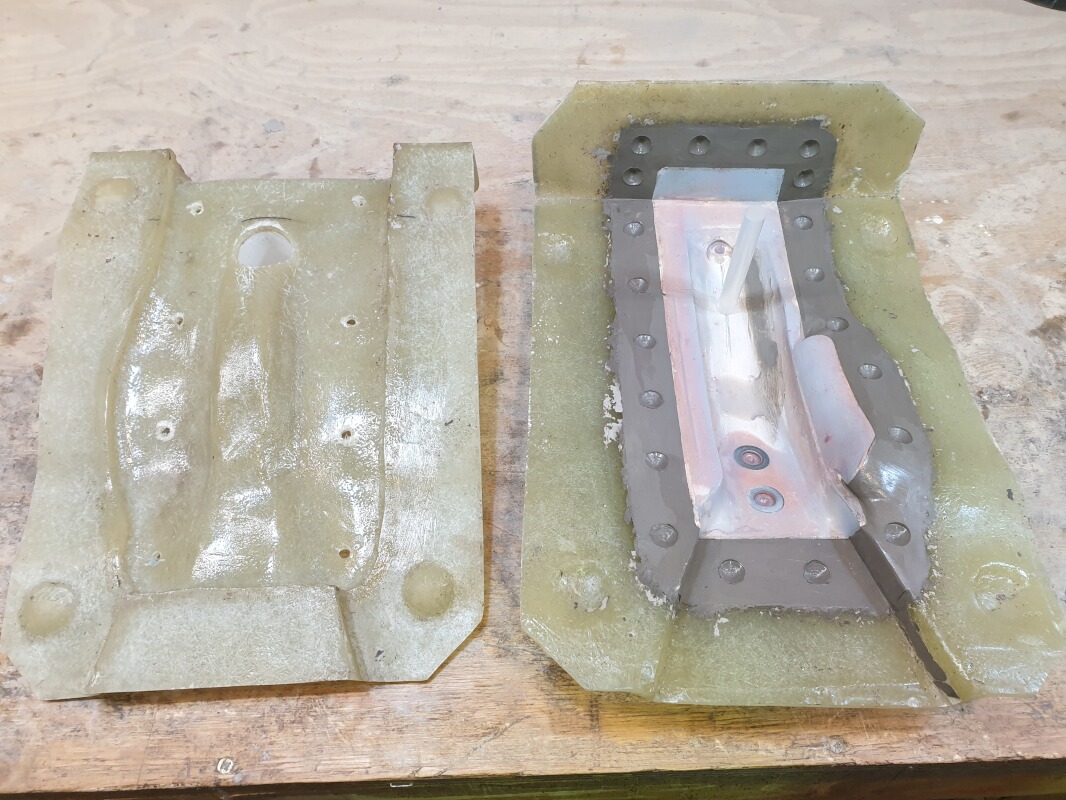
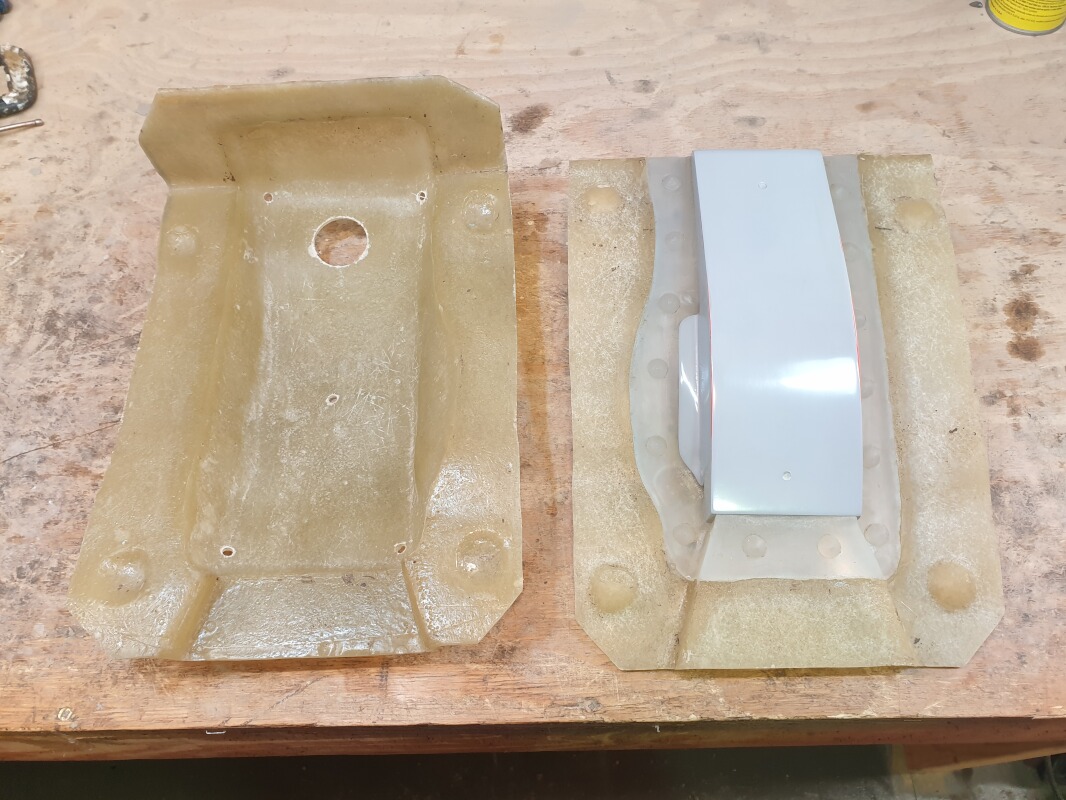
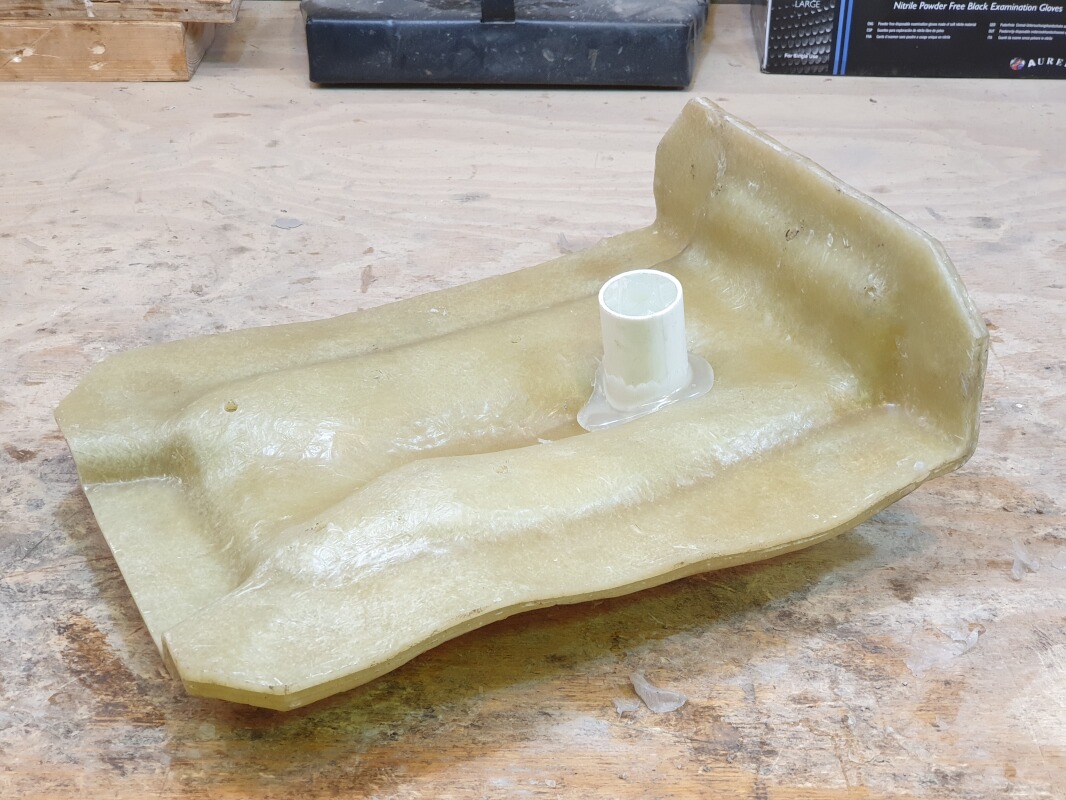
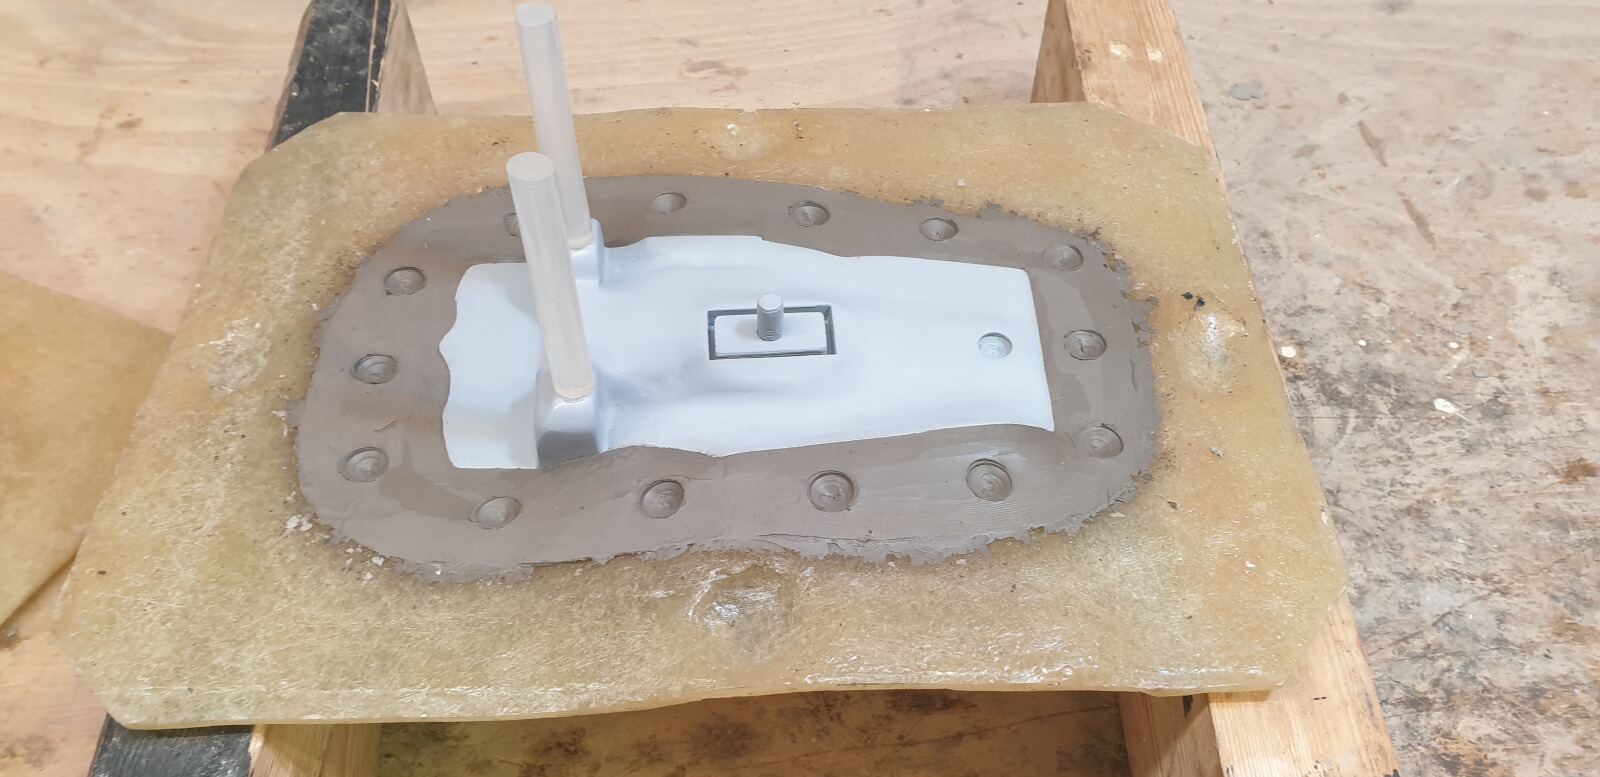
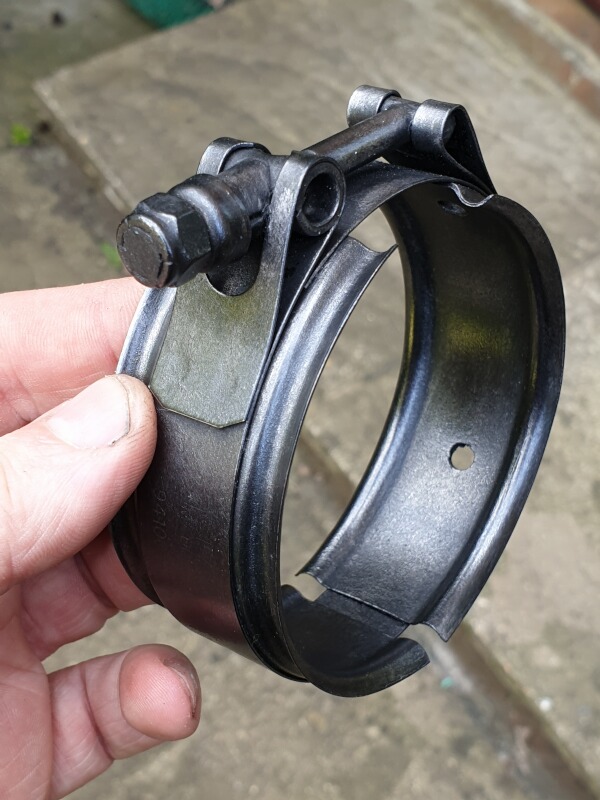
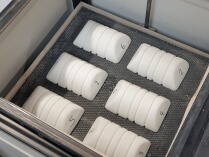
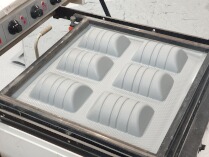
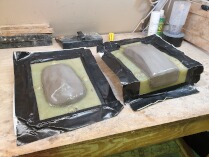
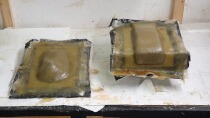
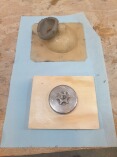
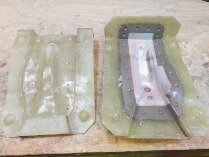
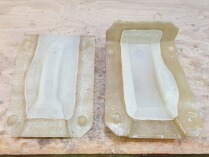
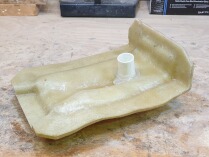
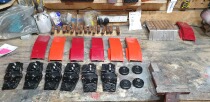
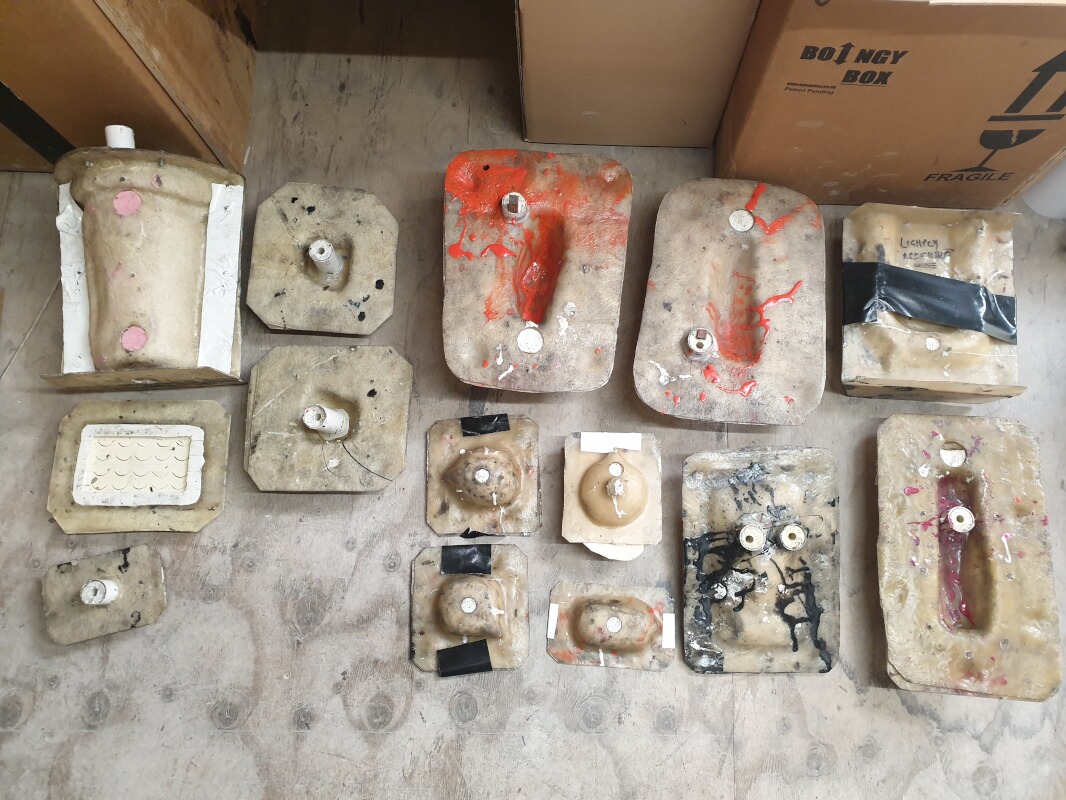
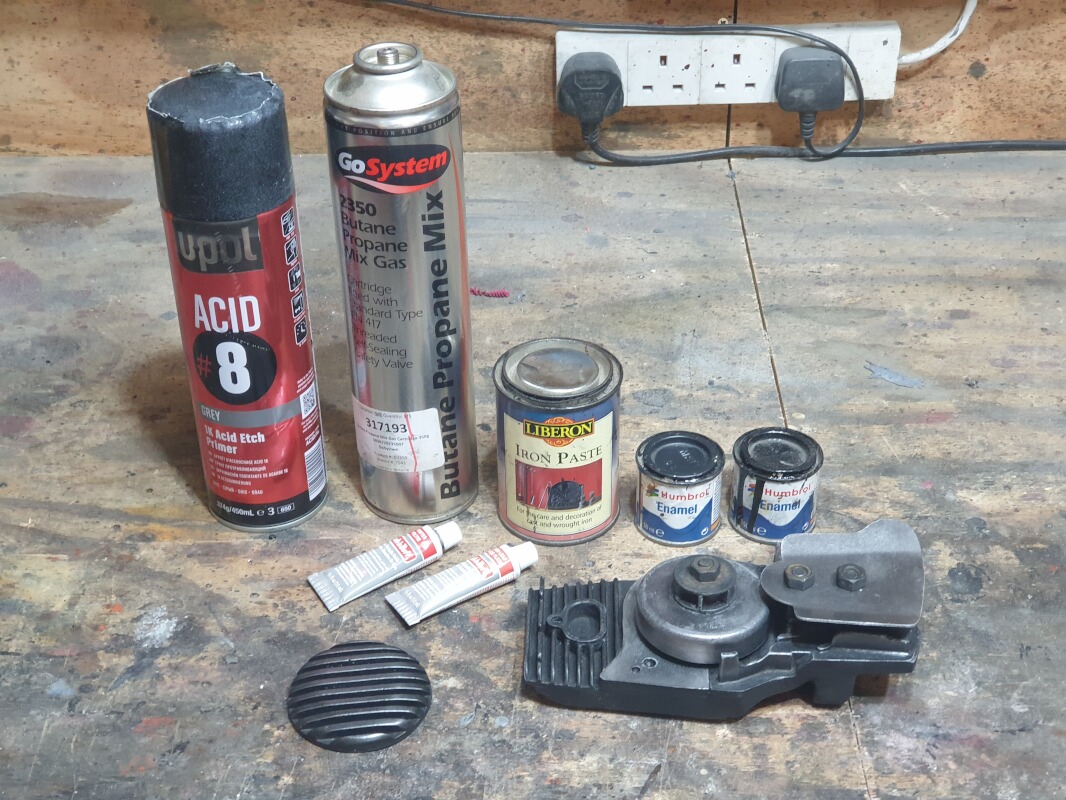
Replacing Various Moulds & A Run Of DIY Parts (January to February 2021)
Here you can see my old degraded moulds, and my new-mould making process; making two sided fibreglass shells, with two sided silicone inserts, along test castings and February 2021's run of revised DIY parts.
 073 073 |
|
 074 074 |
|
 075 075 |
| |
 076 076 |
|
 077 077 |
|
 078 078 |
| |
 079 079 |
|
 080 080 |
|
 081 081 |
| |
 082 082 |
|
 083 083 |
|
 084 084 |
| |
 085 085 |
|
 086 086 |
|
 087 087 |
| |
 088 088 |
|
 089 089 |
|
 090 090 |
| |
 091 091 |
|
 092 092 |
|
 093 093 |
| |
 094 094 |
|
 095 095 |
|
 096 096 |
| |
 097 097 |
|
 098 098 |
|
 099 099 |
| |
 100 100 |
|
 101 101 |
|
 102 102 |
| |
 103 103 |
|
 104 104 |
|
 105 105 |
| |
 106 106 |
|
 107 107 |
|
 108 108 |
| |
 109 109 |
|
 110 110 |
|
 111 111 |
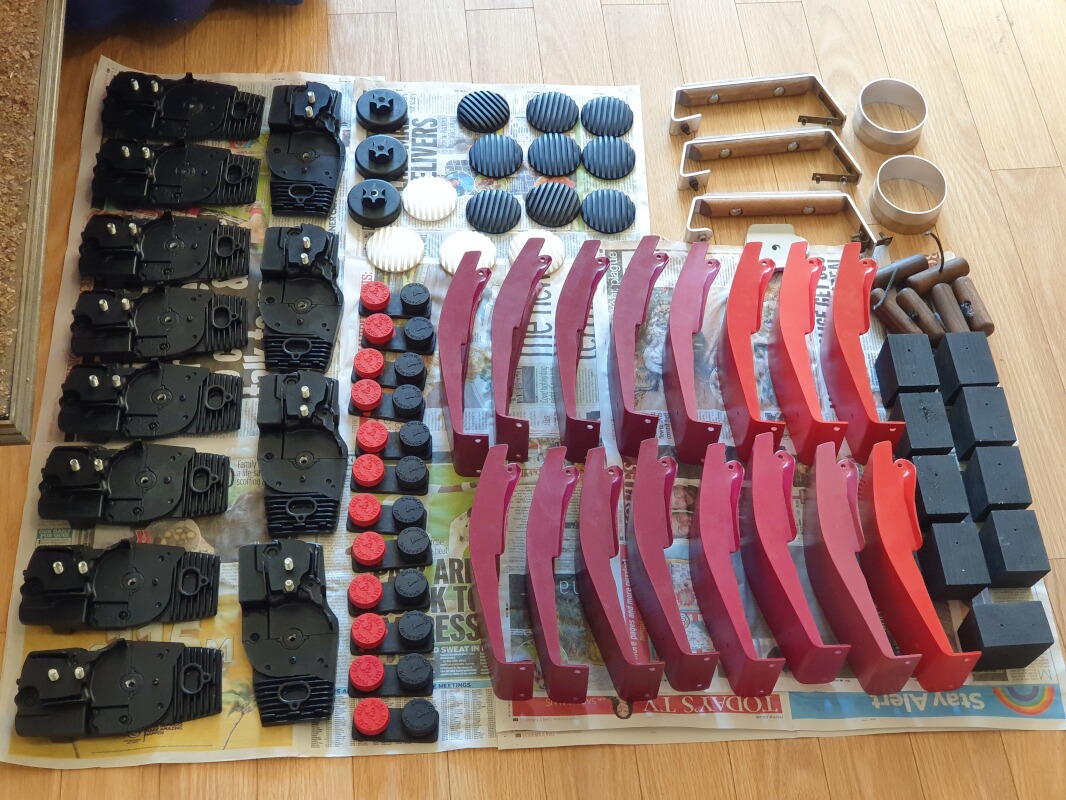
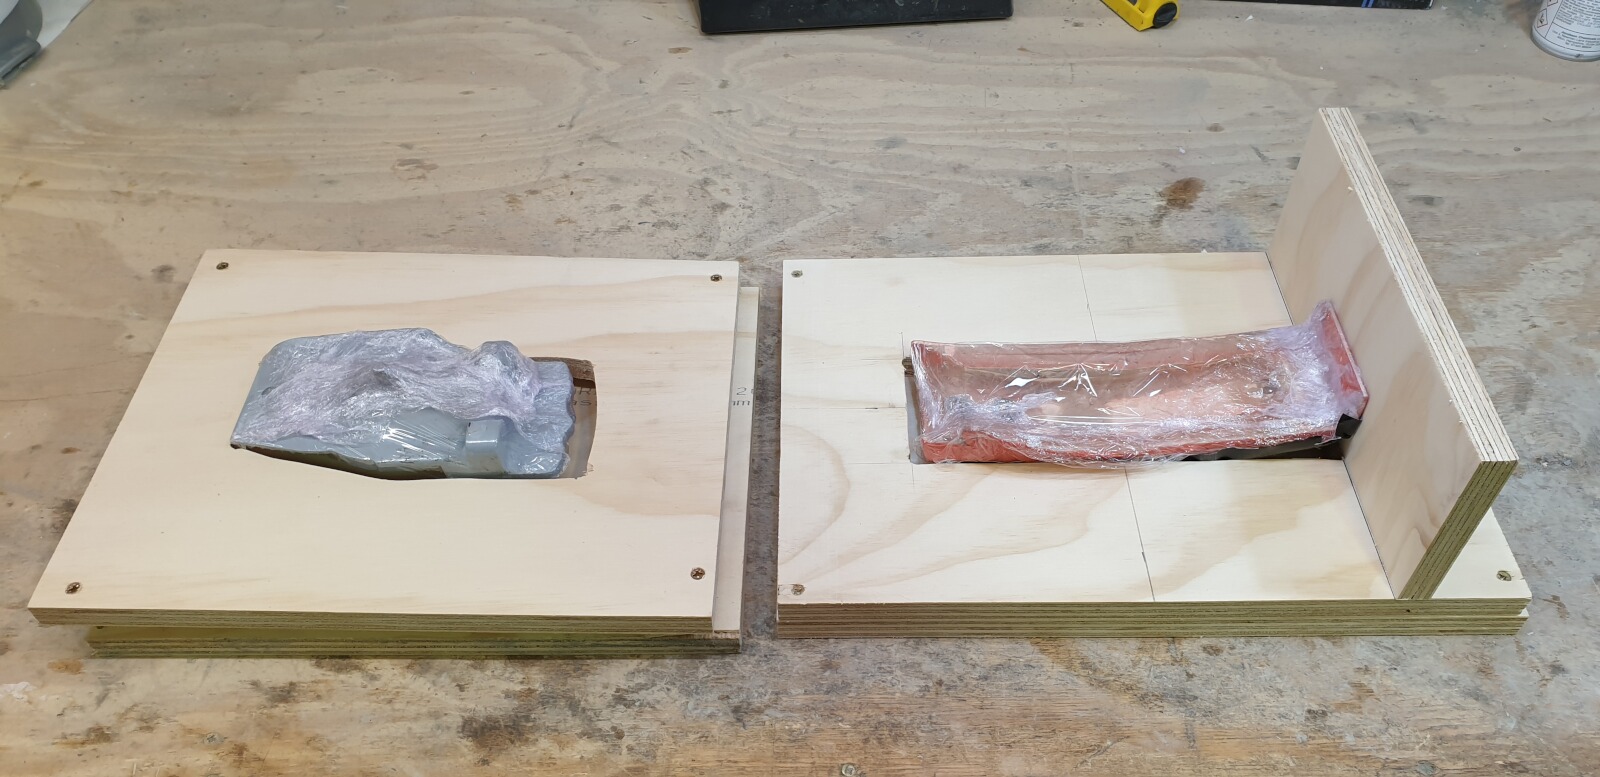
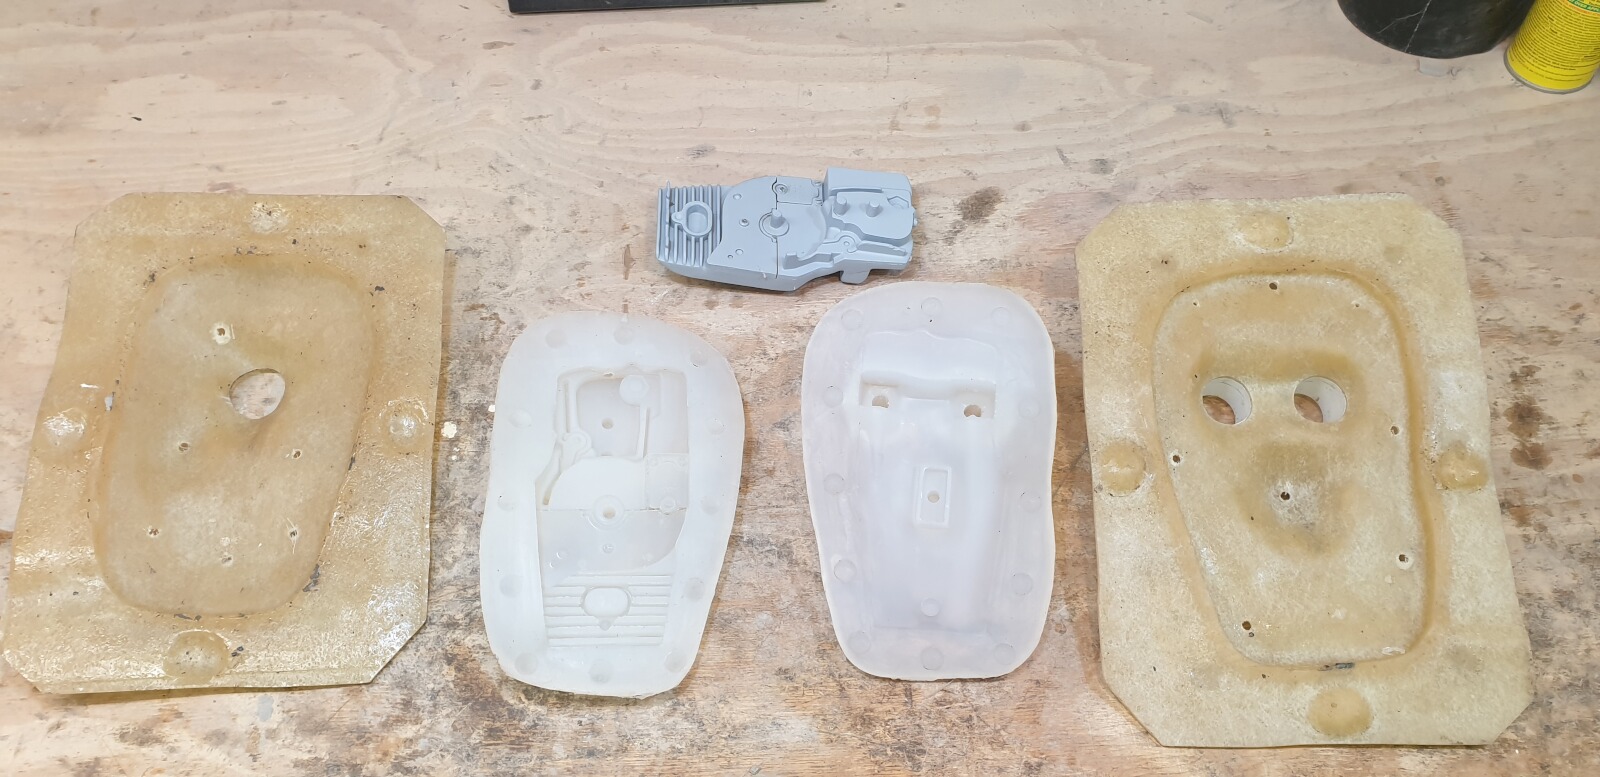
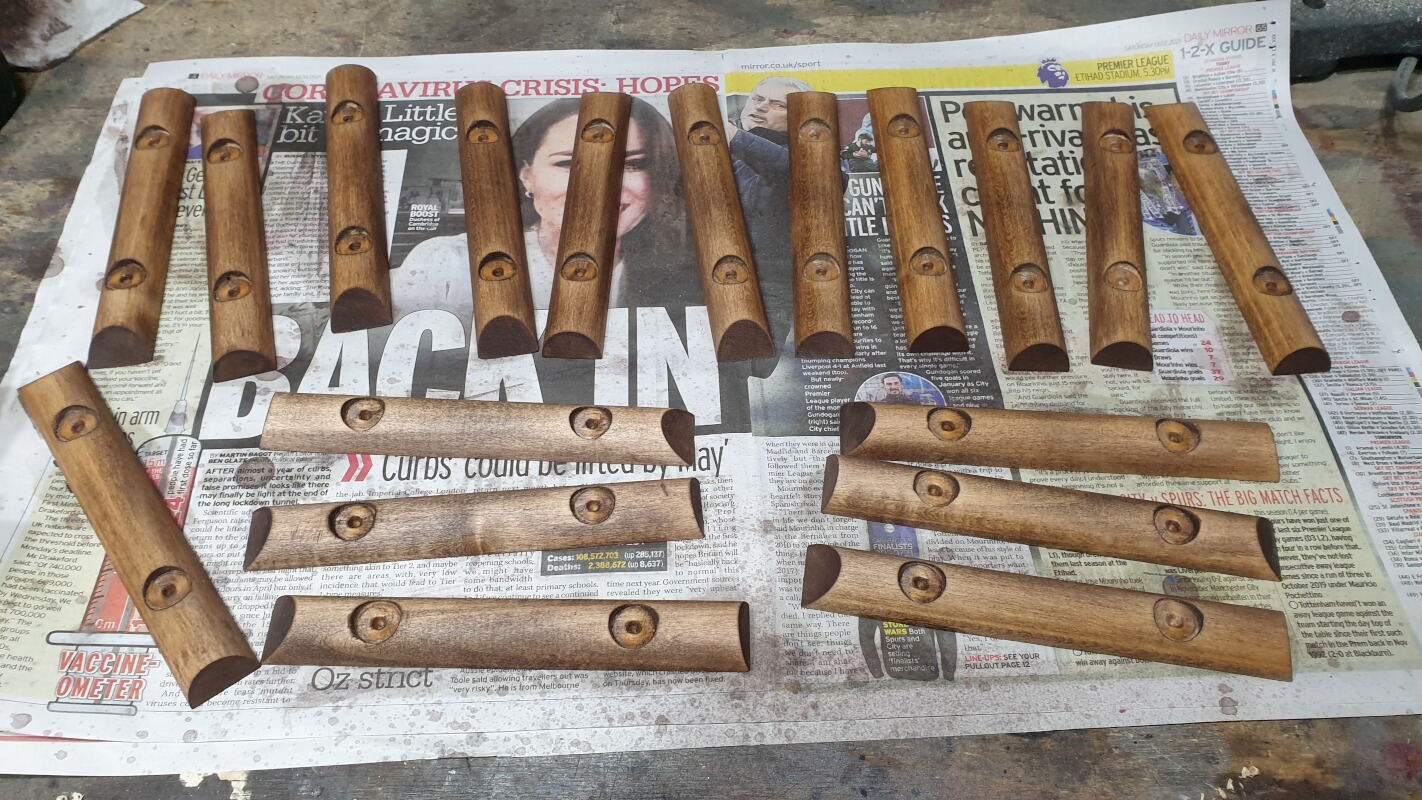
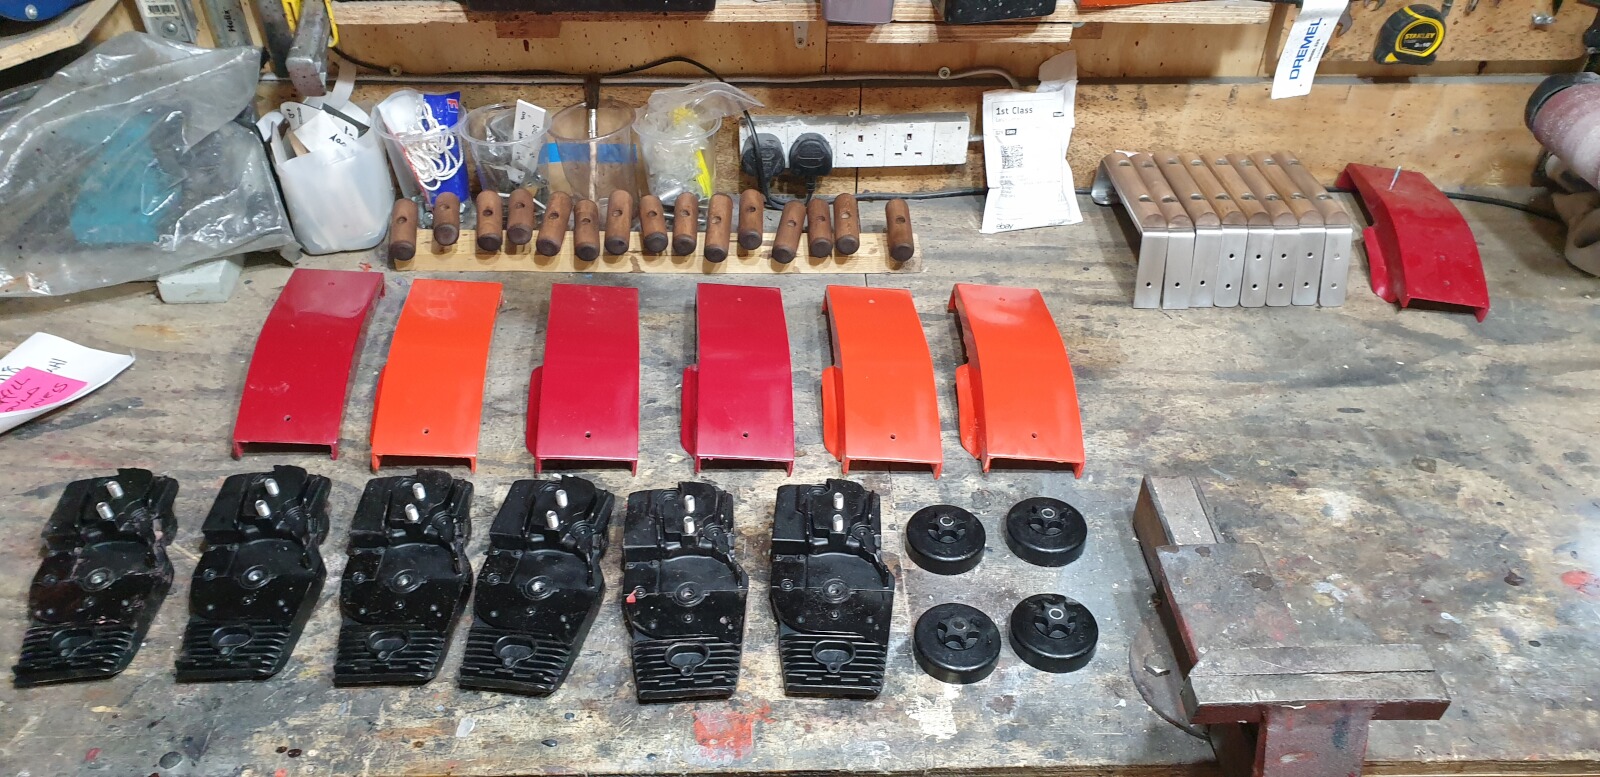
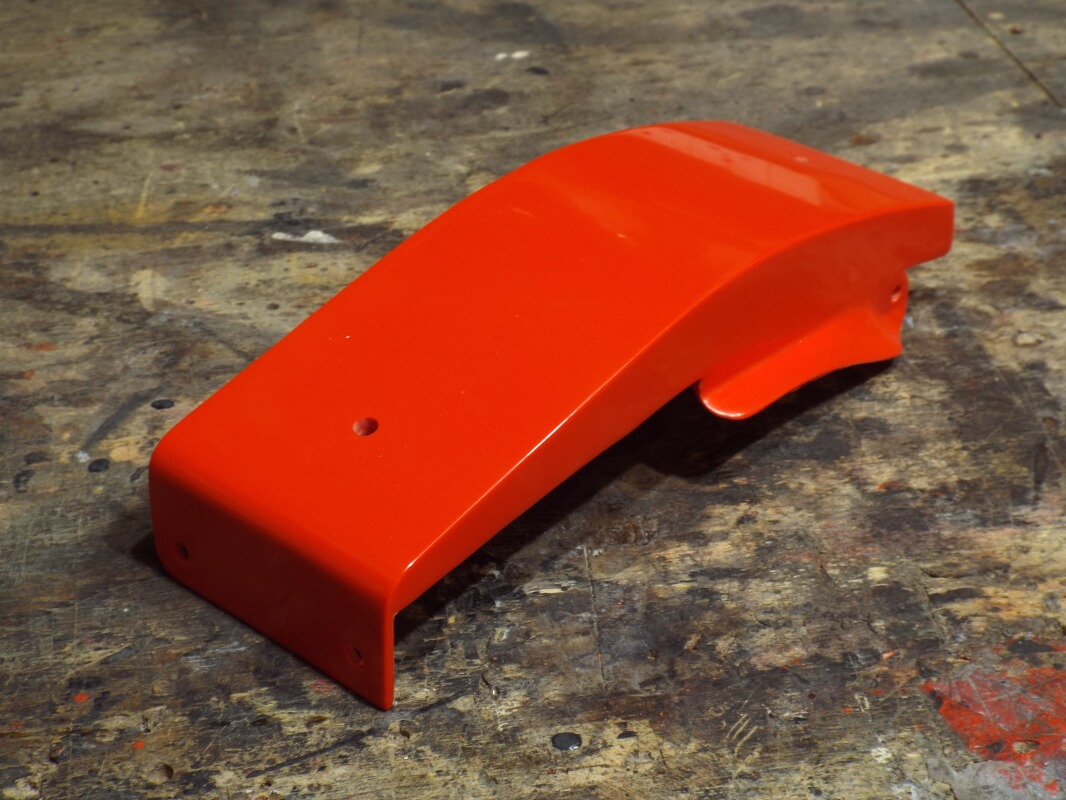
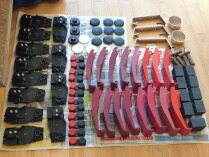
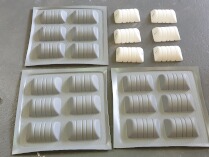
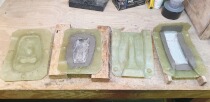
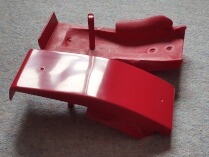
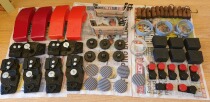
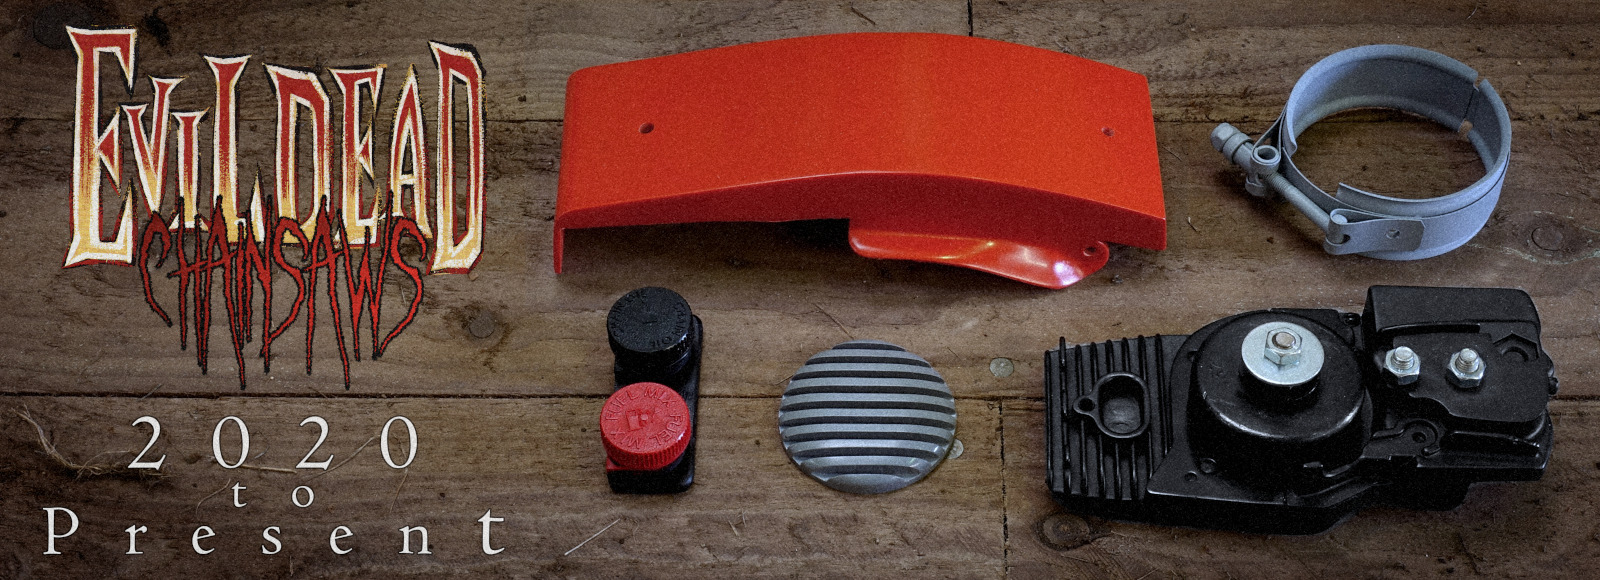
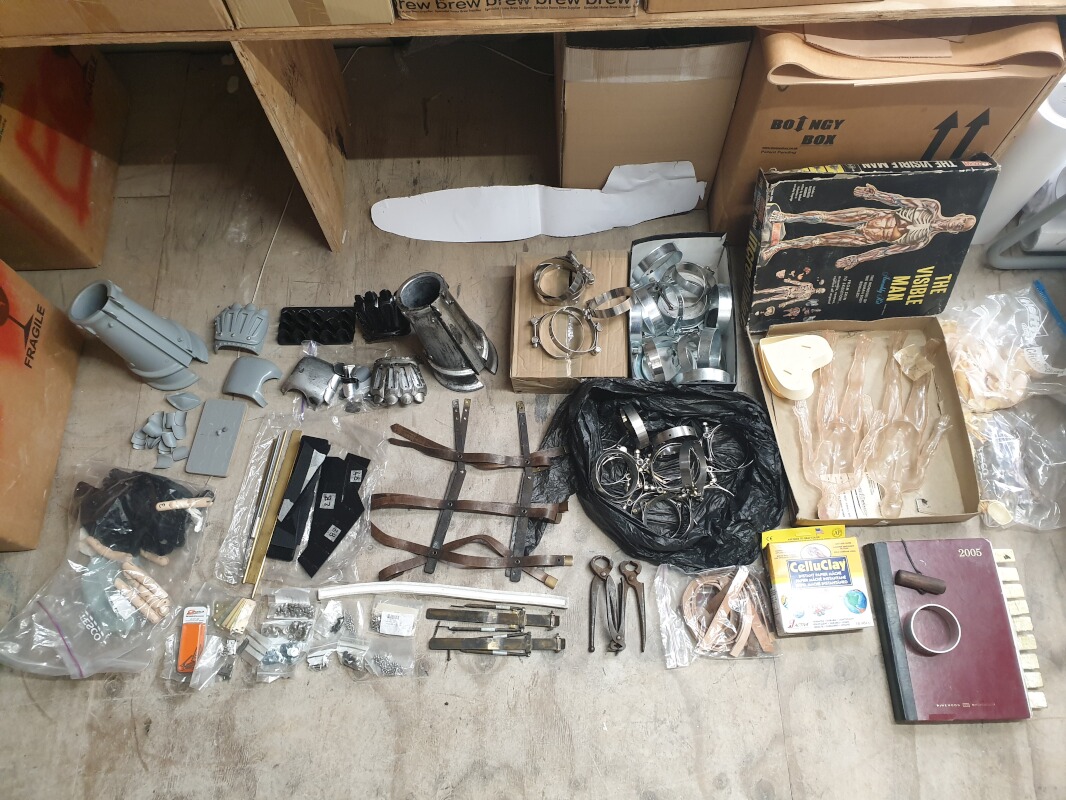
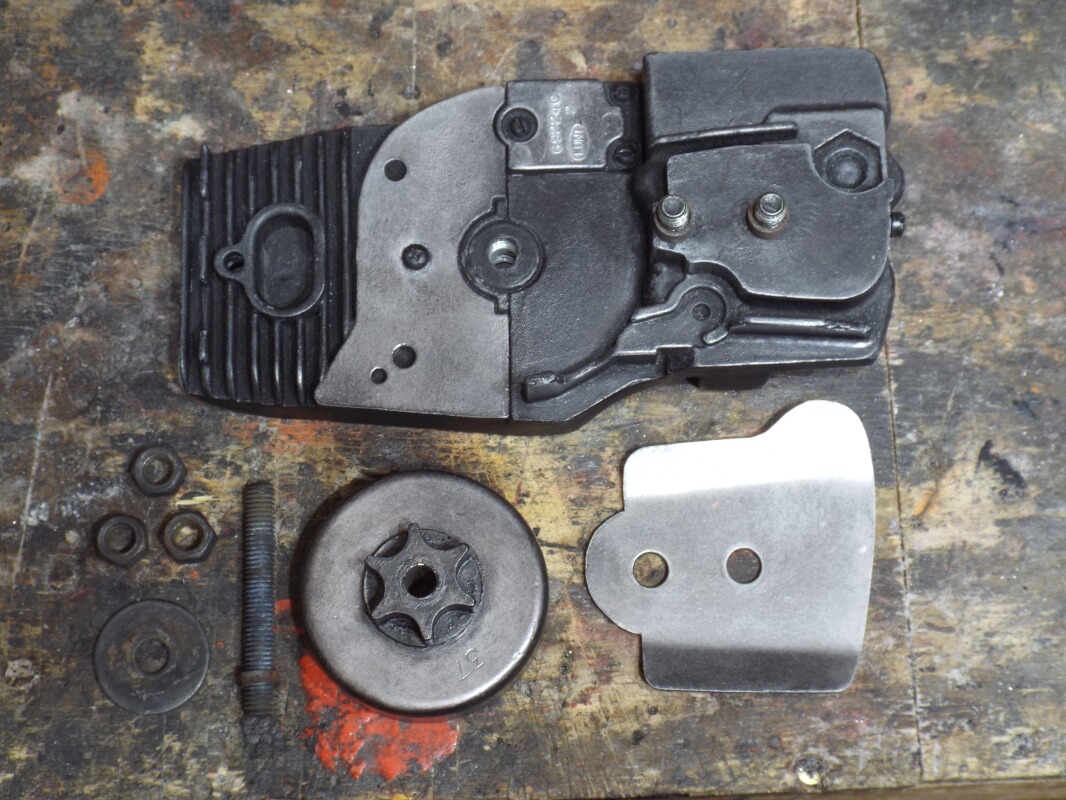
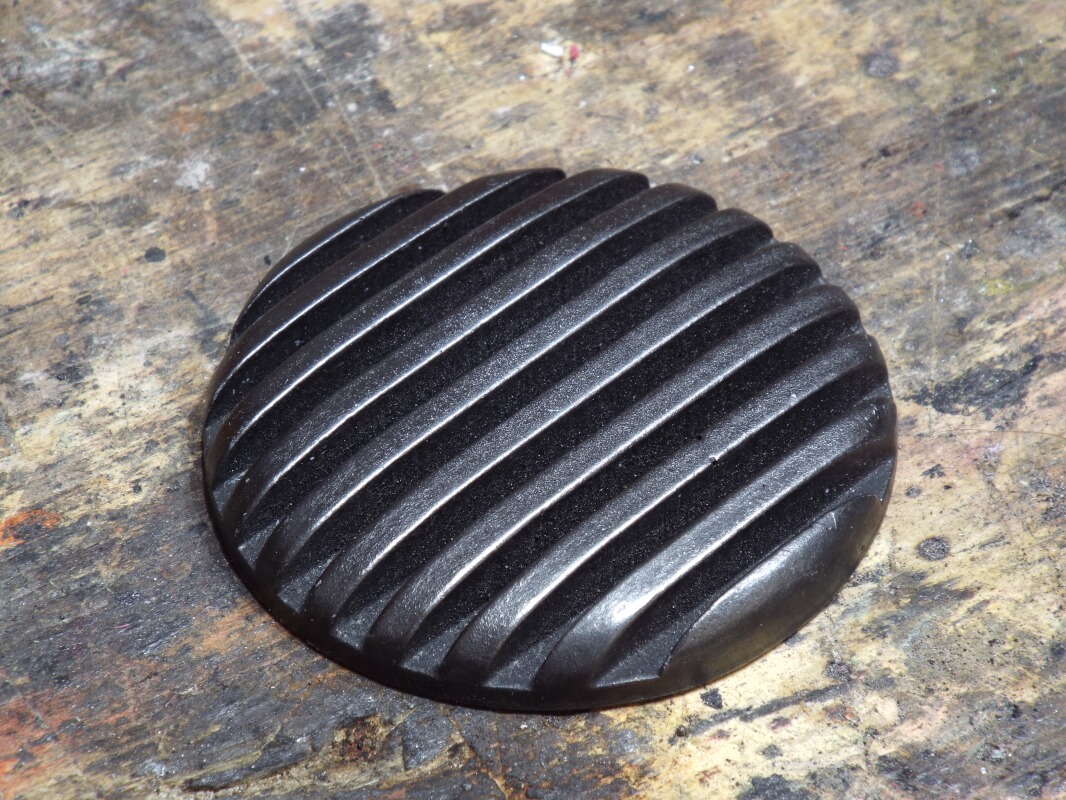
All The Completed Revised & Remoulded DIY Parts (February 2021)
Here you can see photos of all the DIY parts revised and/or remoulded through 2020 to 2021. This just leaves the two body mould sides, two half muffler moulds, and the side 'C' handle mould, as per the original moulds, although these moulds would only be needed if I was to make more complete chainsaws, and that is still unlikely as of writing.
 112 112 |
|
 113 113 |
|
 114 114 |
| |
 115 115 |
|
 116 116 |
|
 117 117 |
| |
 118 118 |
|
 119 119 |
|
 120 120 |
|
|
|


_001_lbx.jpg)