|
|
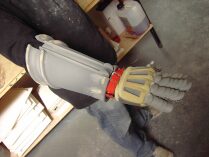
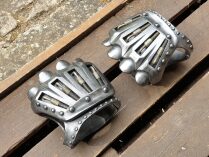
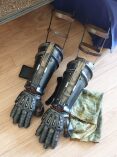
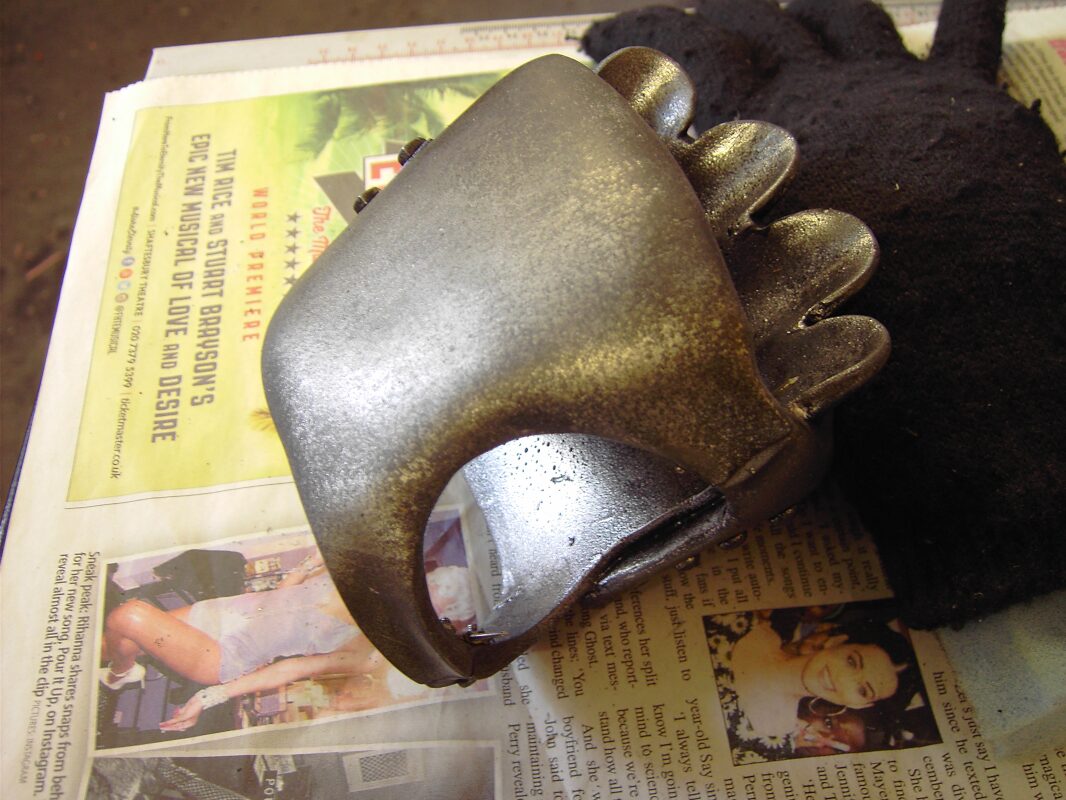
This was a project ranging from June to August 2014, back when I was running EvilDeadChainsaws.com. It was a replica of Ash's mechanical arm seen throughout Army Of Darkness. This write-up covers the prototyping of my first arm; making the parts, moulding them and producing the final replica.

Prior to this project, I had only been selling chainsaws though EvilDeadChainsaws.com. I had never intended to make a mechanical arm replica. Army Of Darkness is my least favourite of the trilogy and it was never a prop which interested me enough to put the huge amount of work needed, to produce an accurate replica to sell.
This project first began at the start of March 2014. A previous EvilDeadChainsaws.com replica chainsaw customer asked if I had seen the BlindSquirrelProps - Ash Mechanical Hand project, and if I would ever consider taking it on for him. I'd already seen this, and had been thinking about creating a replica Mechanical Arm to sell alongside my chainsaws for some years, but I wasn't overly keen to do much about it.
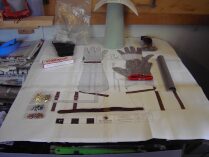
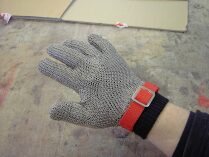
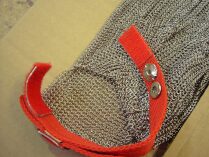
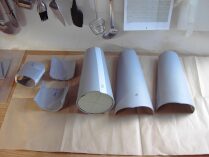
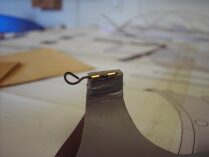
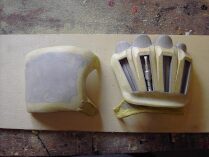
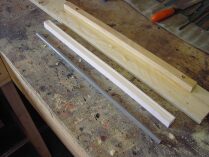
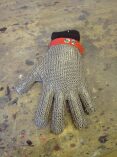
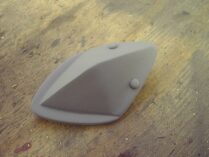
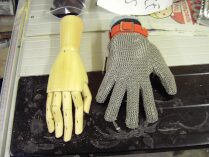
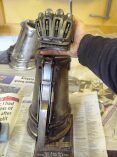
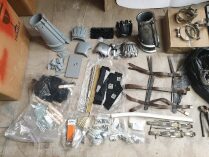
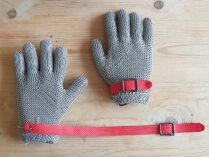
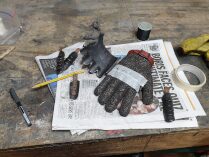
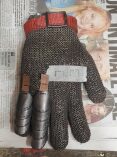
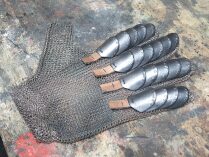
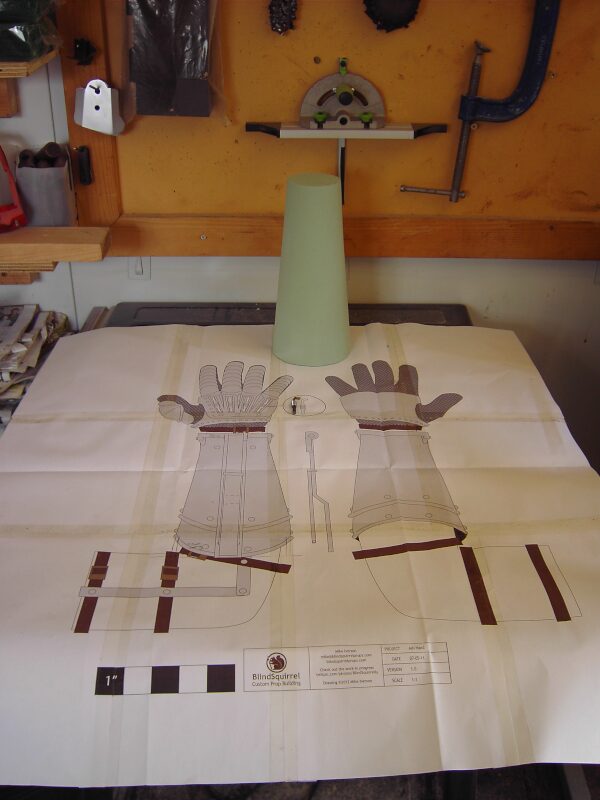
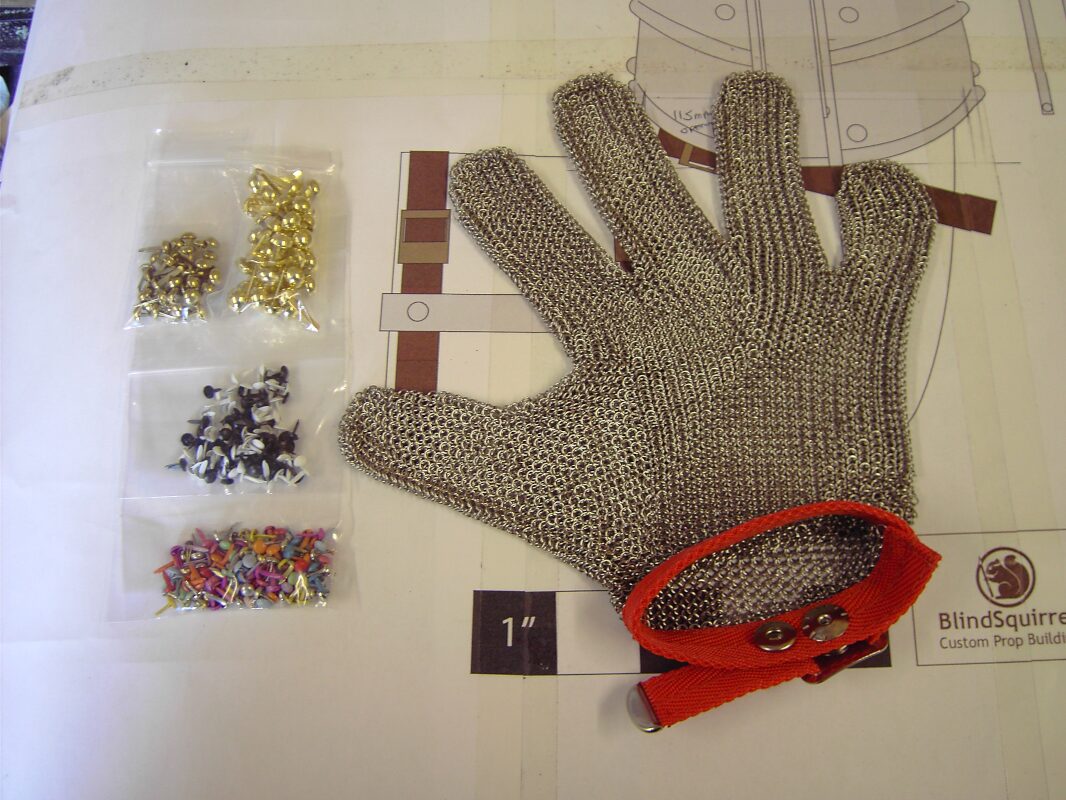
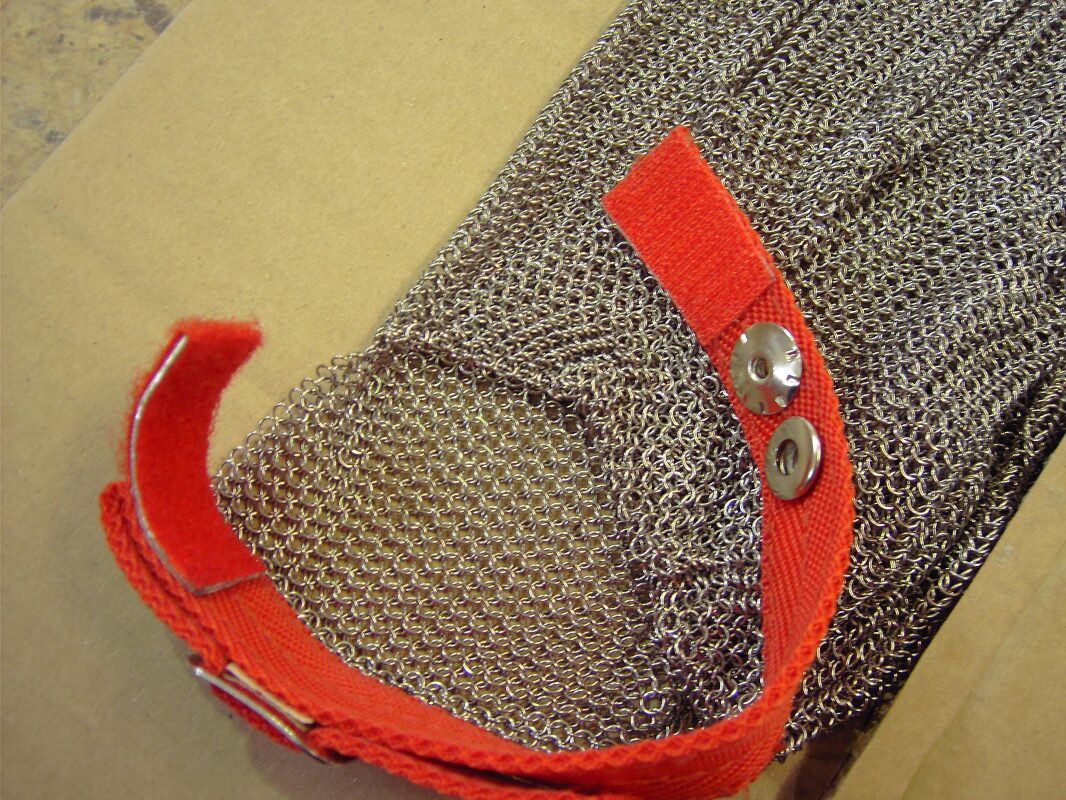
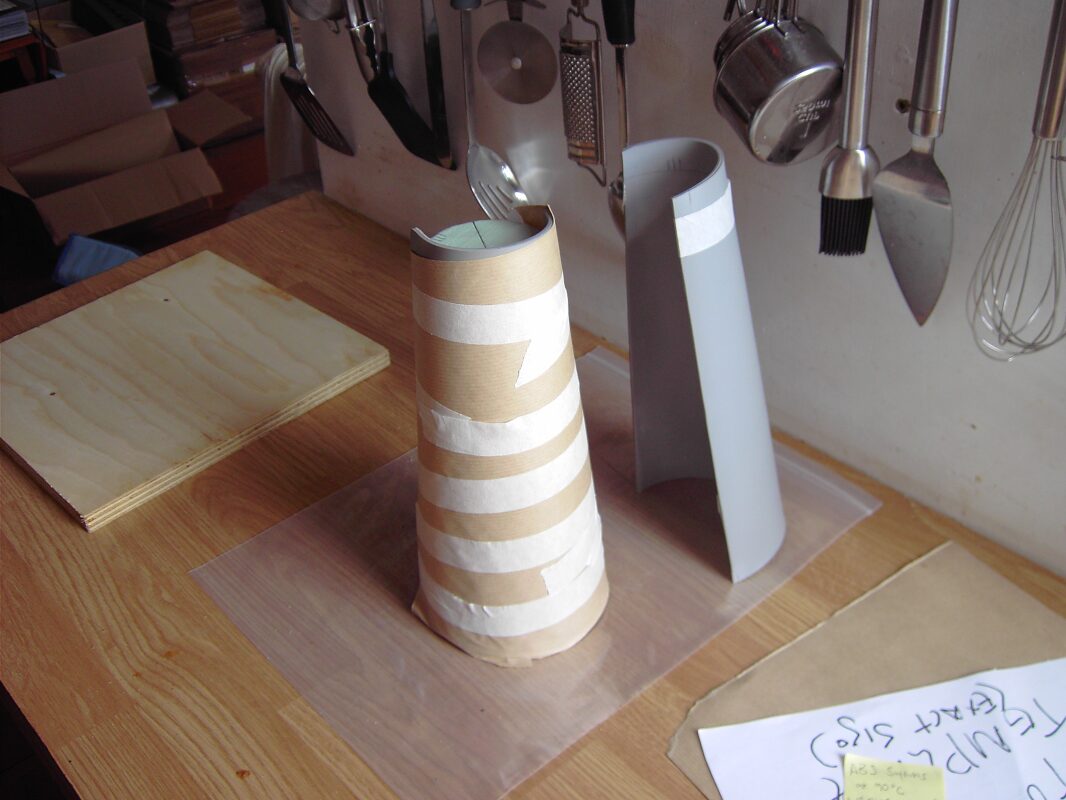
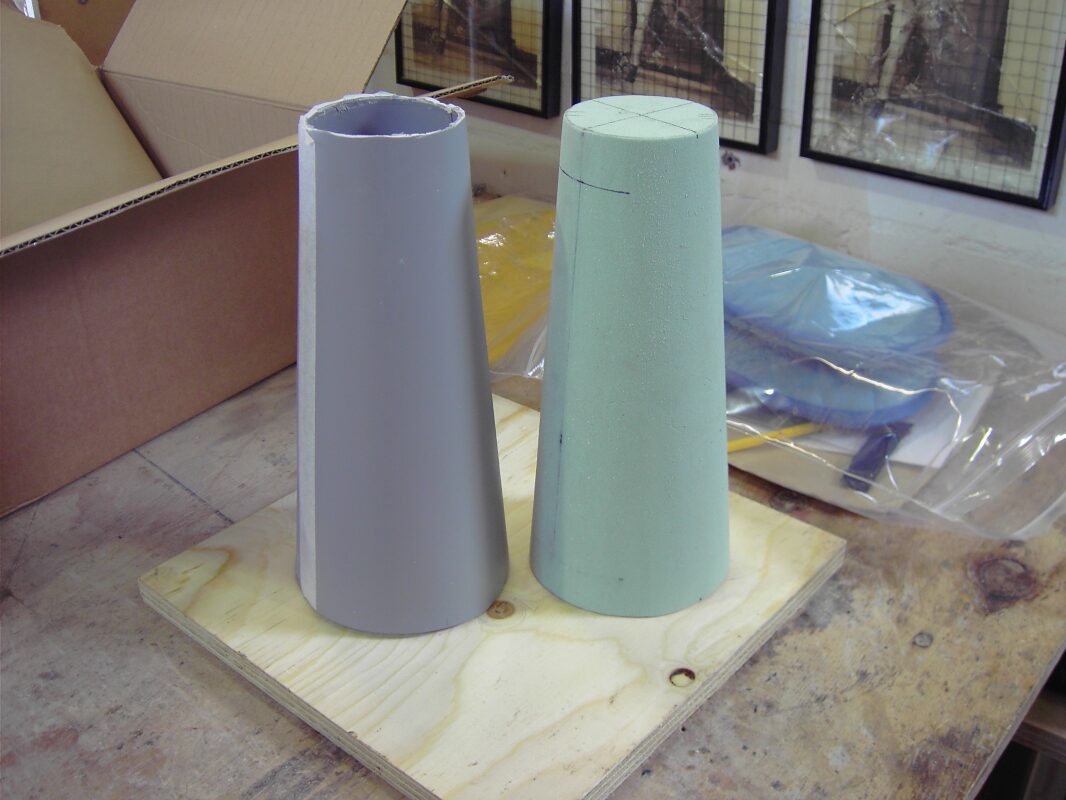
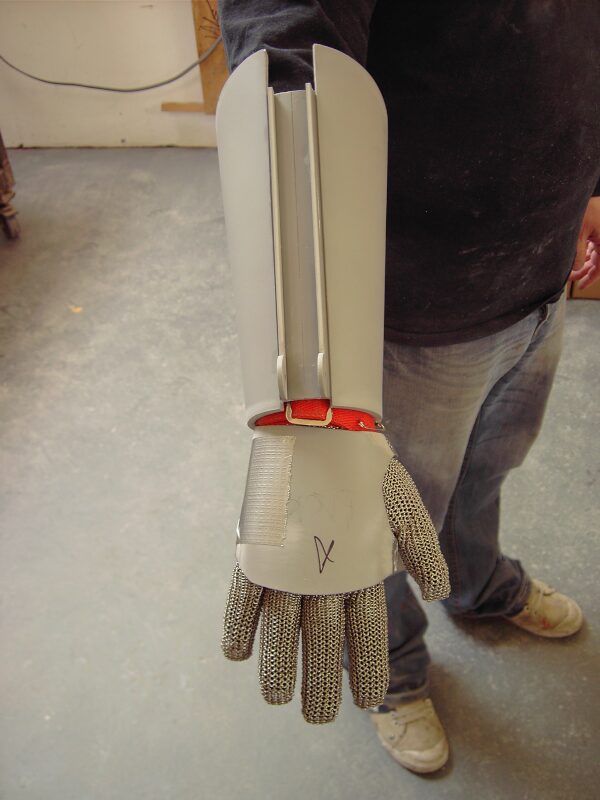
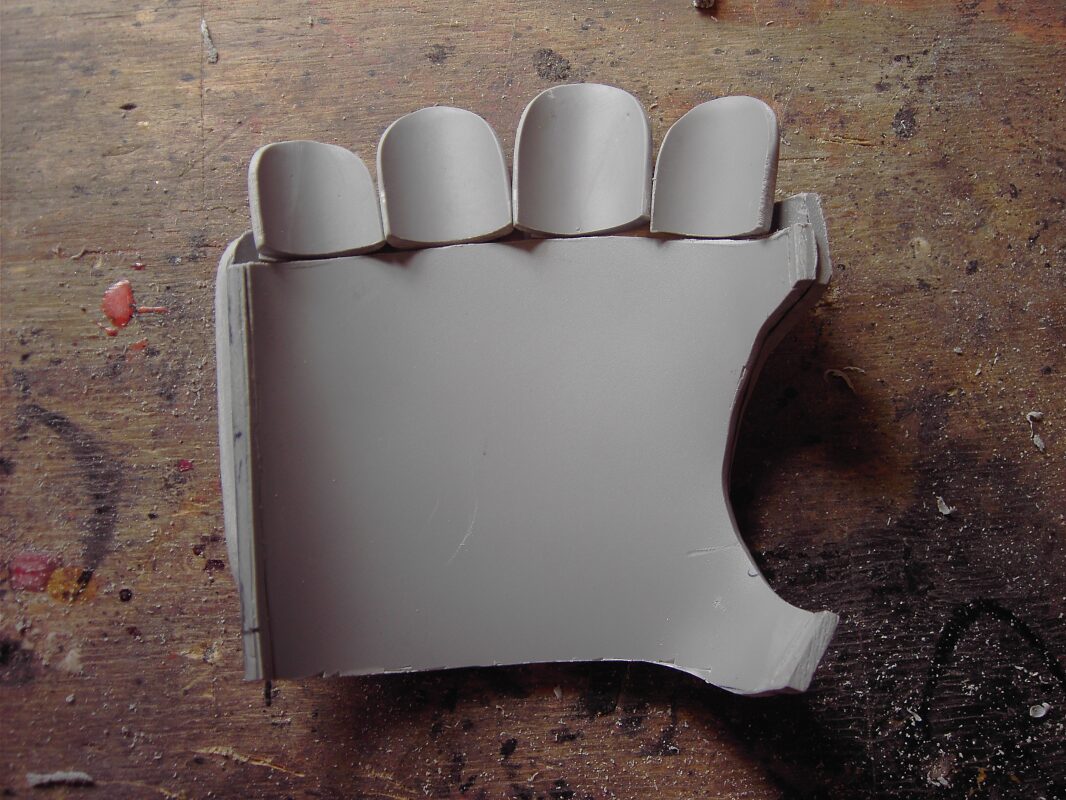
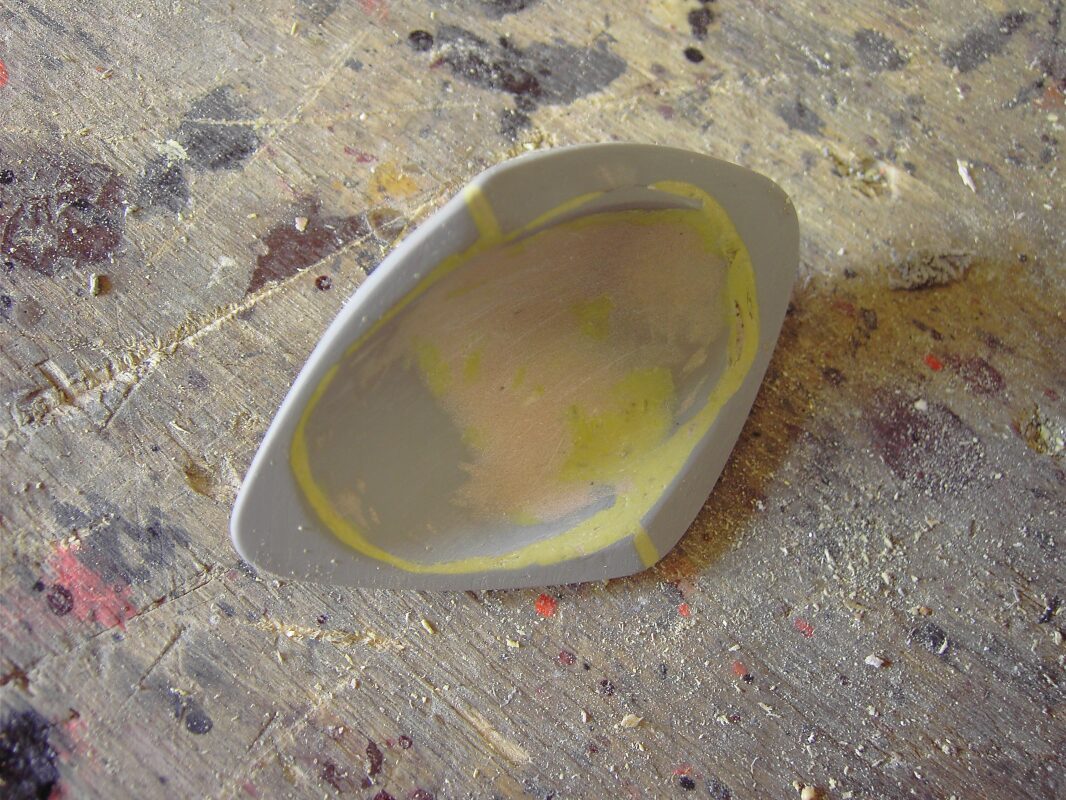
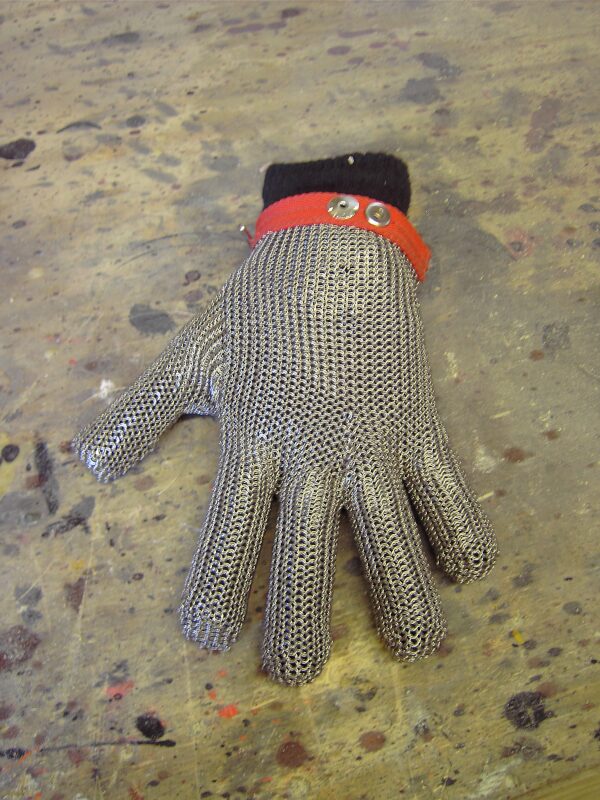
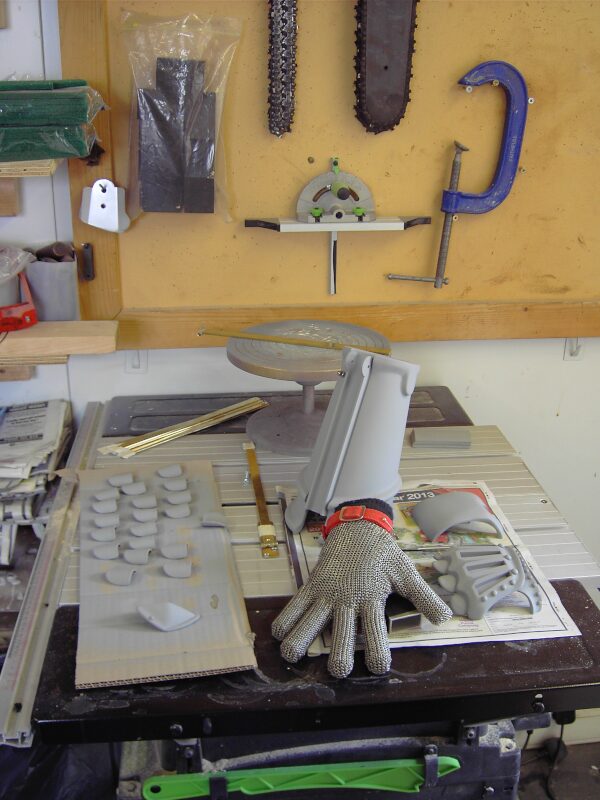
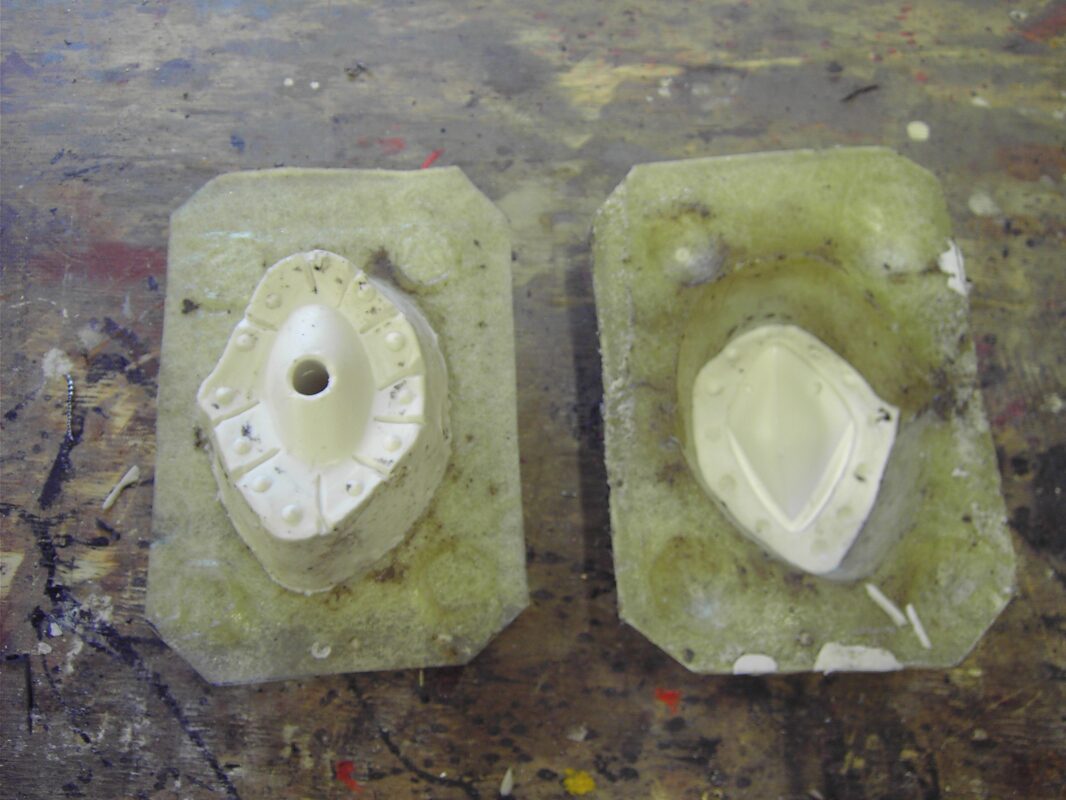
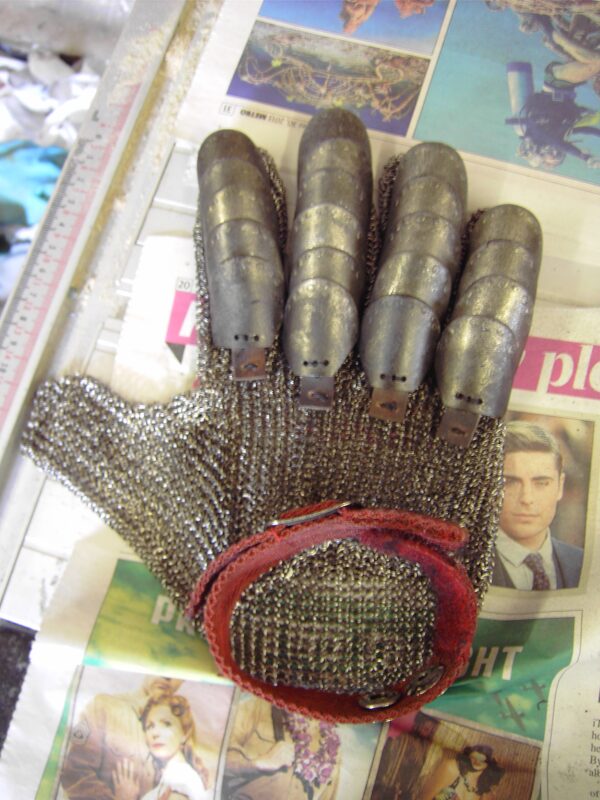
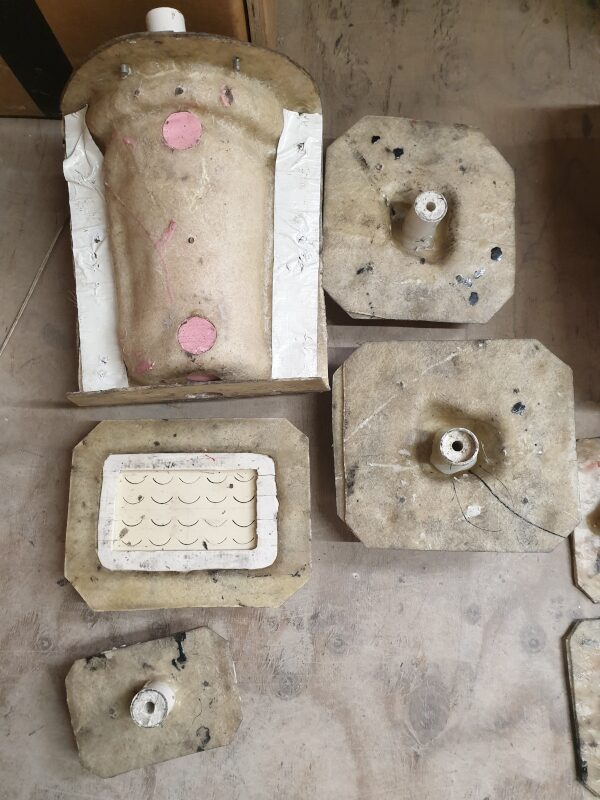
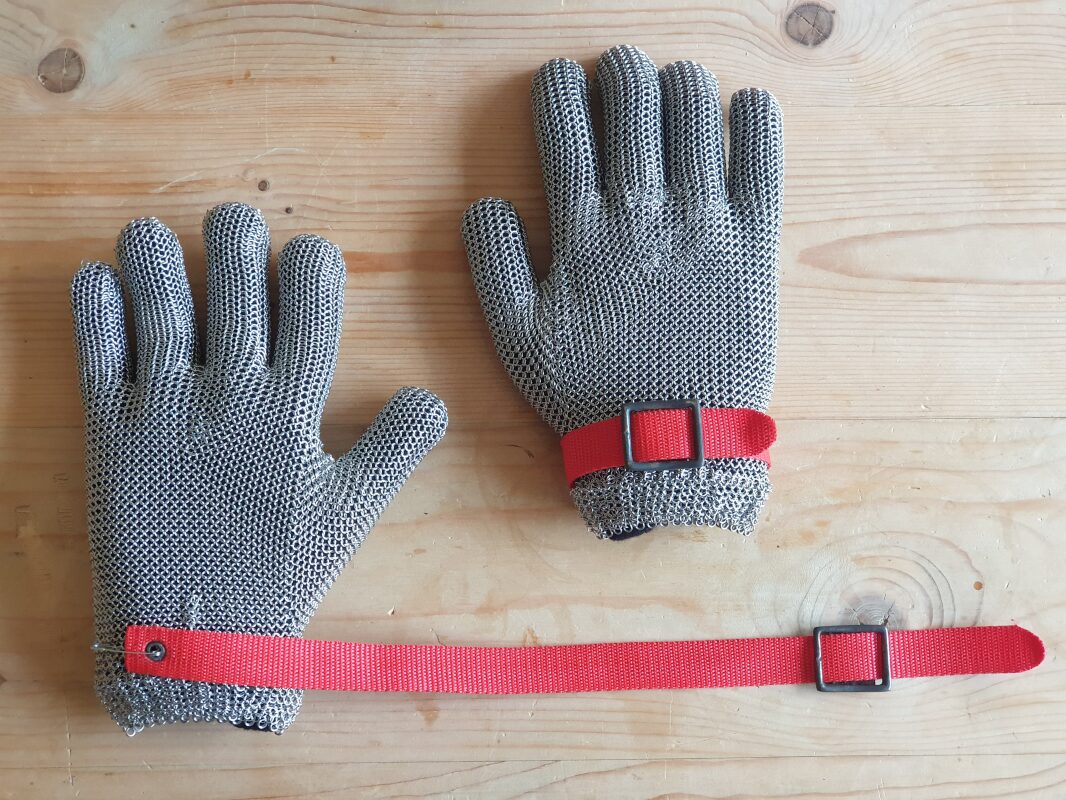
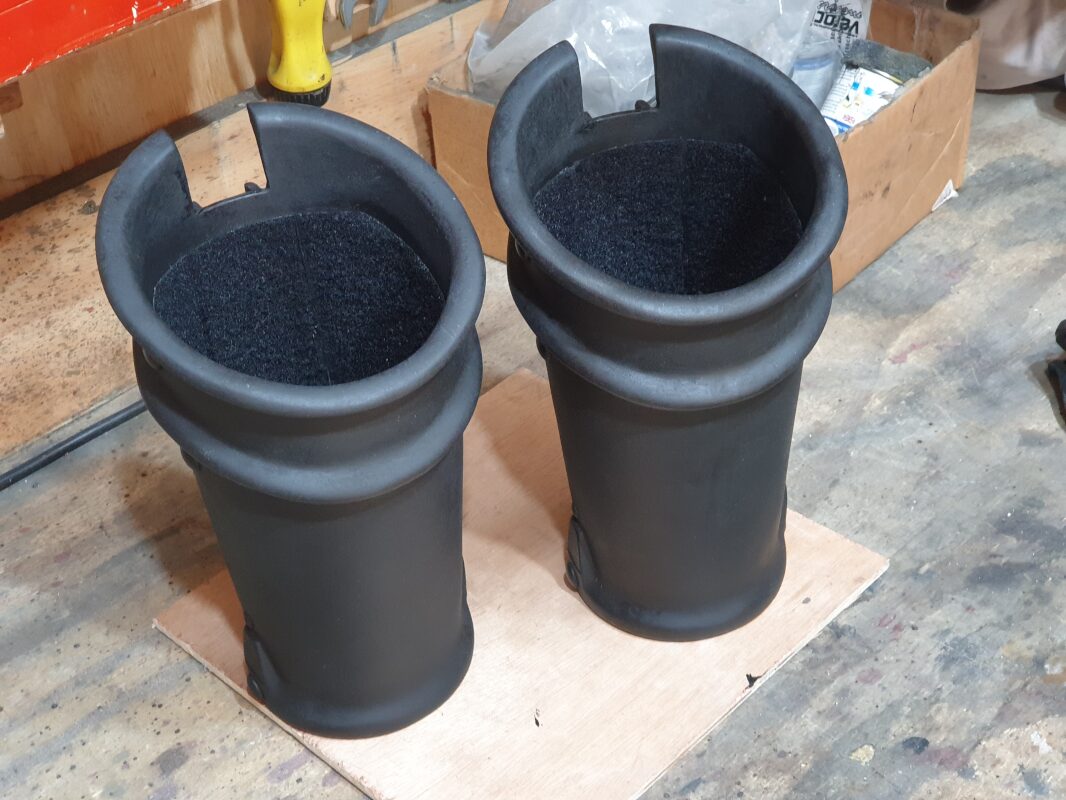
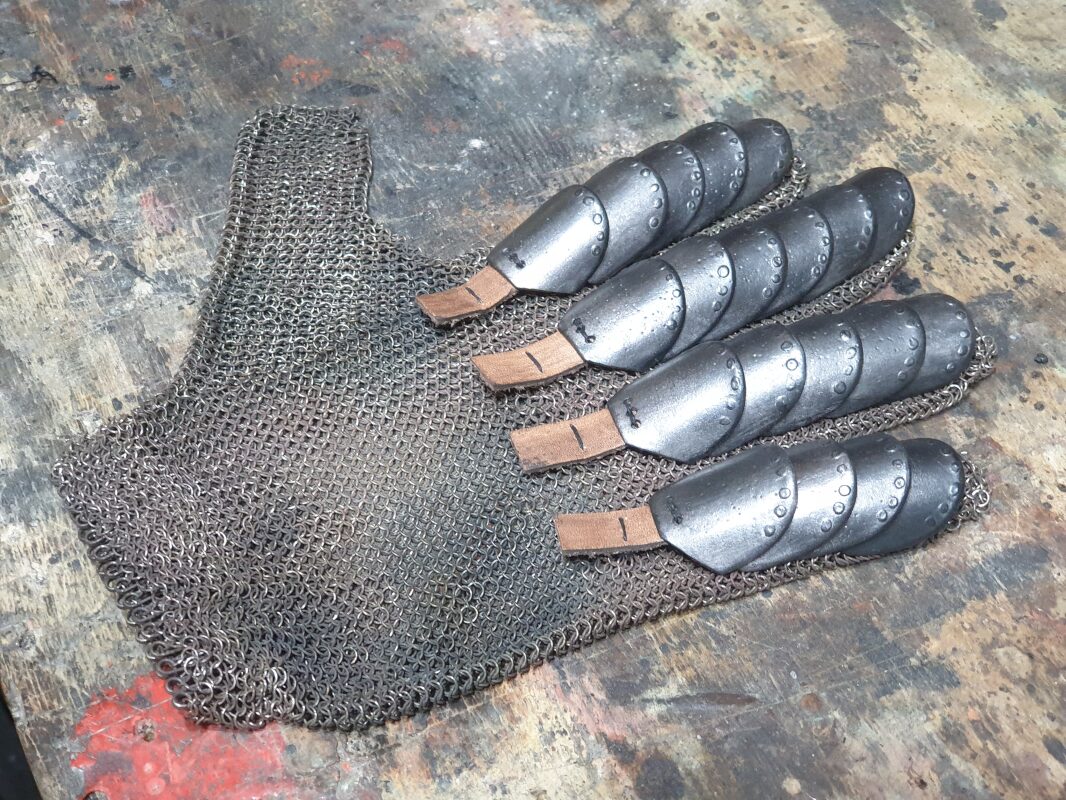
_001_lbx.jpg) Even when first starting my replica chainsaws, I at least had an original real Homelite chainsaw body before I started, and just worked from there. The Mechanical Arm would need to be made entirely from scratch with raw materials. As it turned out the only part I could buy off the shelf ready-made was the chainmail glove, and even that needed some modification.
Even when first starting my replica chainsaws, I at least had an original real Homelite chainsaw body before I started, and just worked from there. The Mechanical Arm would need to be made entirely from scratch with raw materials. As it turned out the only part I could buy off the shelf ready-made was the chainmail glove, and even that needed some modification.
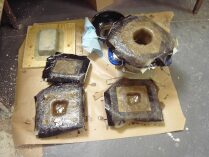
I suggested the customer get in contact with Mike at Blind Squirrel and ask him to make one, although he already had and was told that since Mike didn't mould any of his parts, it would basically mean starting the whole project from scratch again and he didn't want to do that. So anyway over the next few weeks I hawked the project around to some of the local model-making companies to see if anyone else would be willing to do it (I work within Shepperton Film Studios). I was only too happy to completely pass the project onto someone else. Unfortunately I couldn't find anyone who could do it for a reasonable price, so I put it on the back burner until the end of May 2014 when I had more free time. We agreed on a price of £800, and I downloaded & printed off Mike's plans and started working on the rough designs. As I went I found that with regards to the broad measurements & shaping, Mike was spot on, but many of the finer details on his plans were incorrect, misplaced or missing altogether.
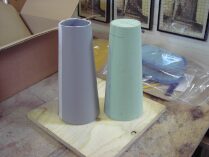
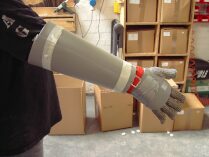
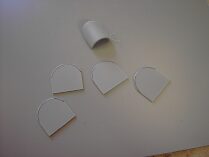
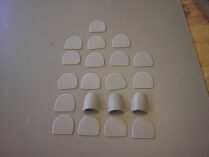
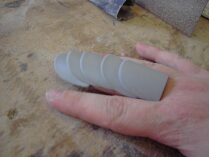
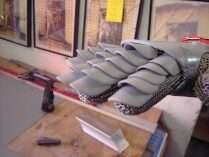
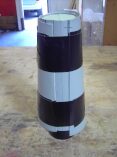
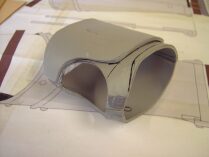
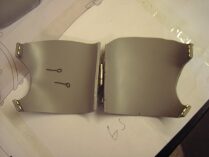
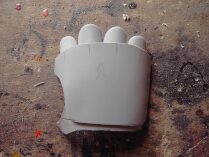
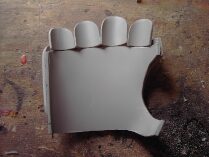
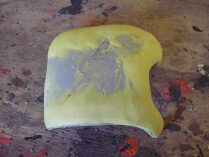
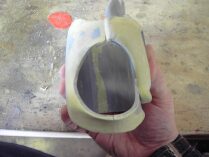
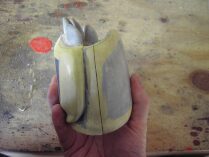
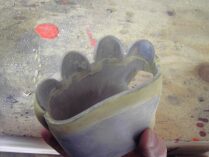
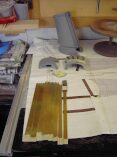
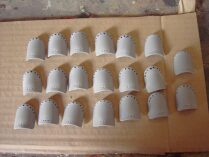
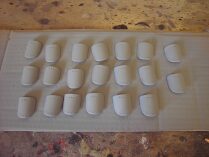
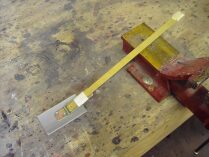
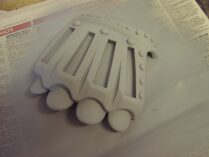
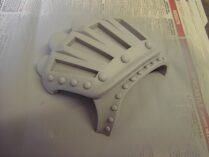
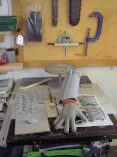
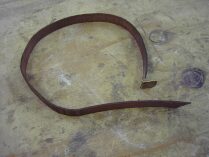
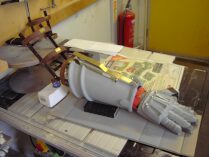
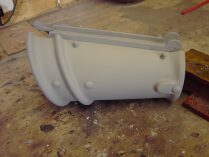
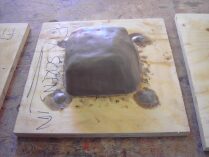
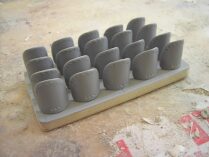
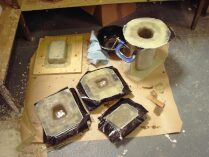
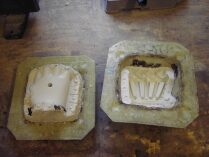
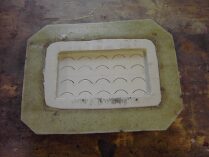
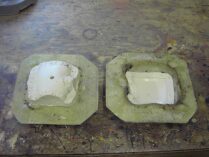
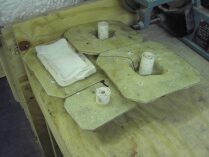
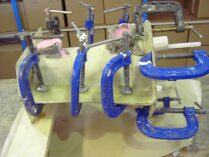
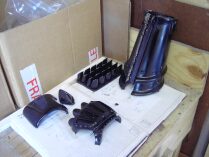
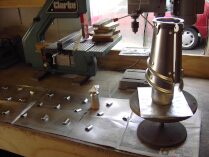
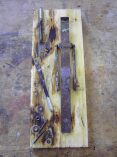
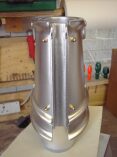
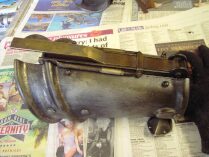
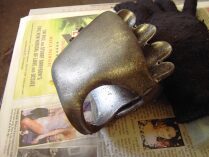
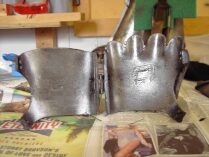
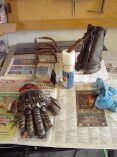
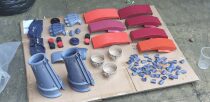
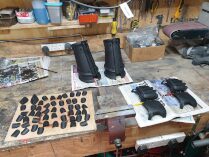
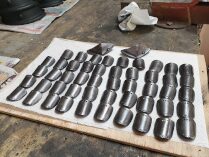
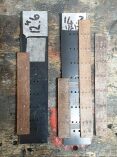
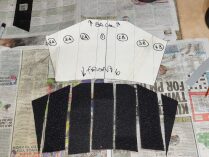
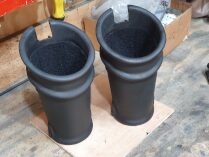
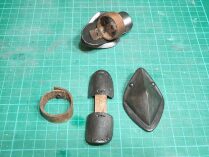
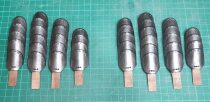
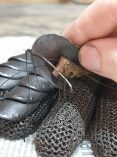
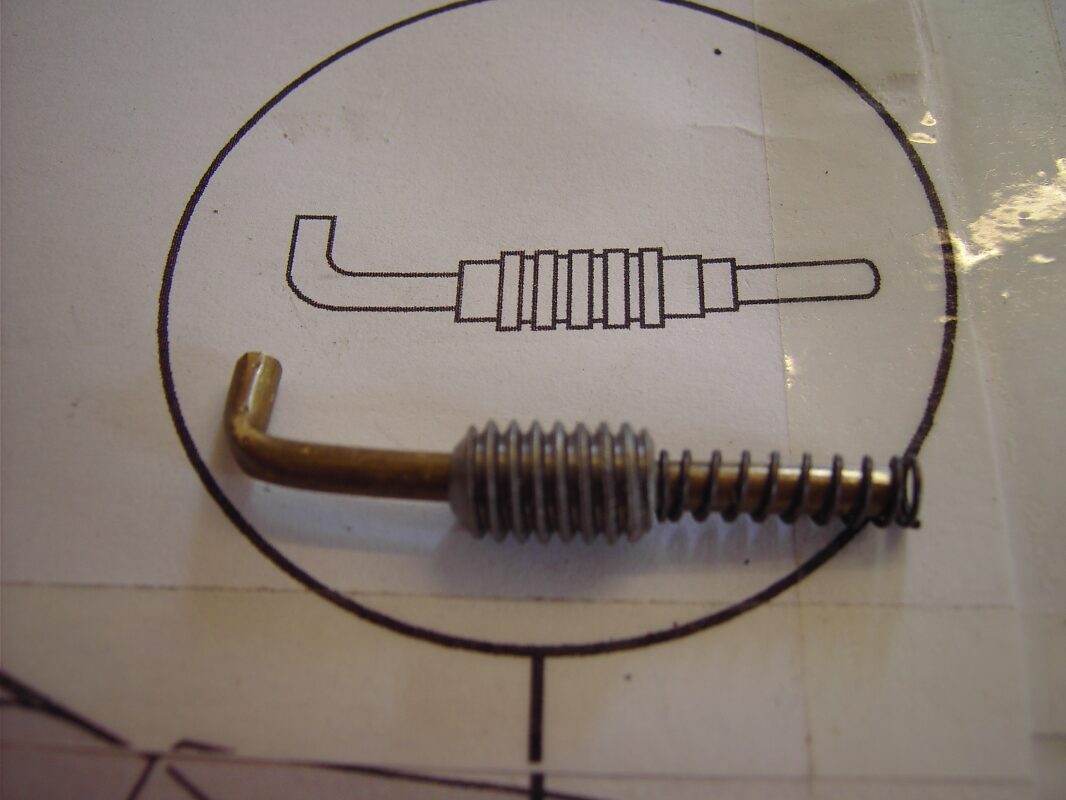
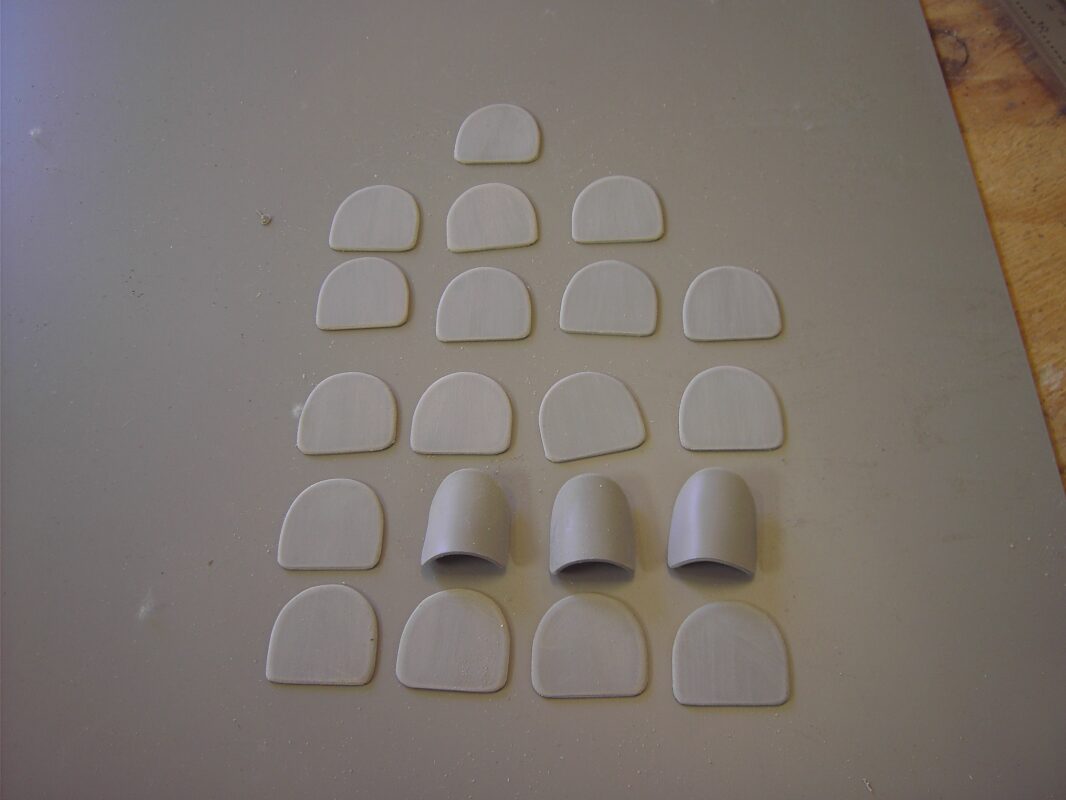
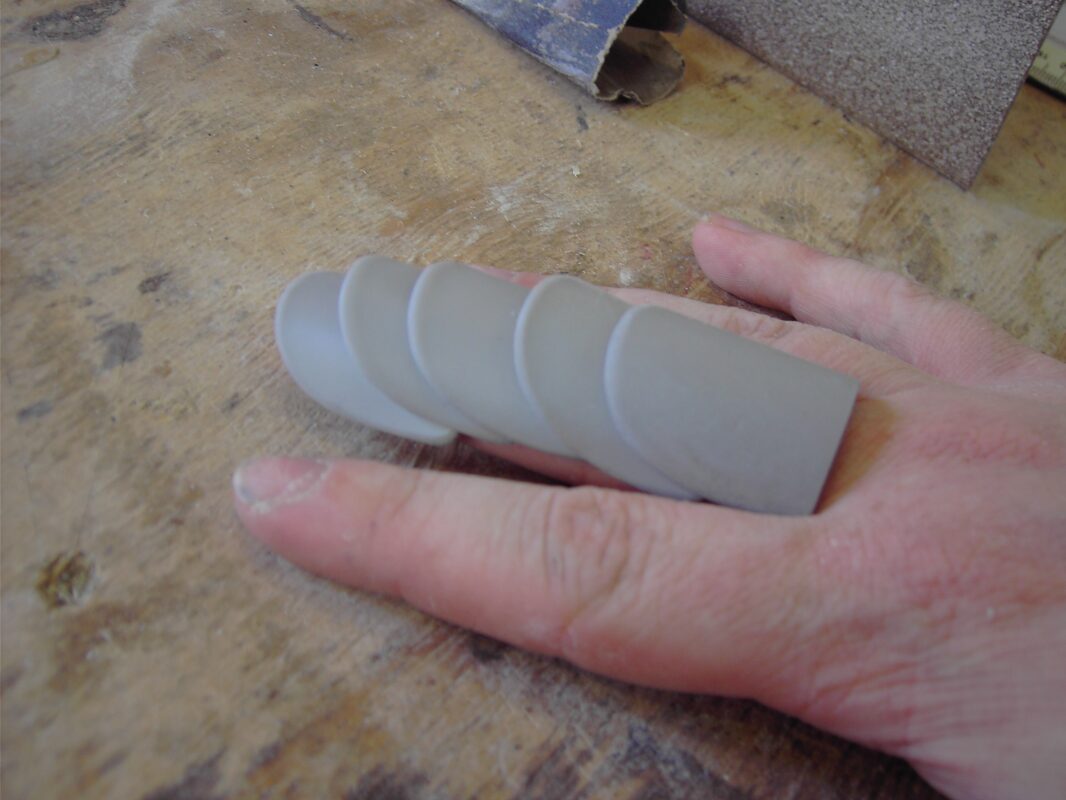
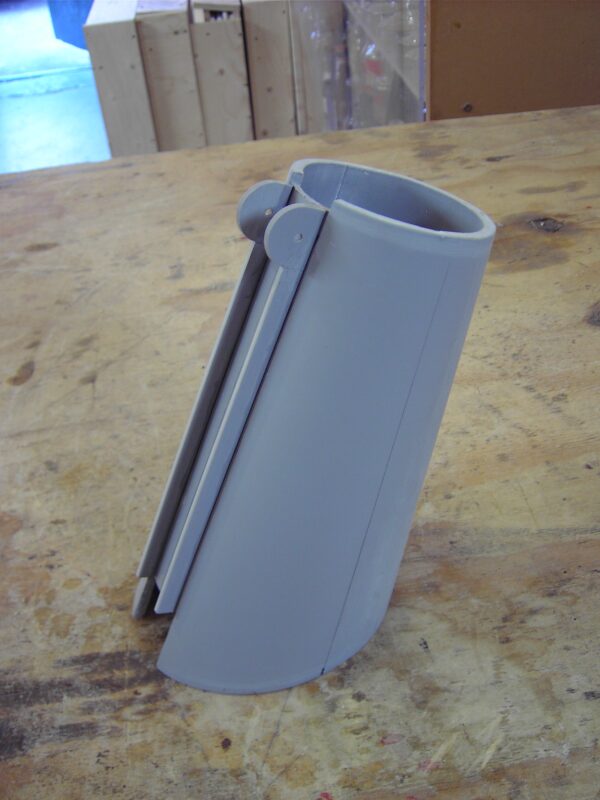
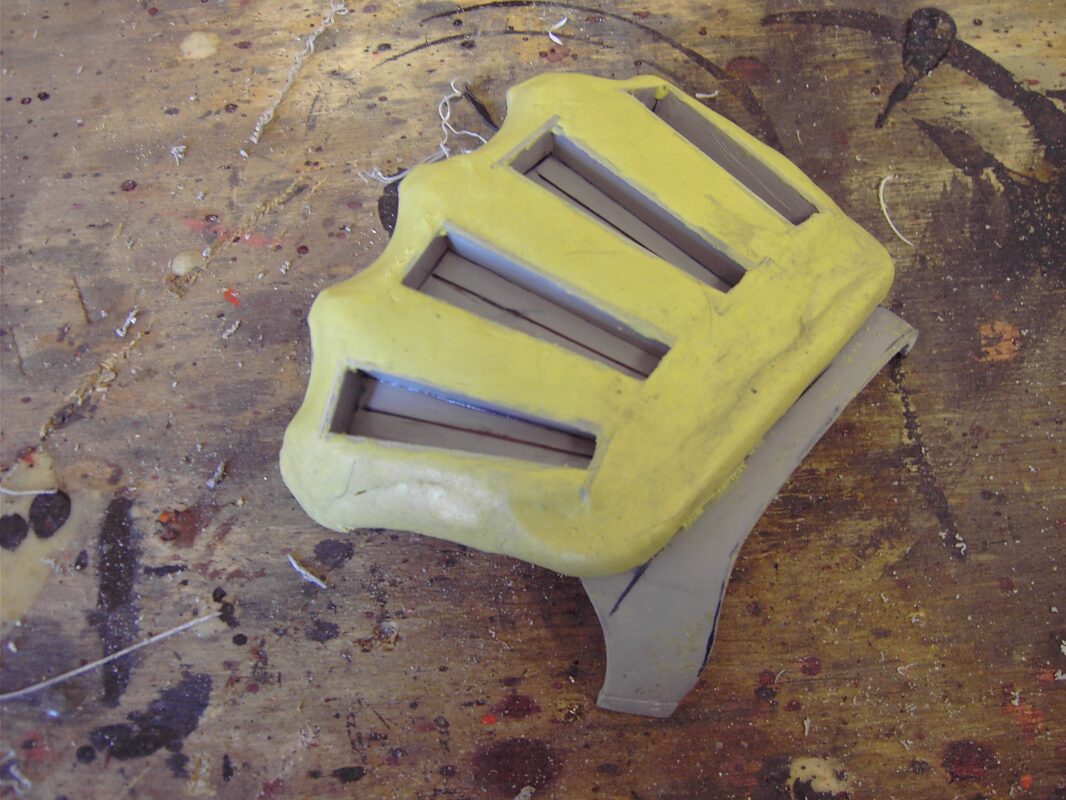
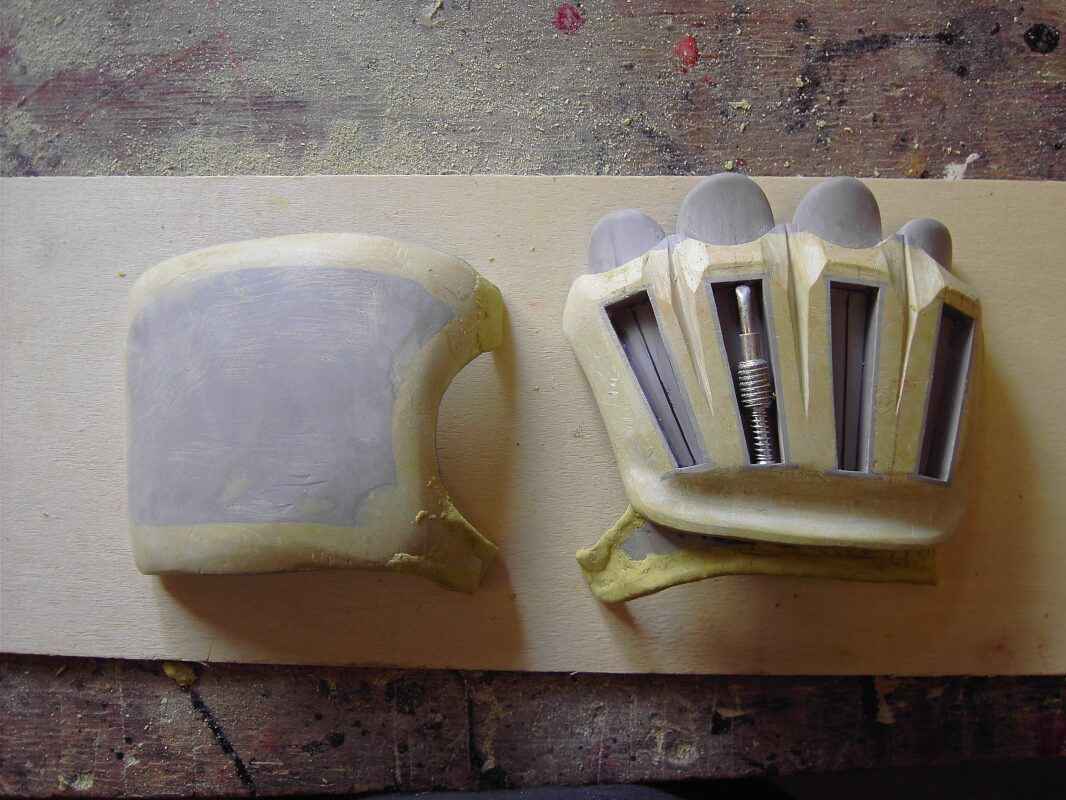
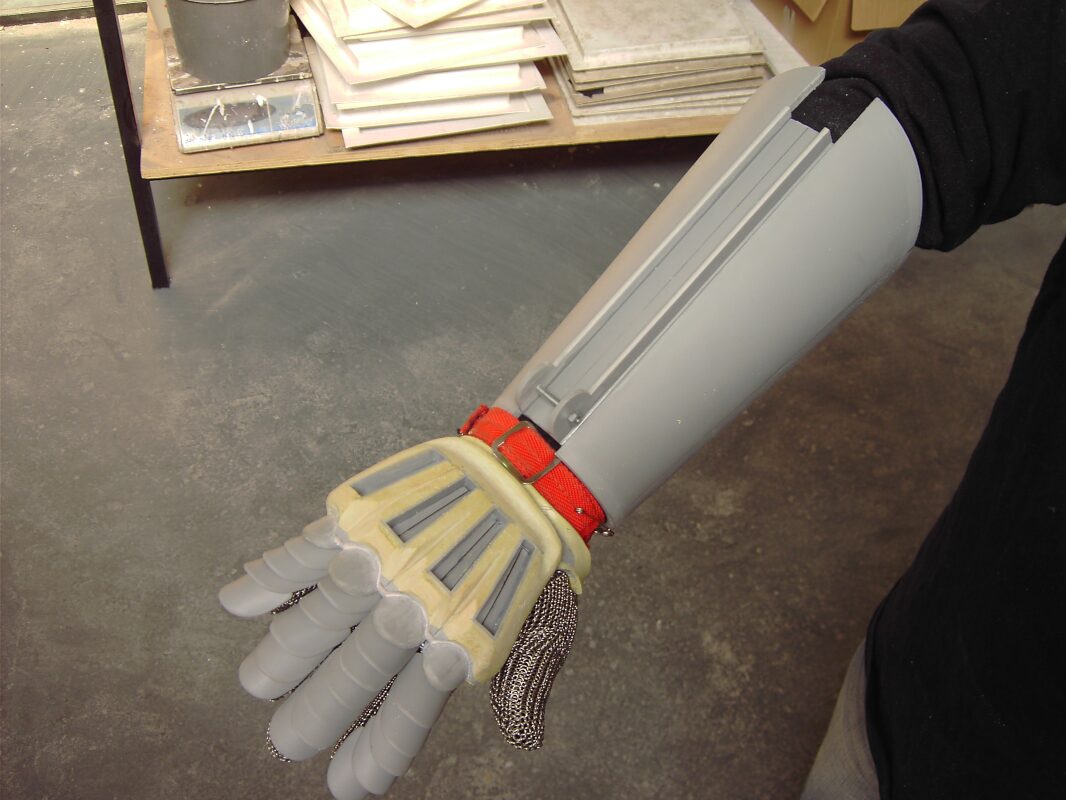
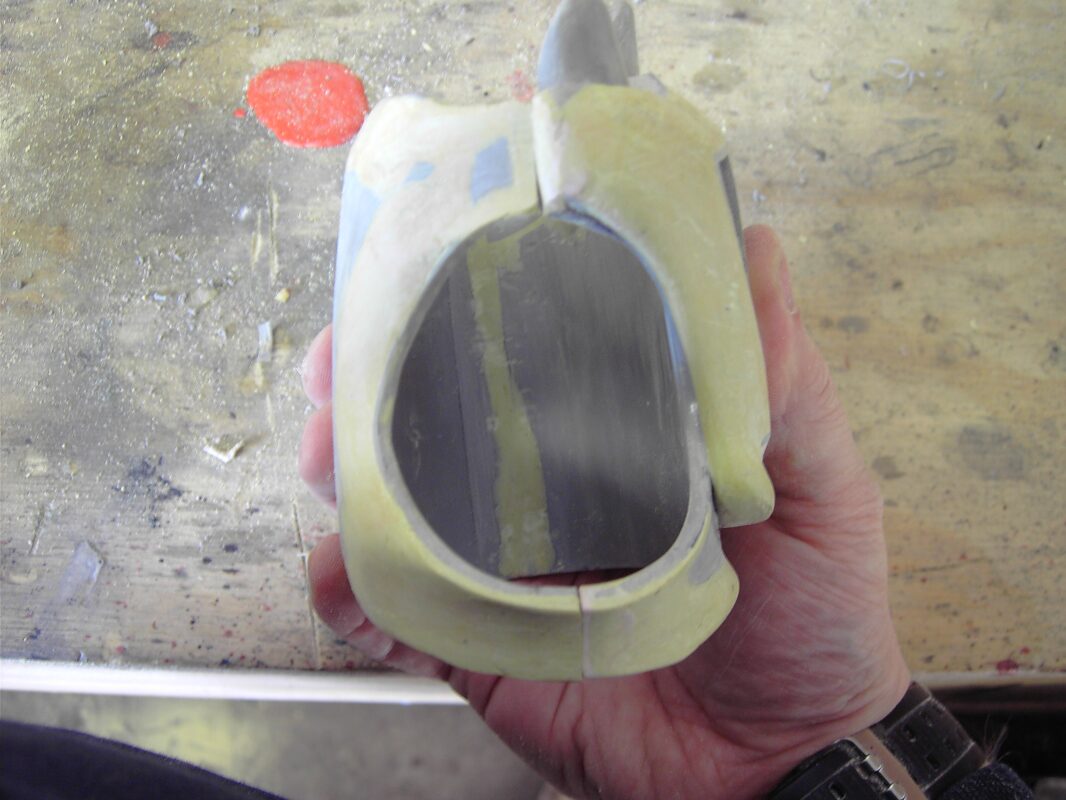
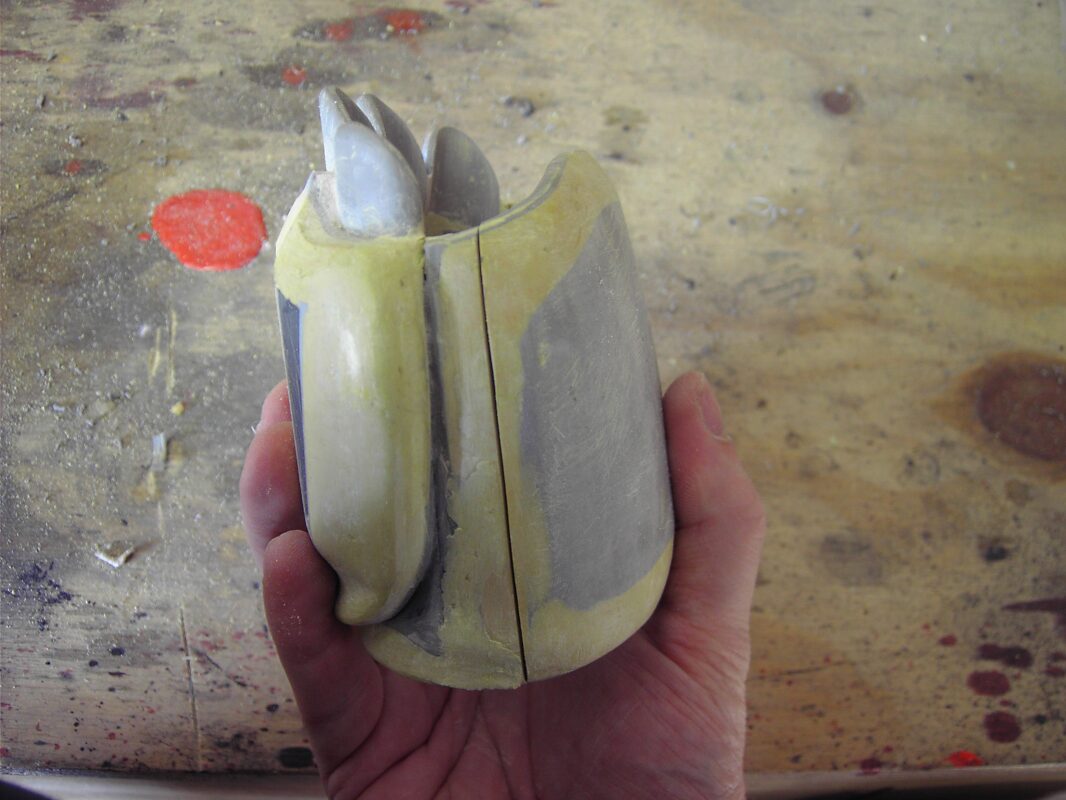
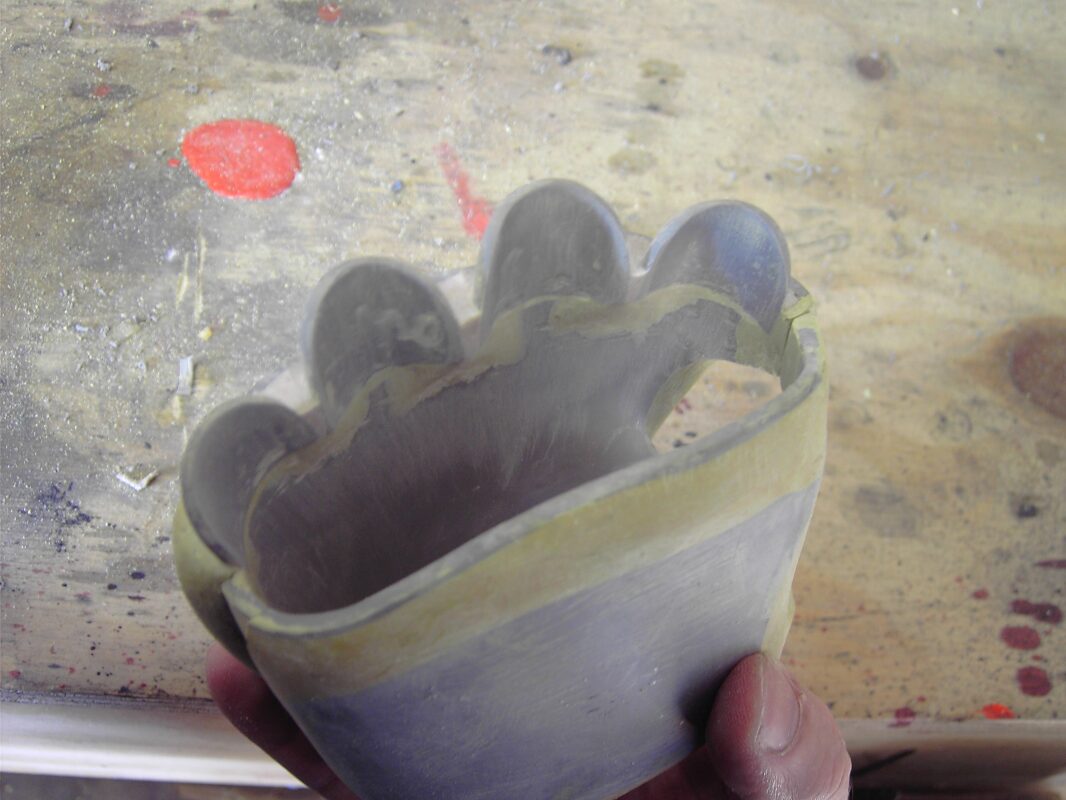
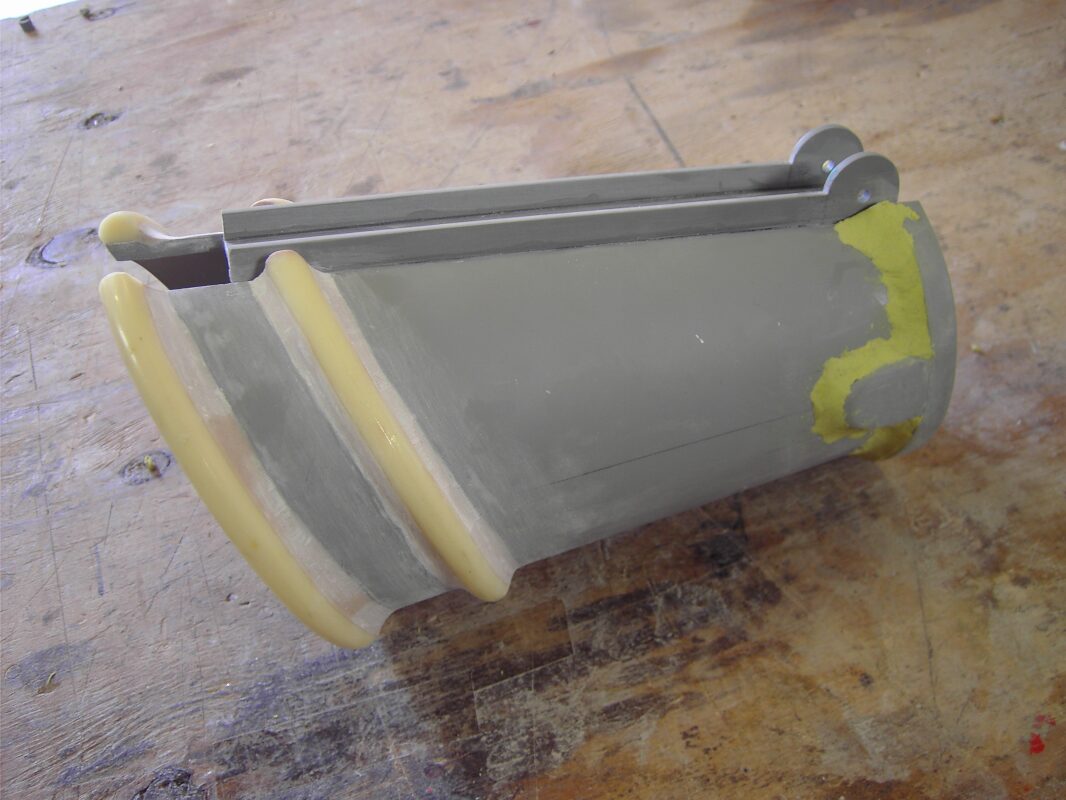
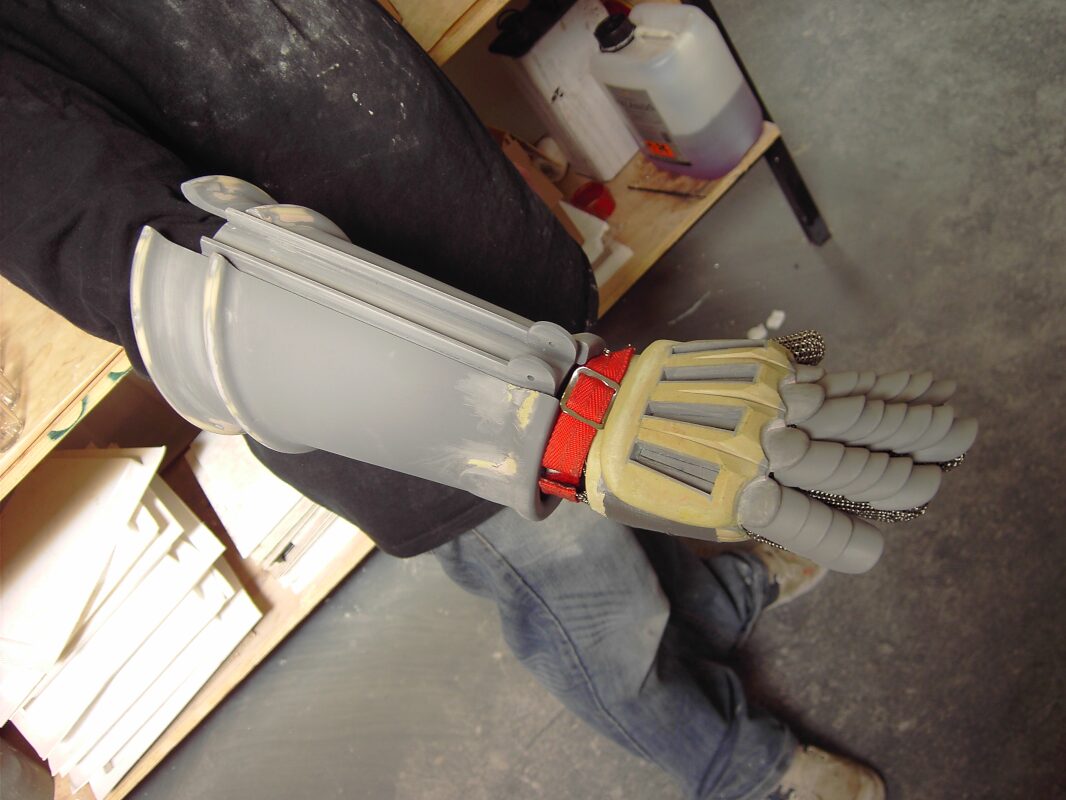
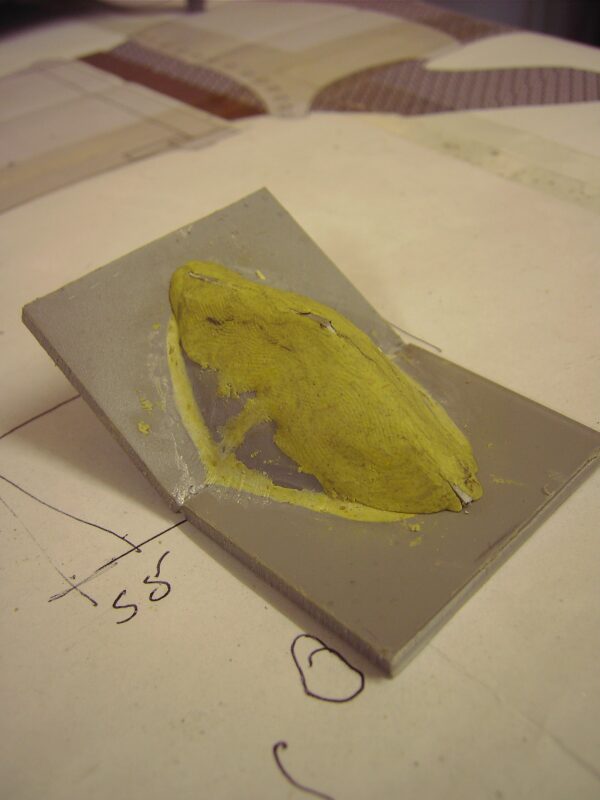
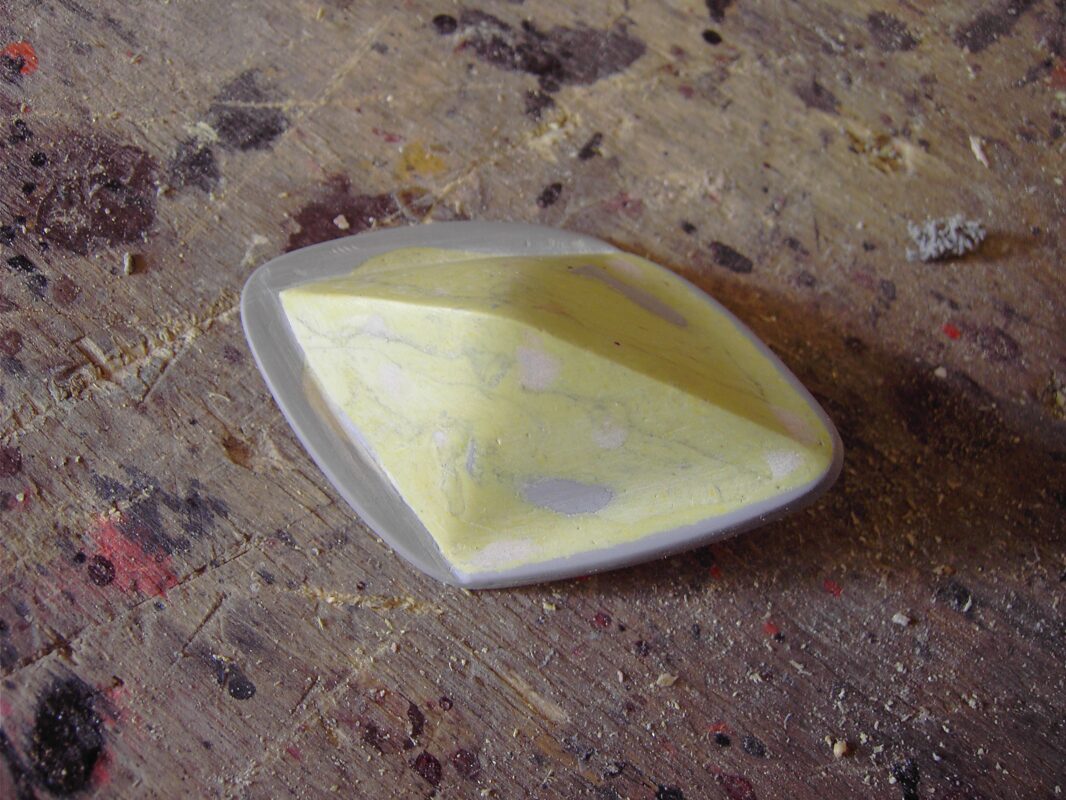
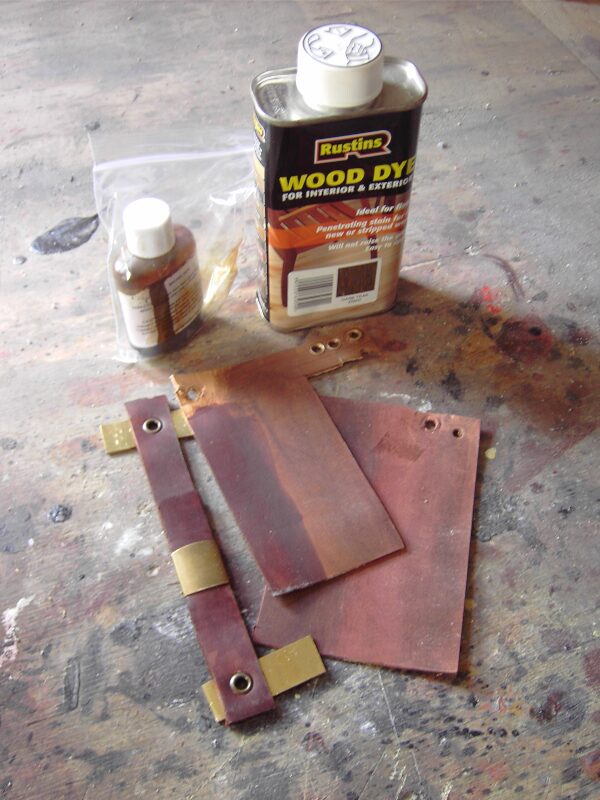
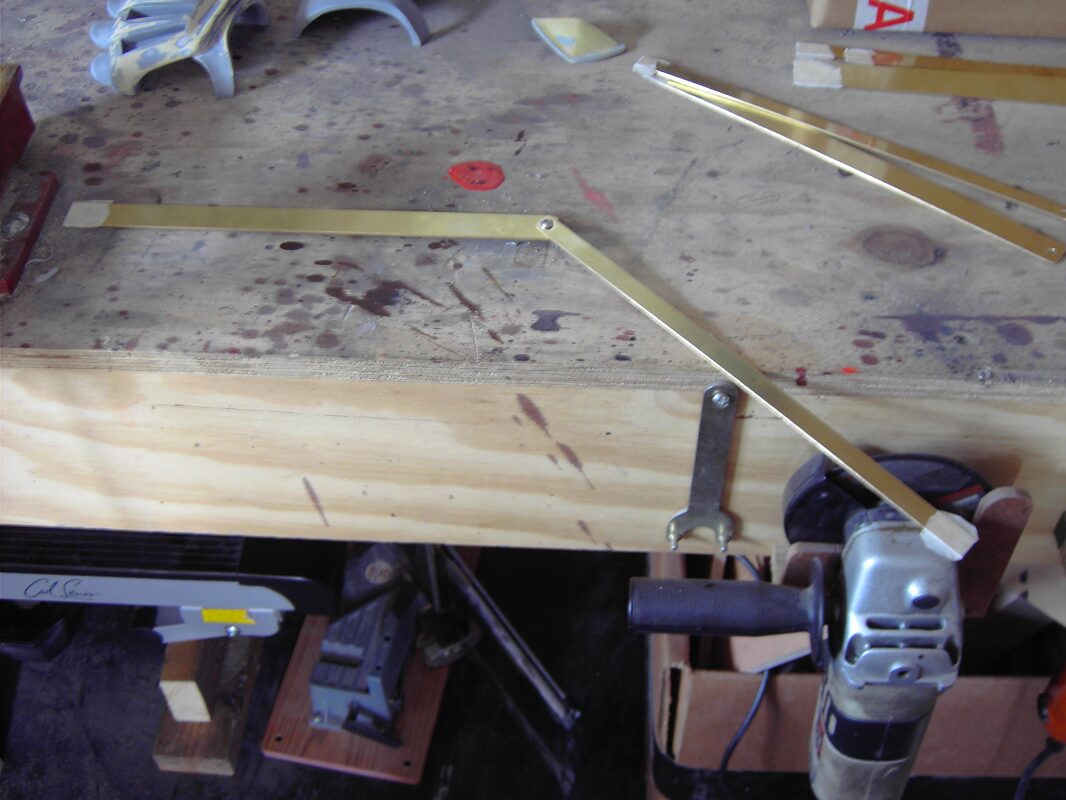
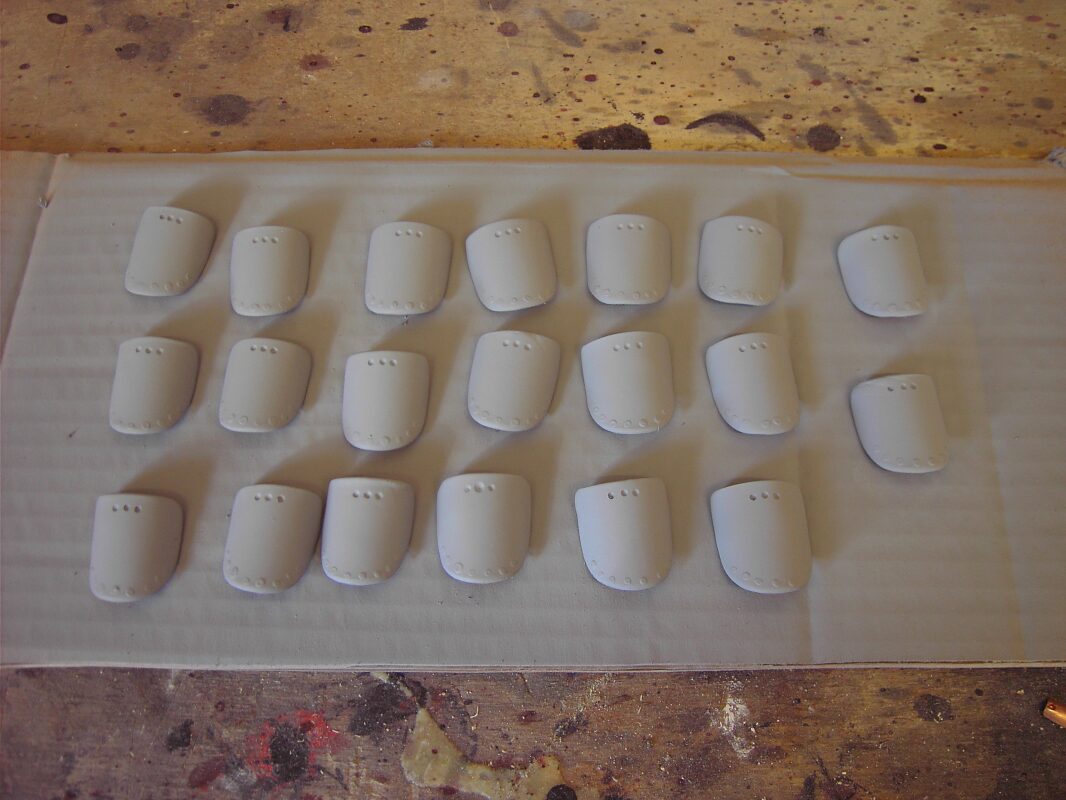
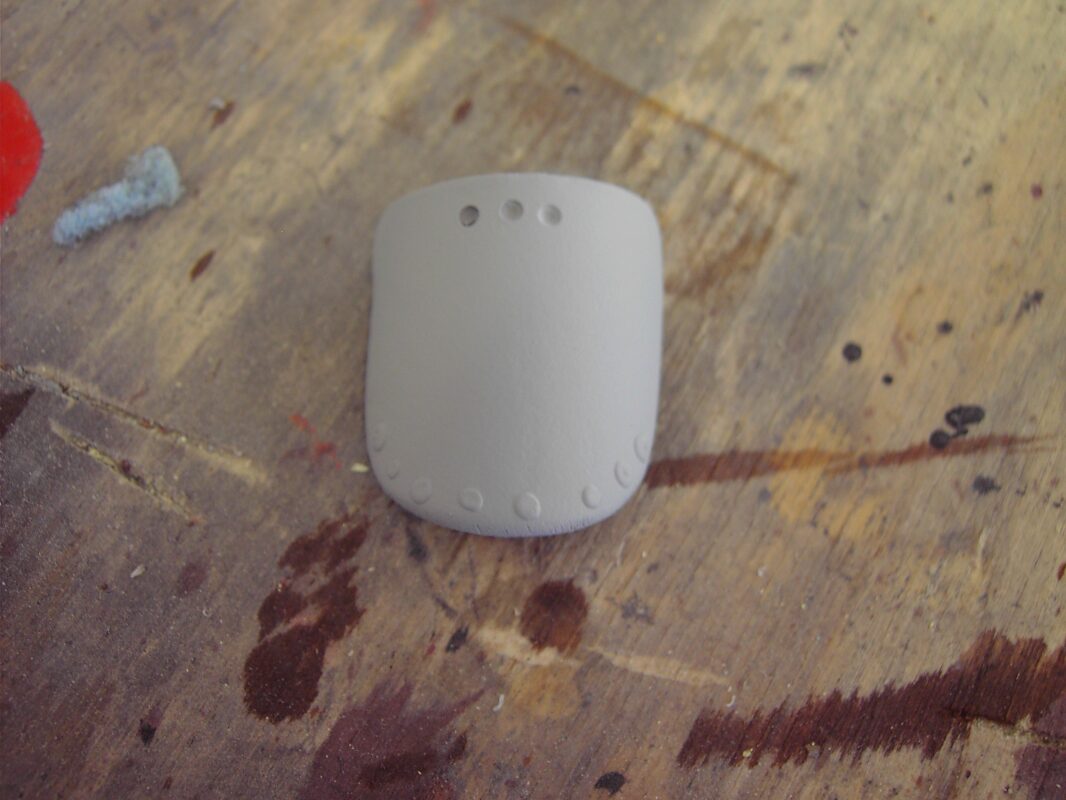
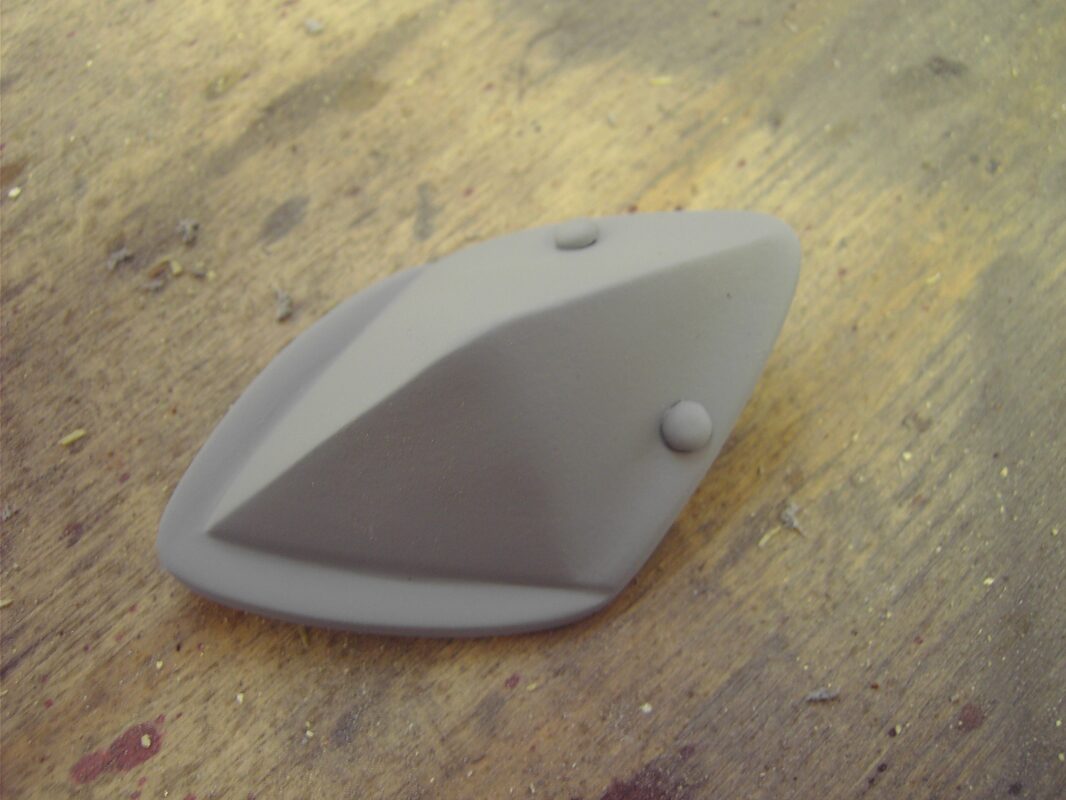
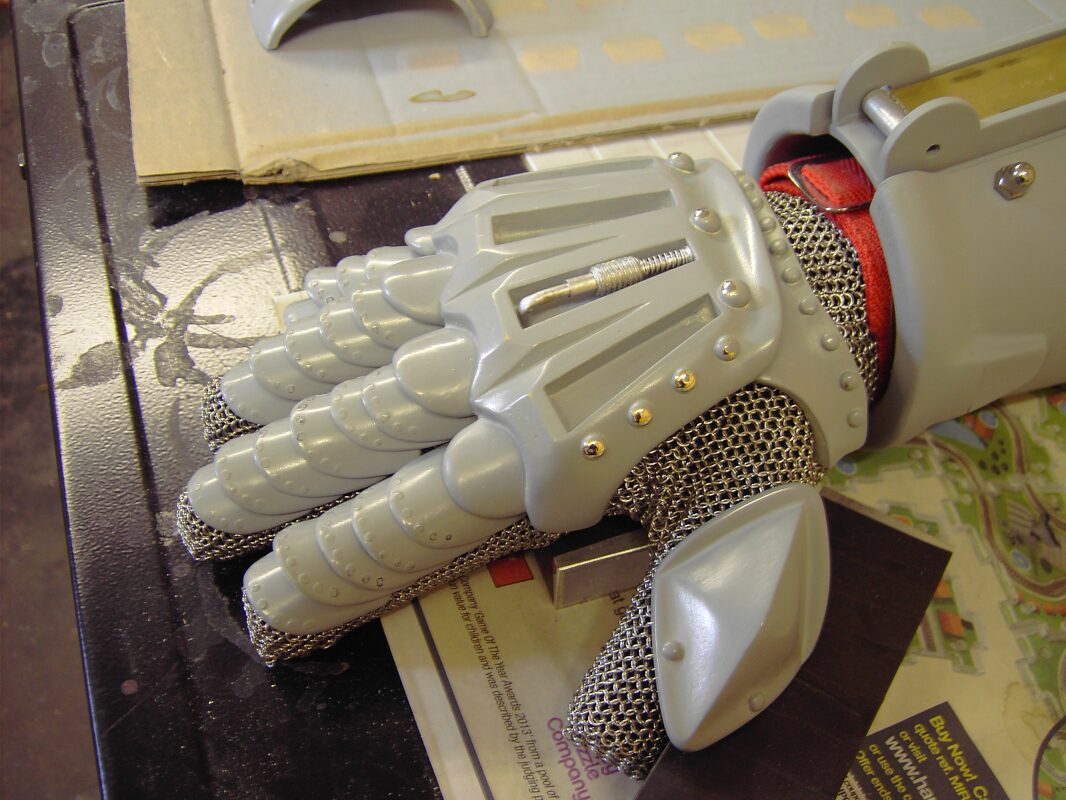
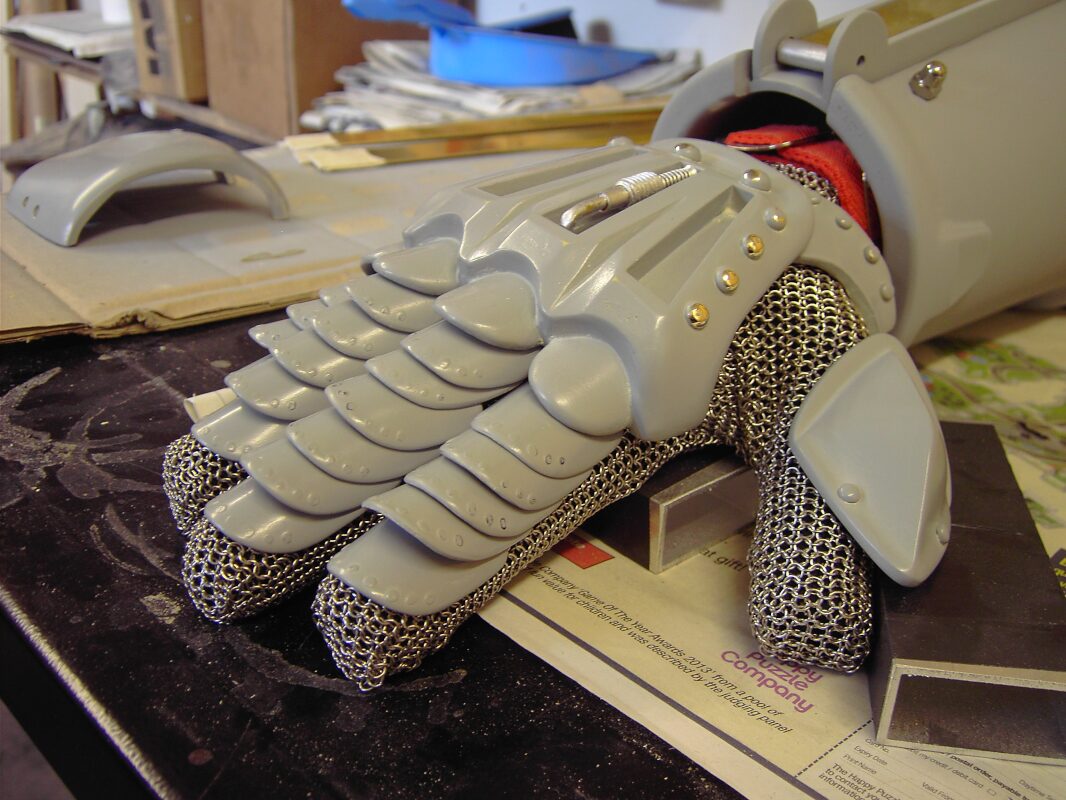
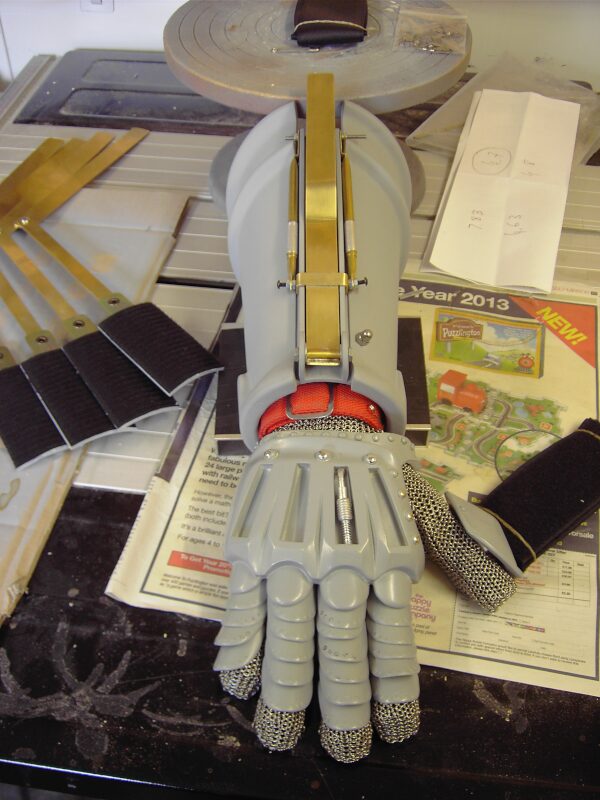
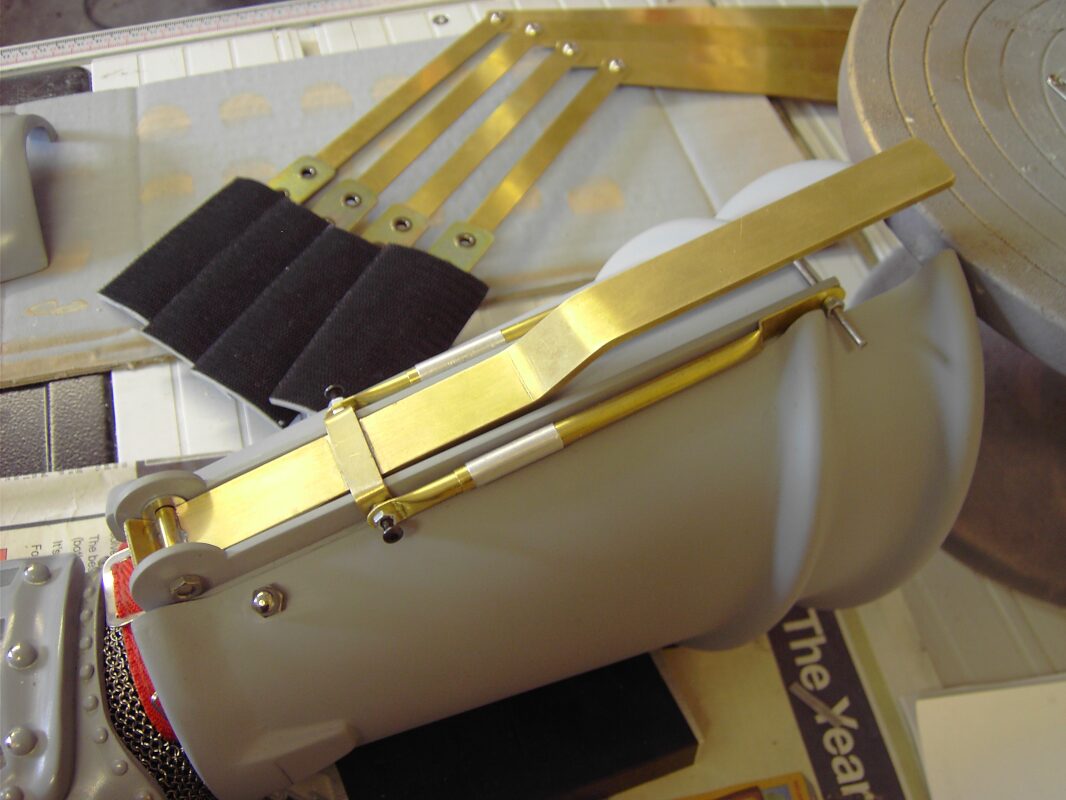
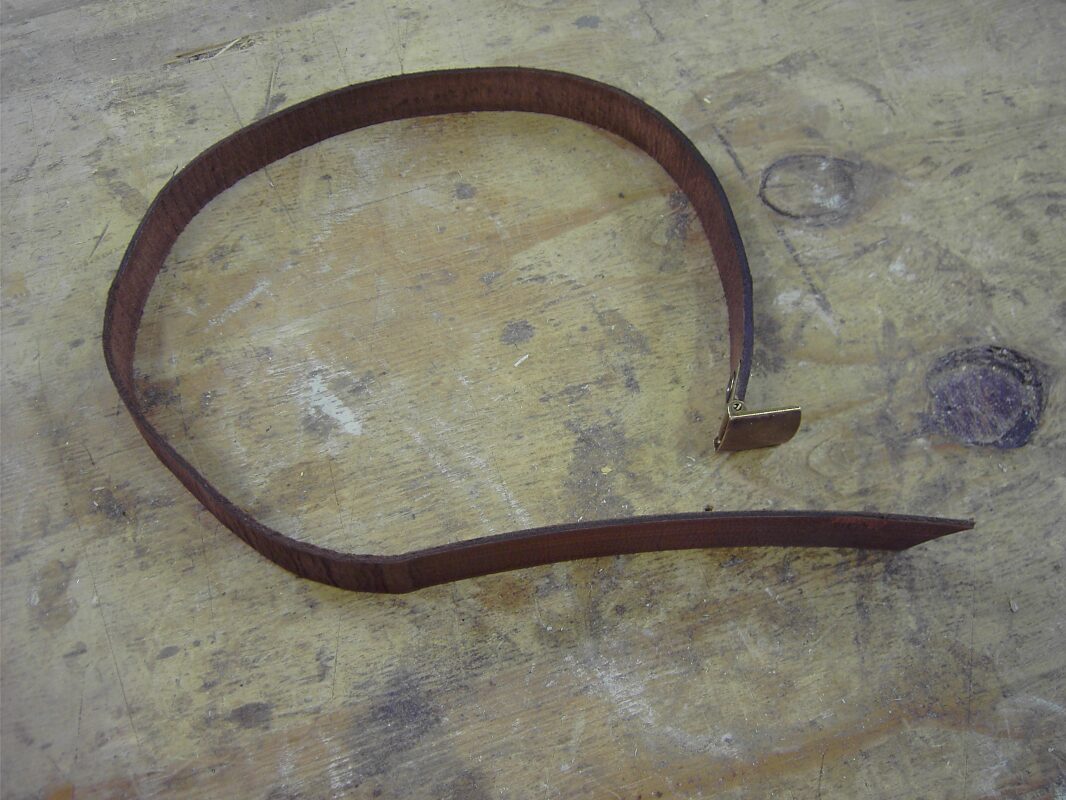
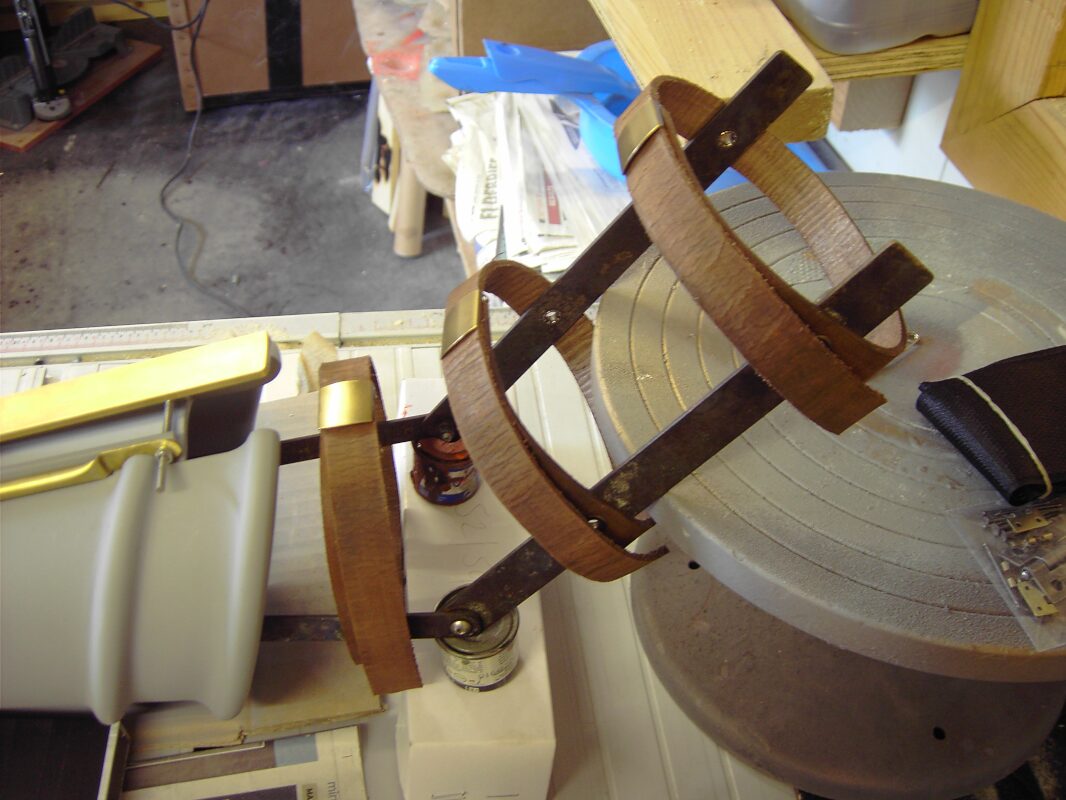
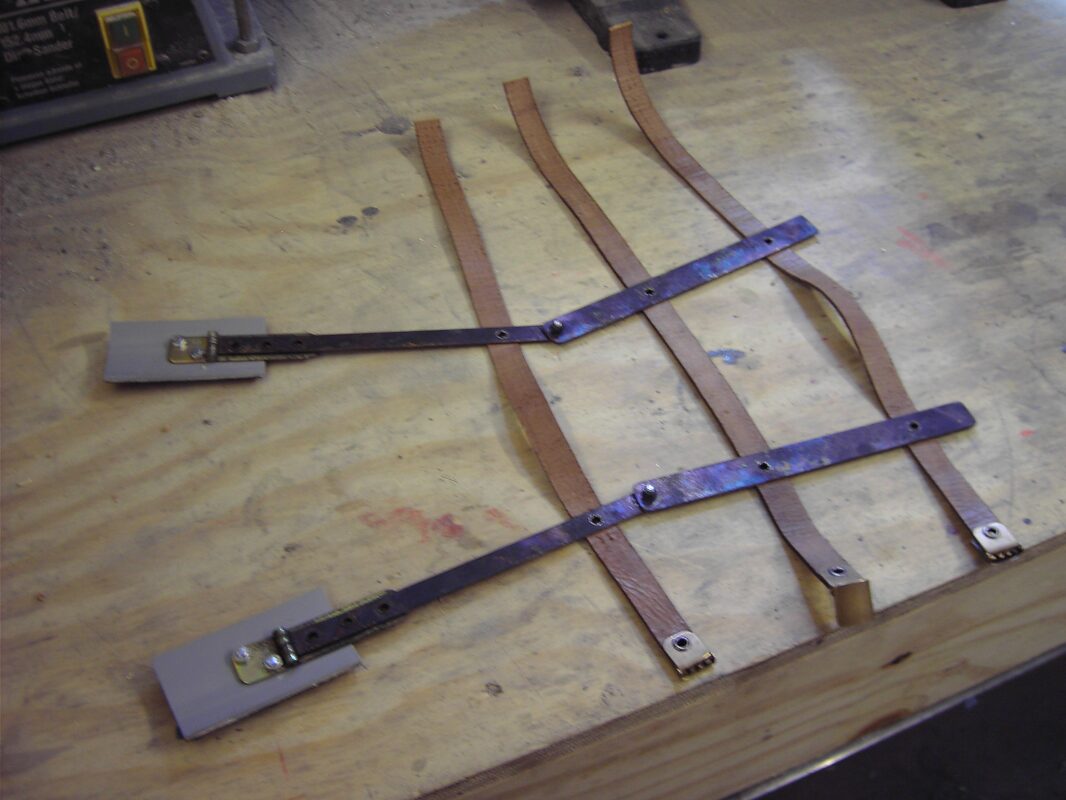
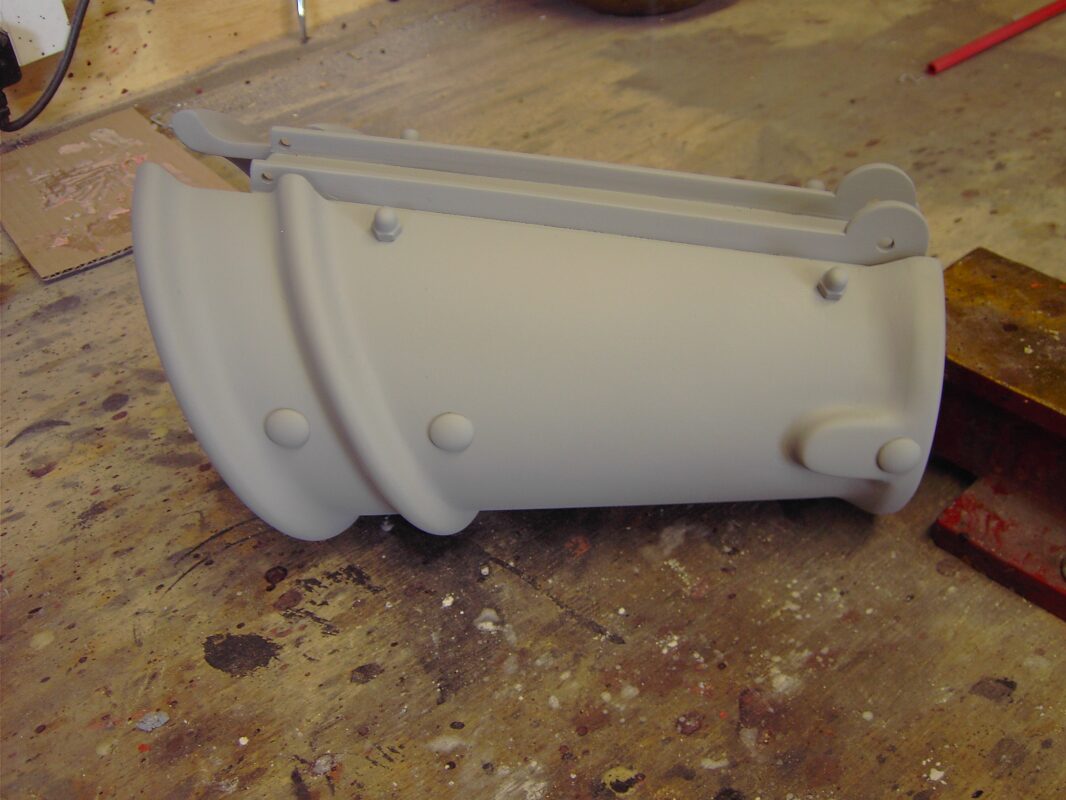
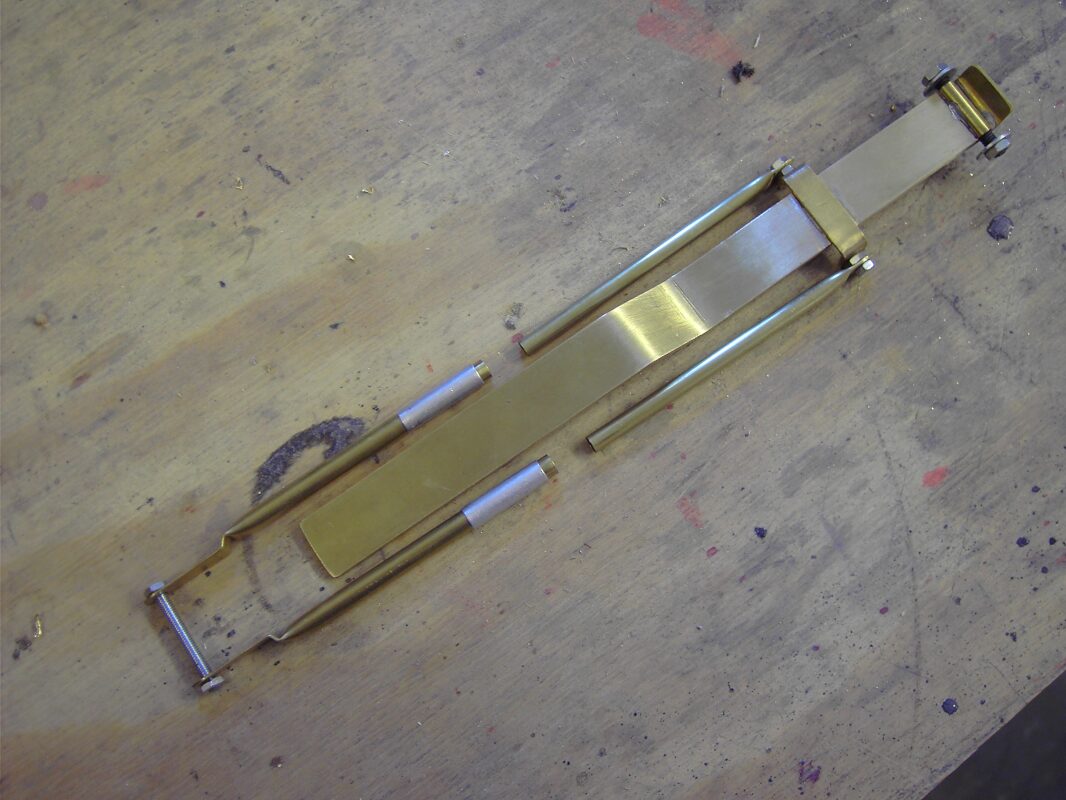
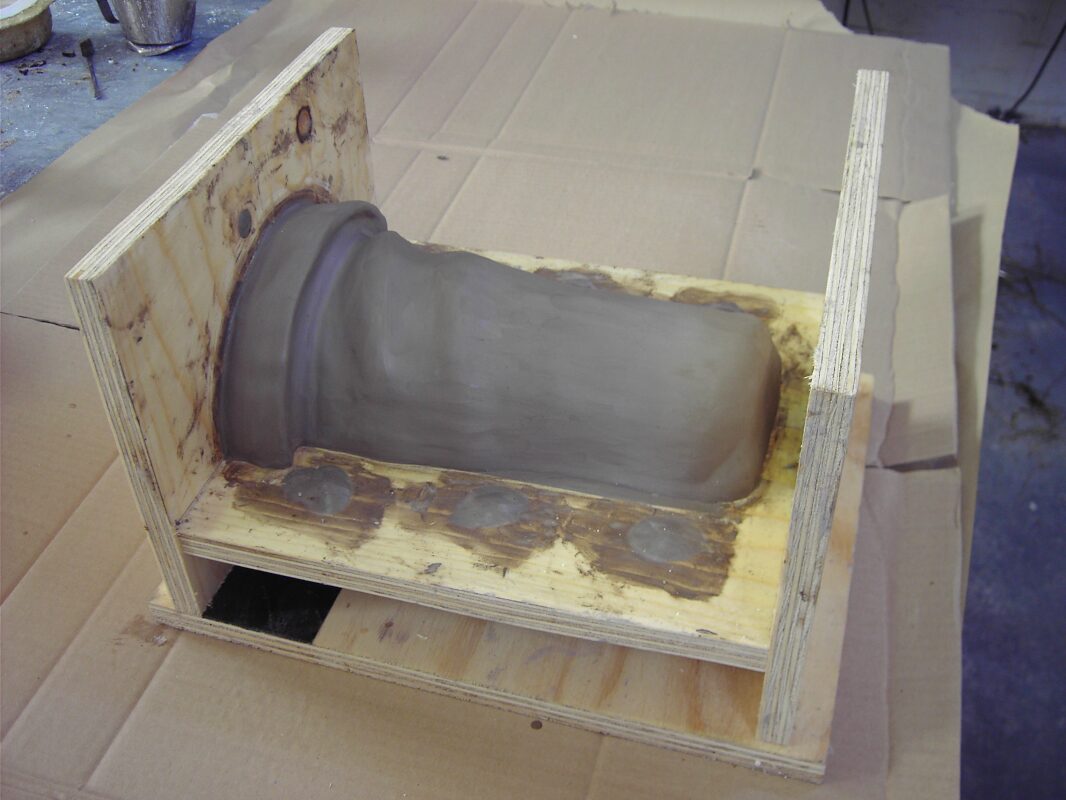
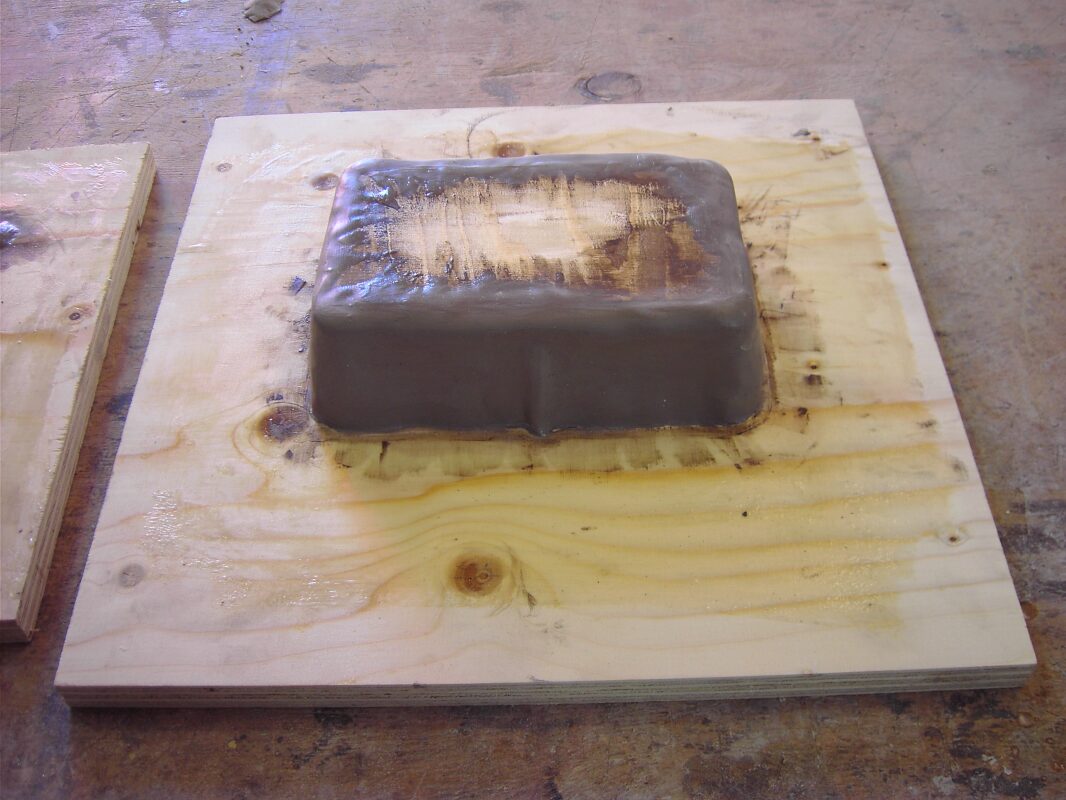
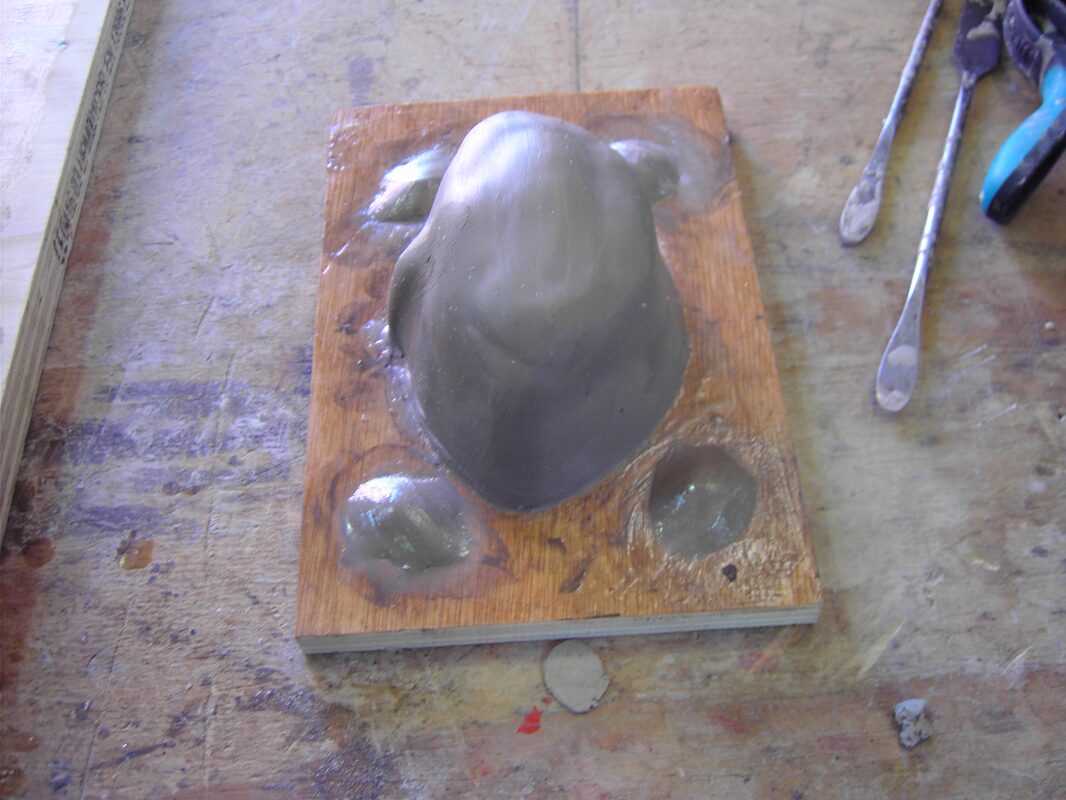
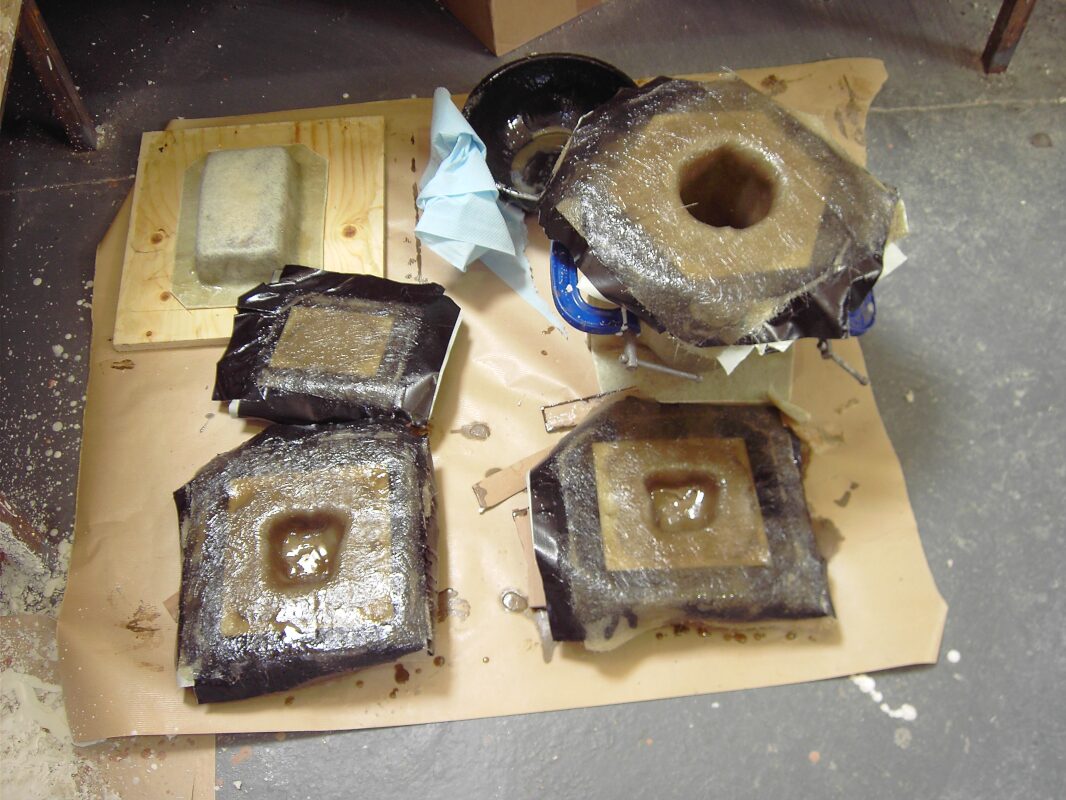
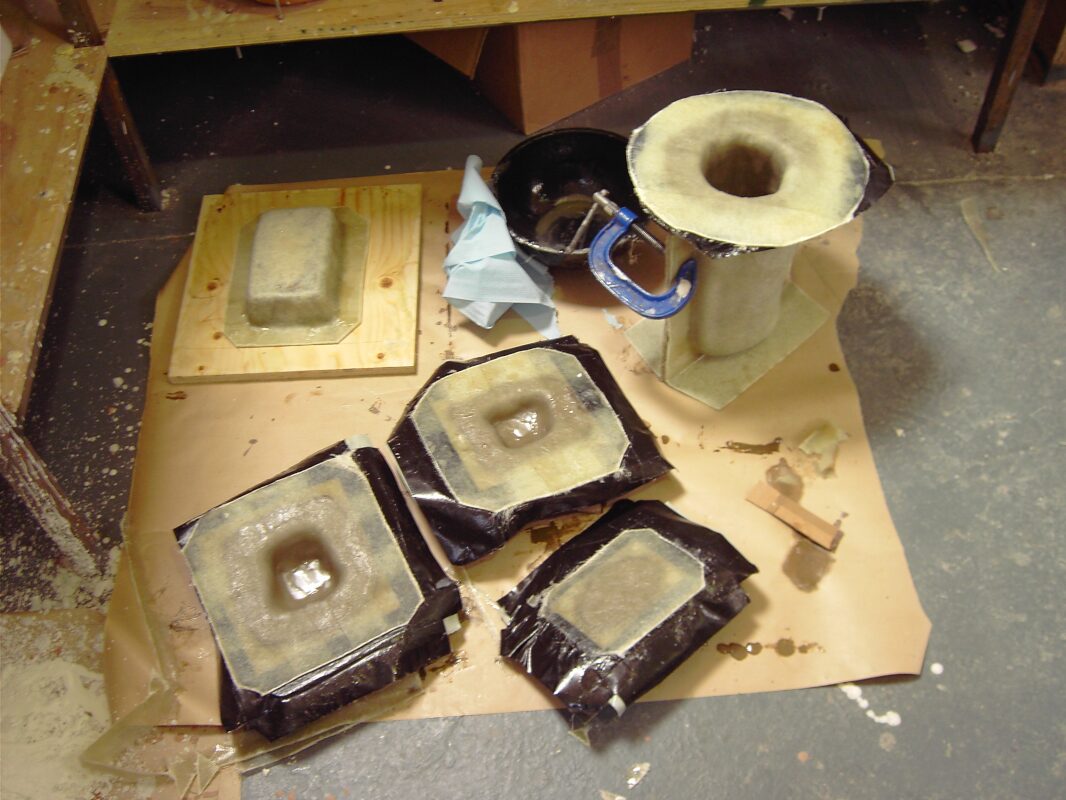
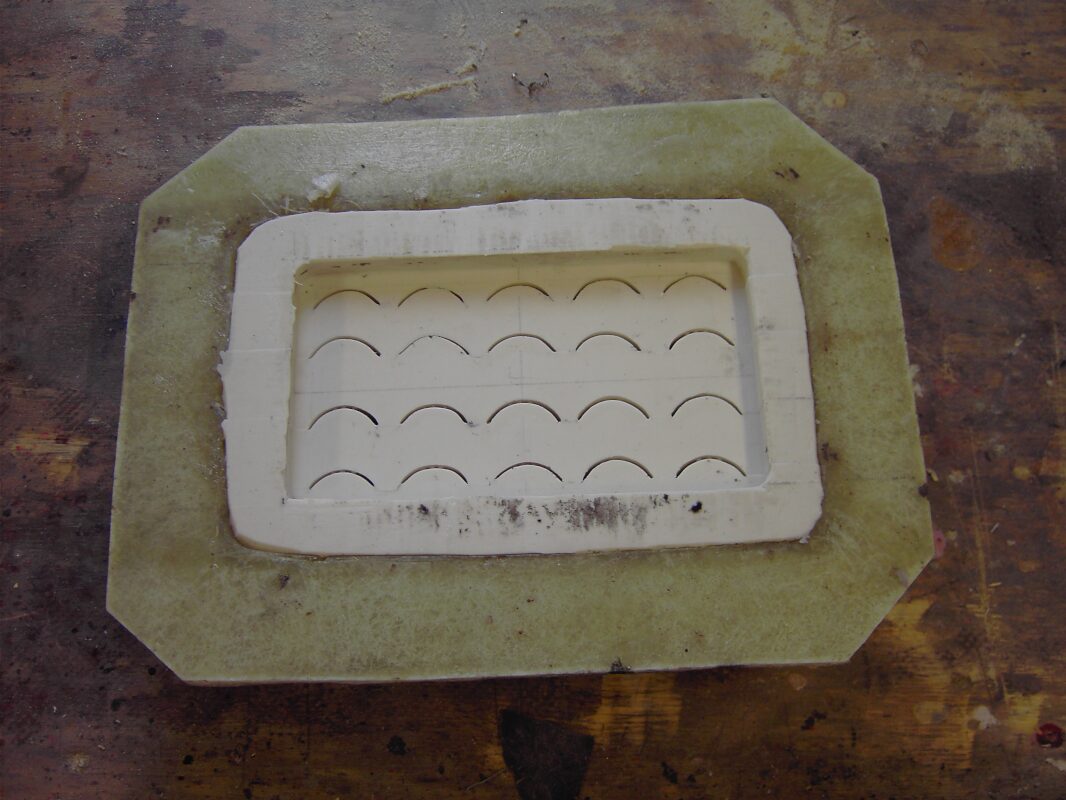
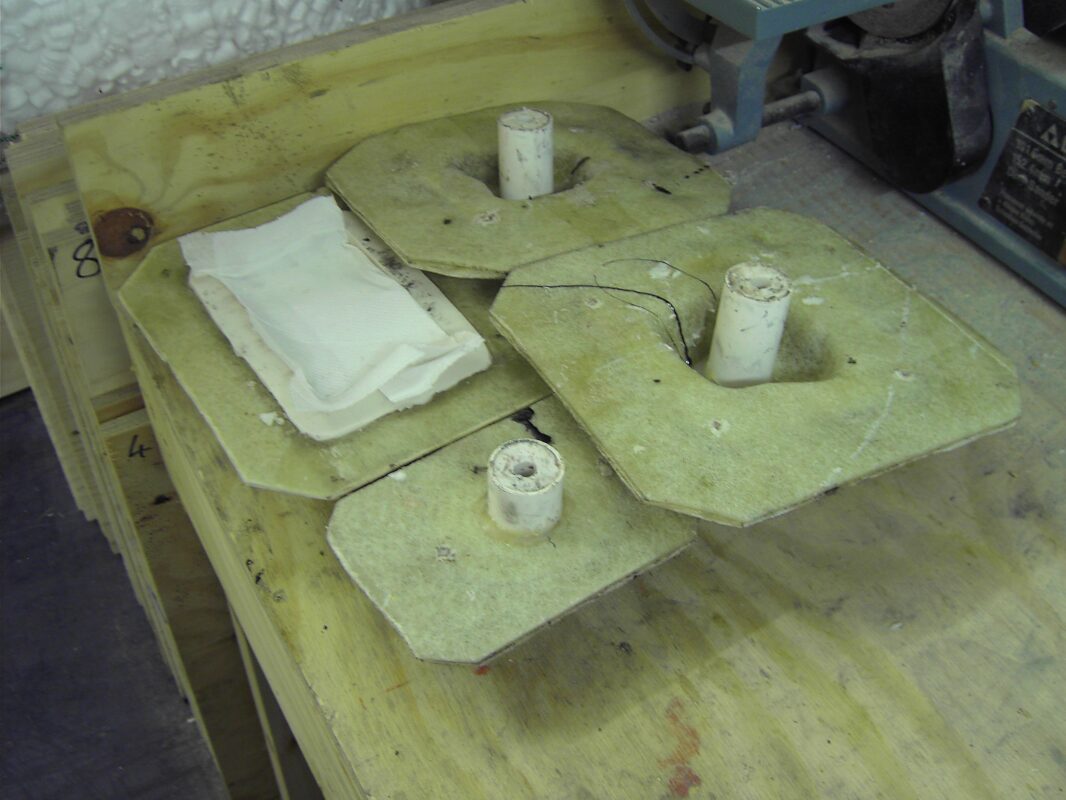
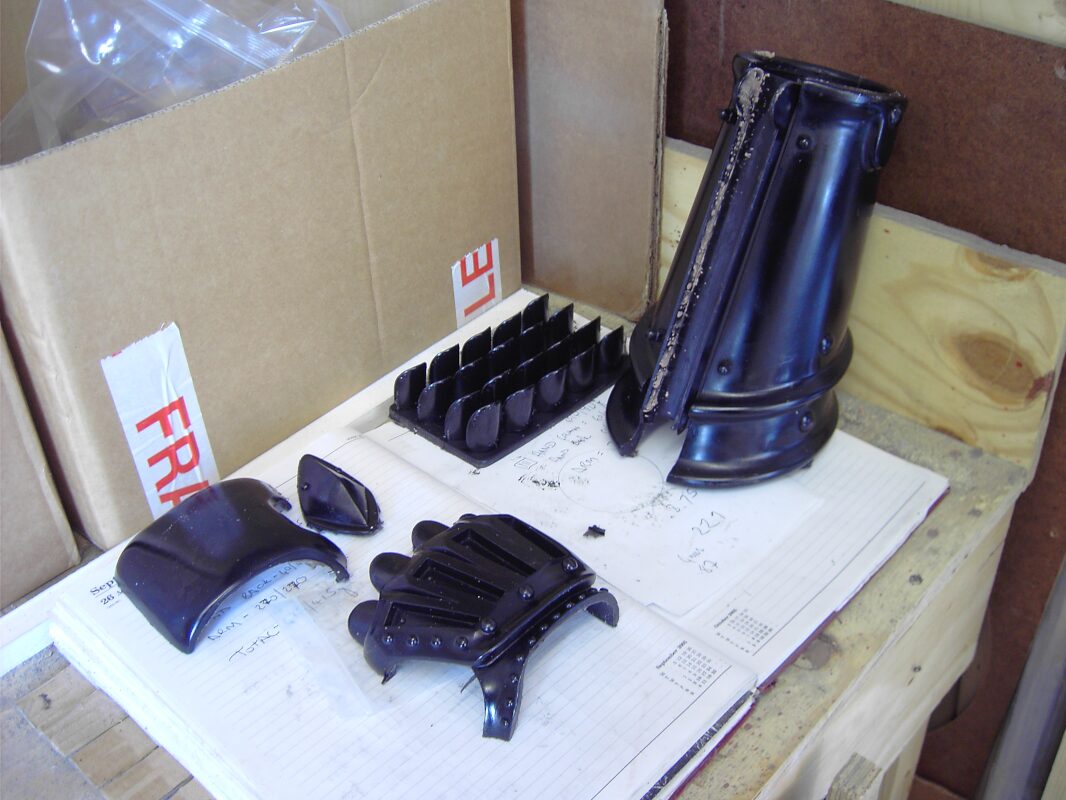
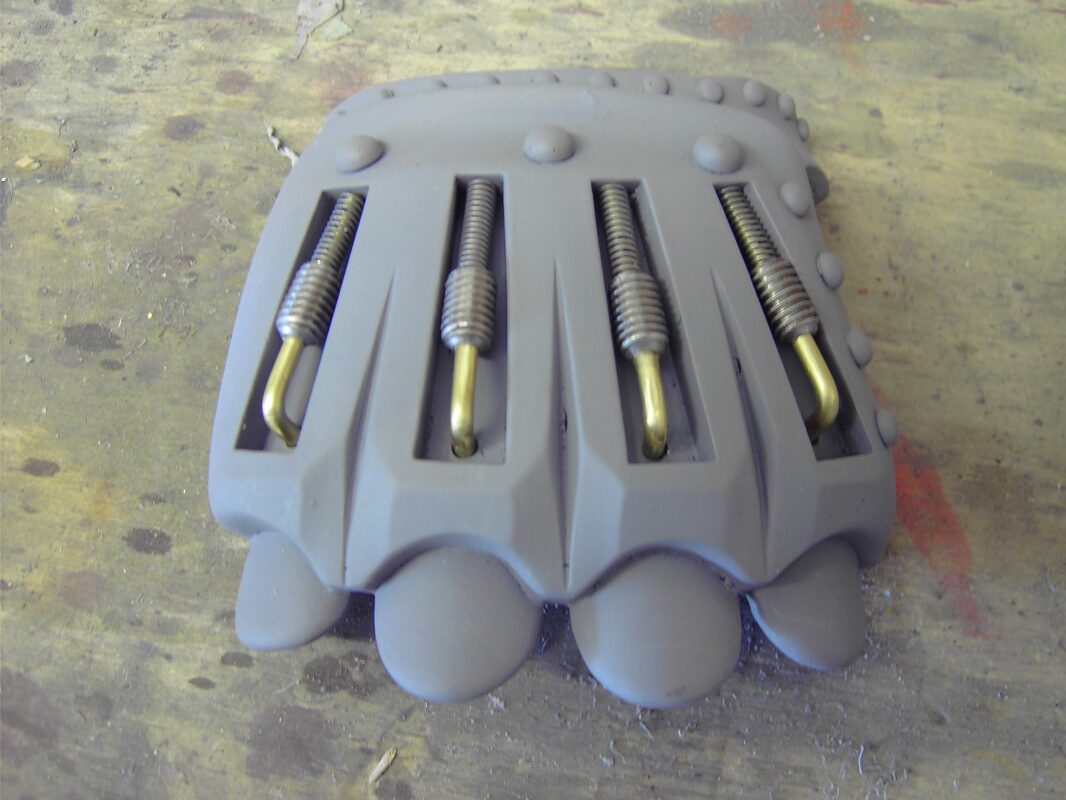
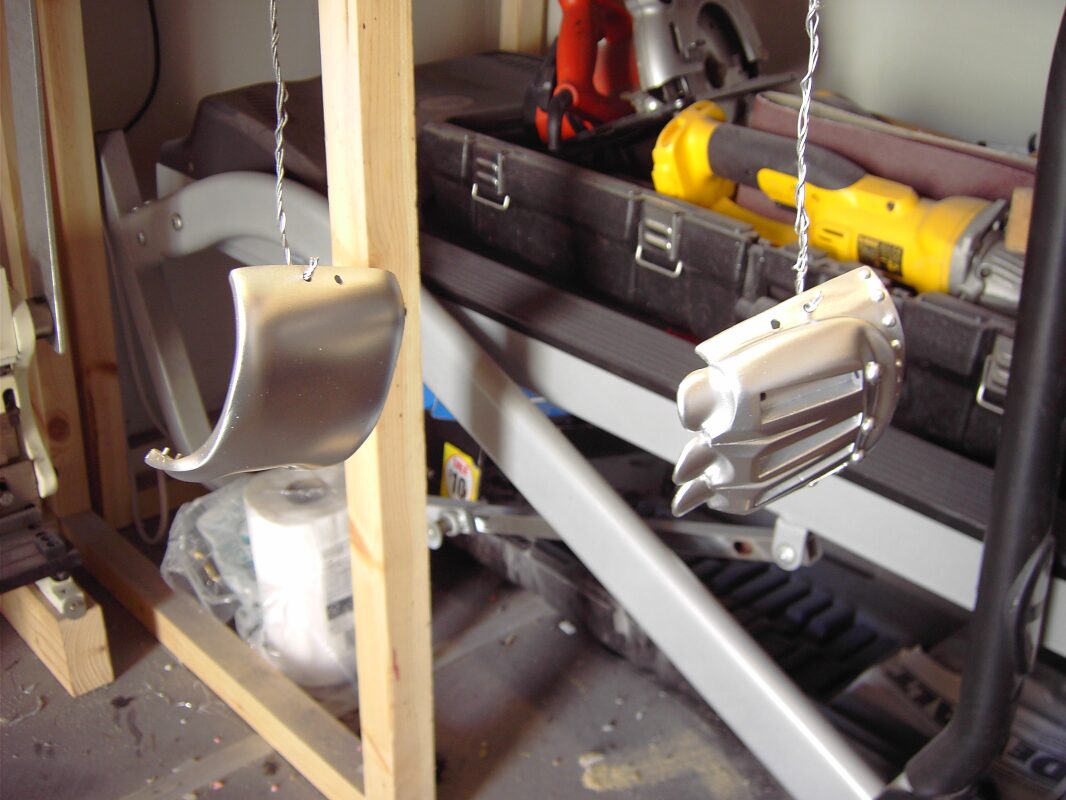
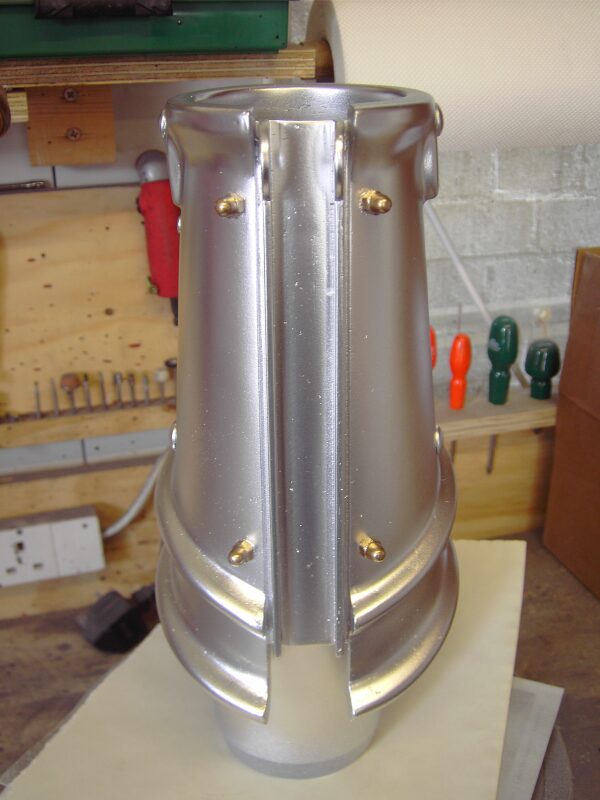
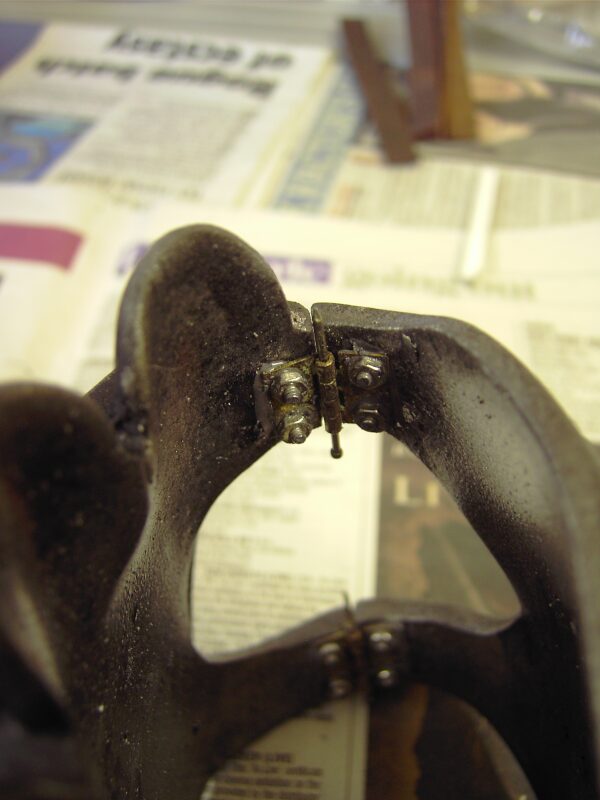
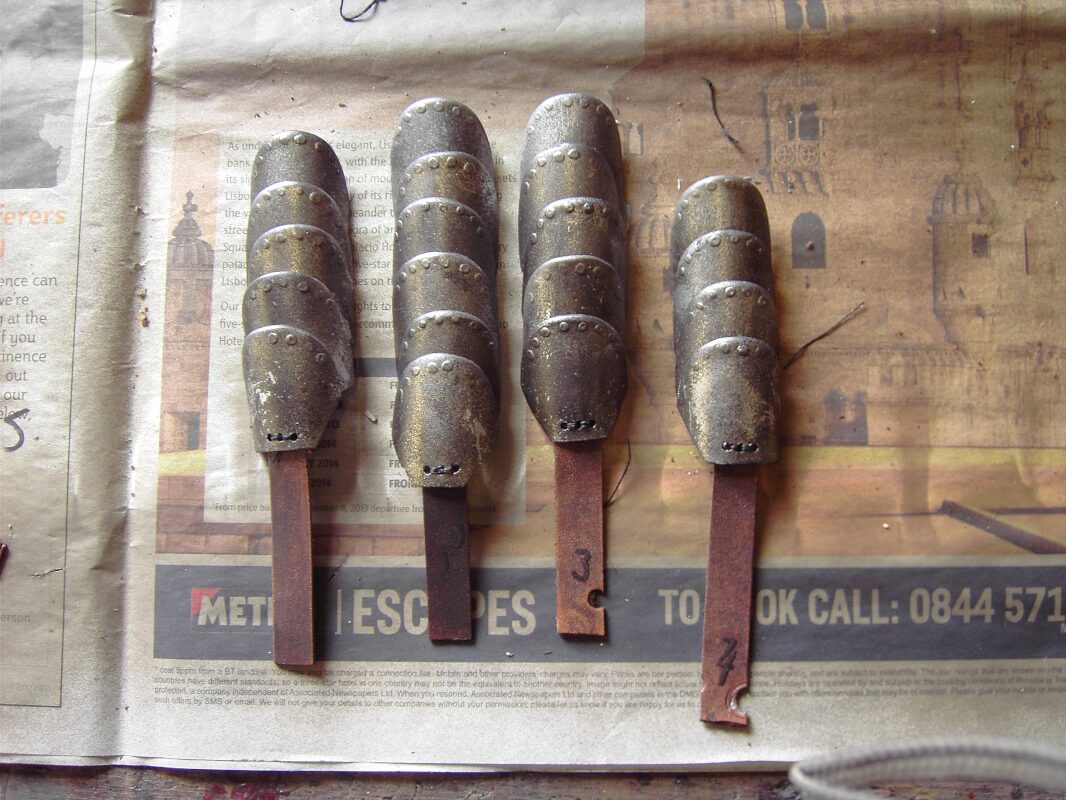
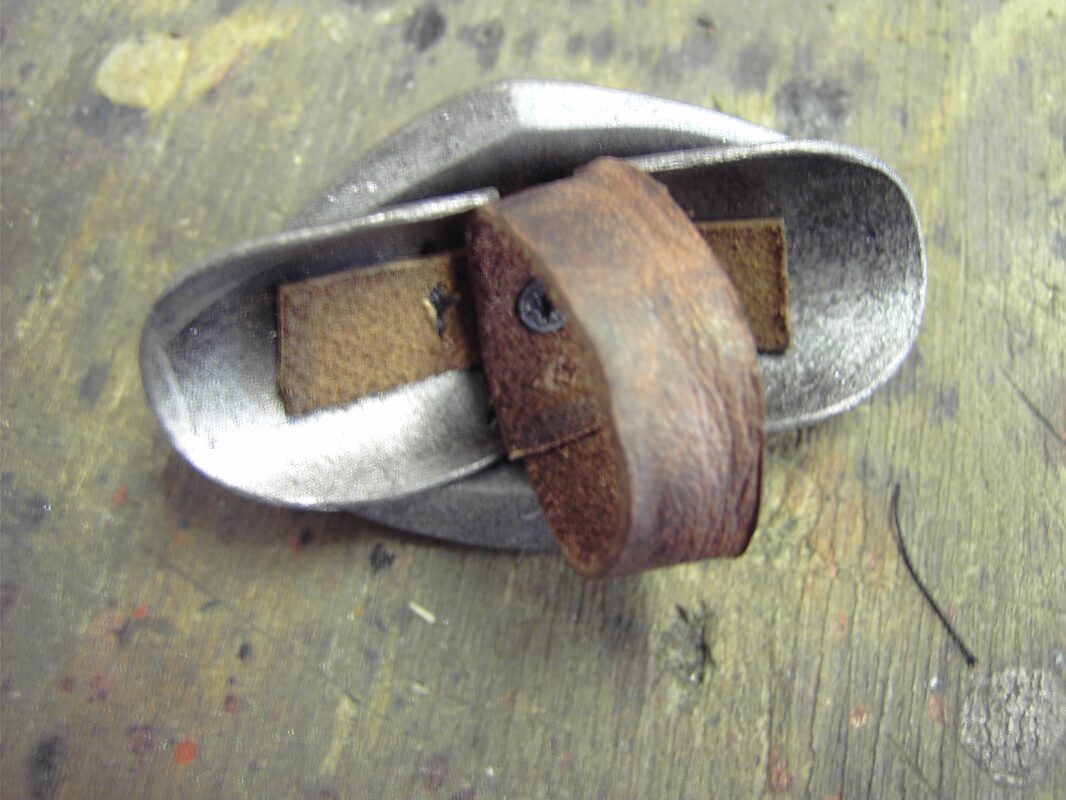
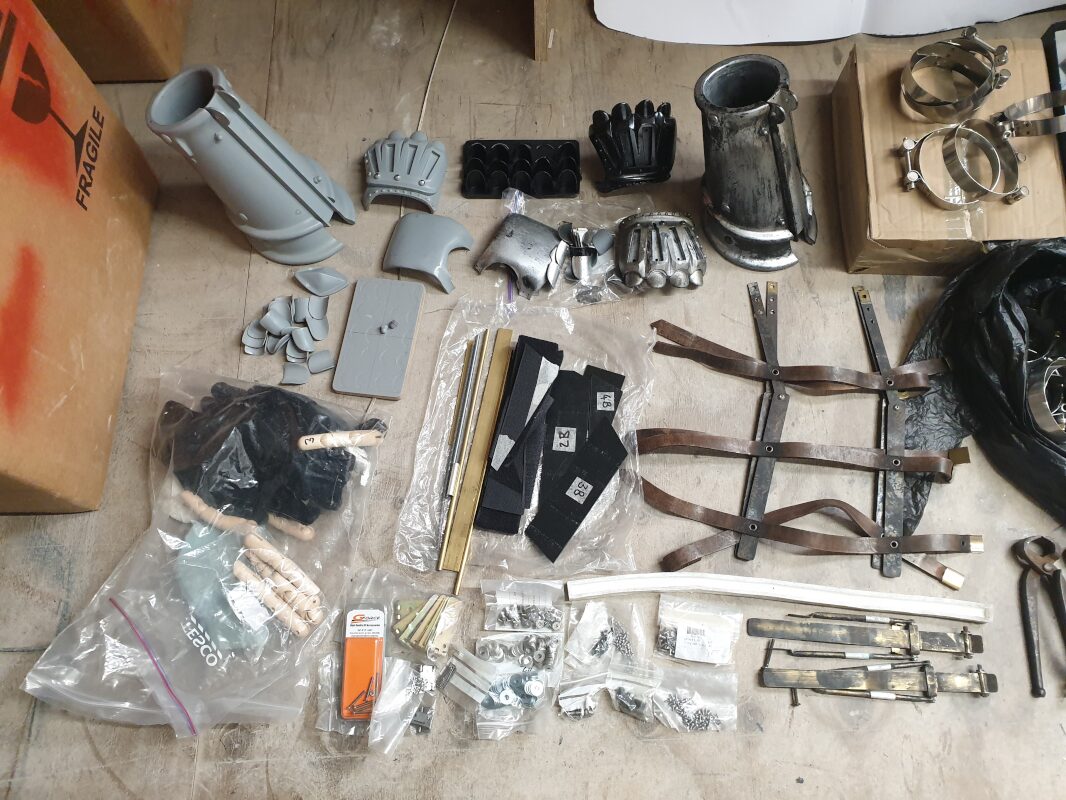
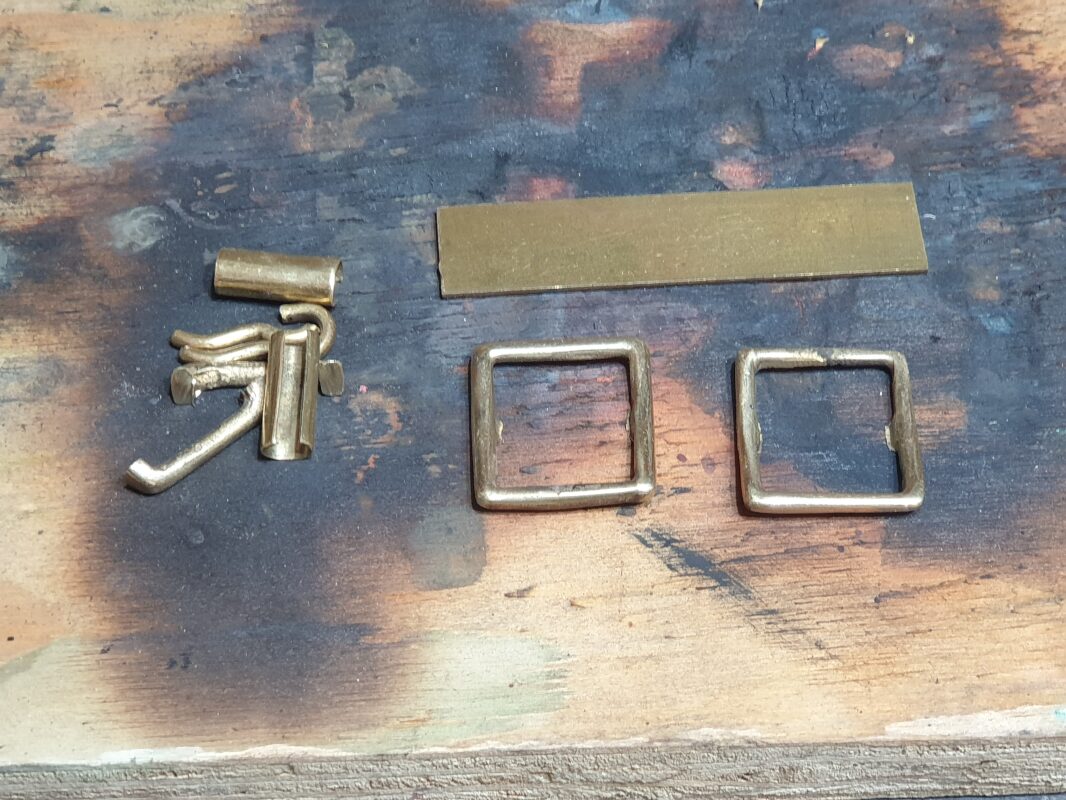
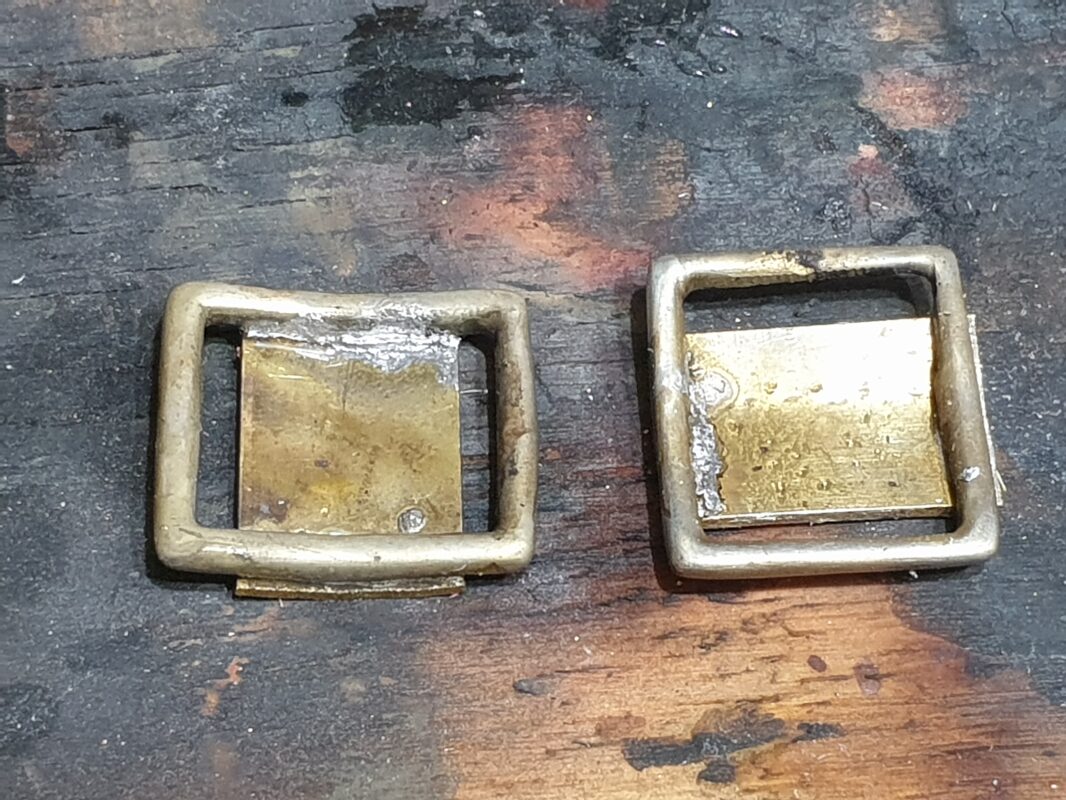
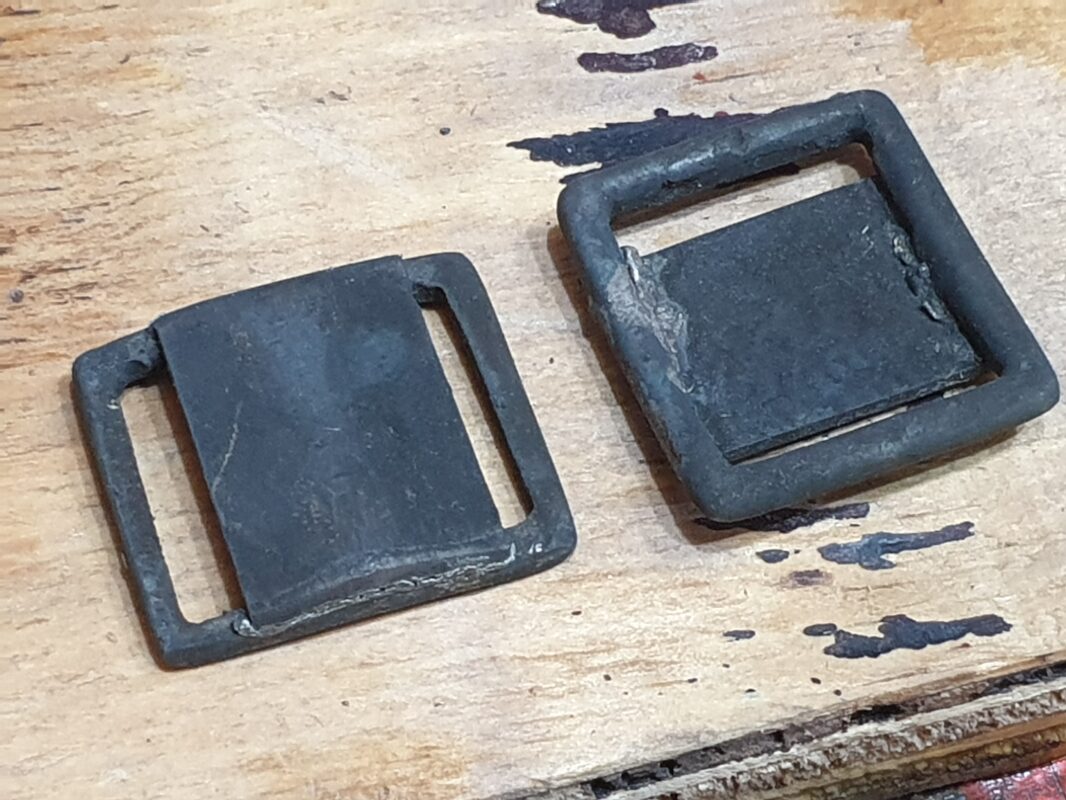
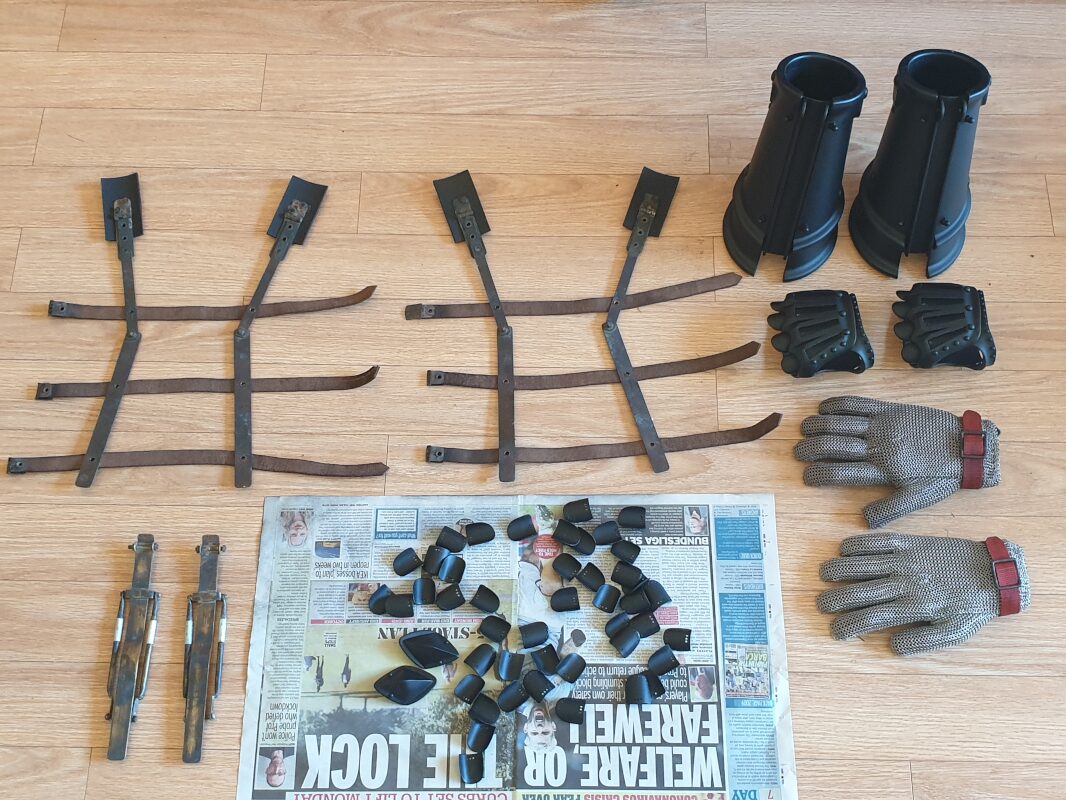
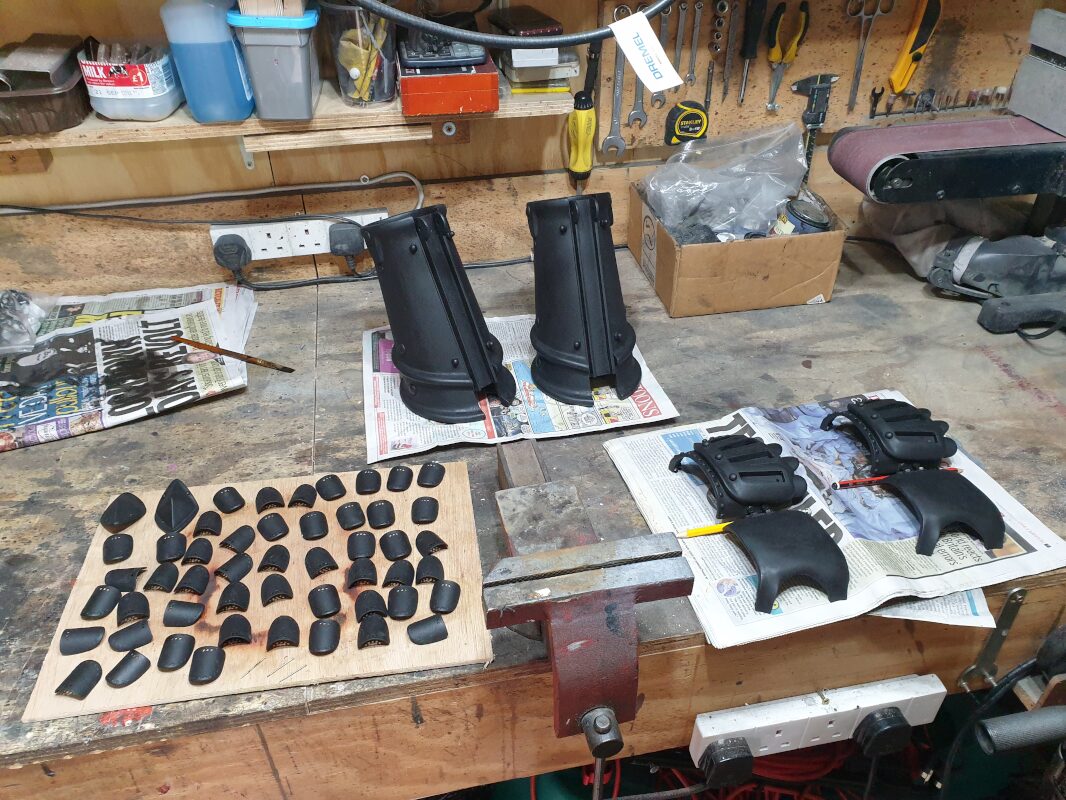
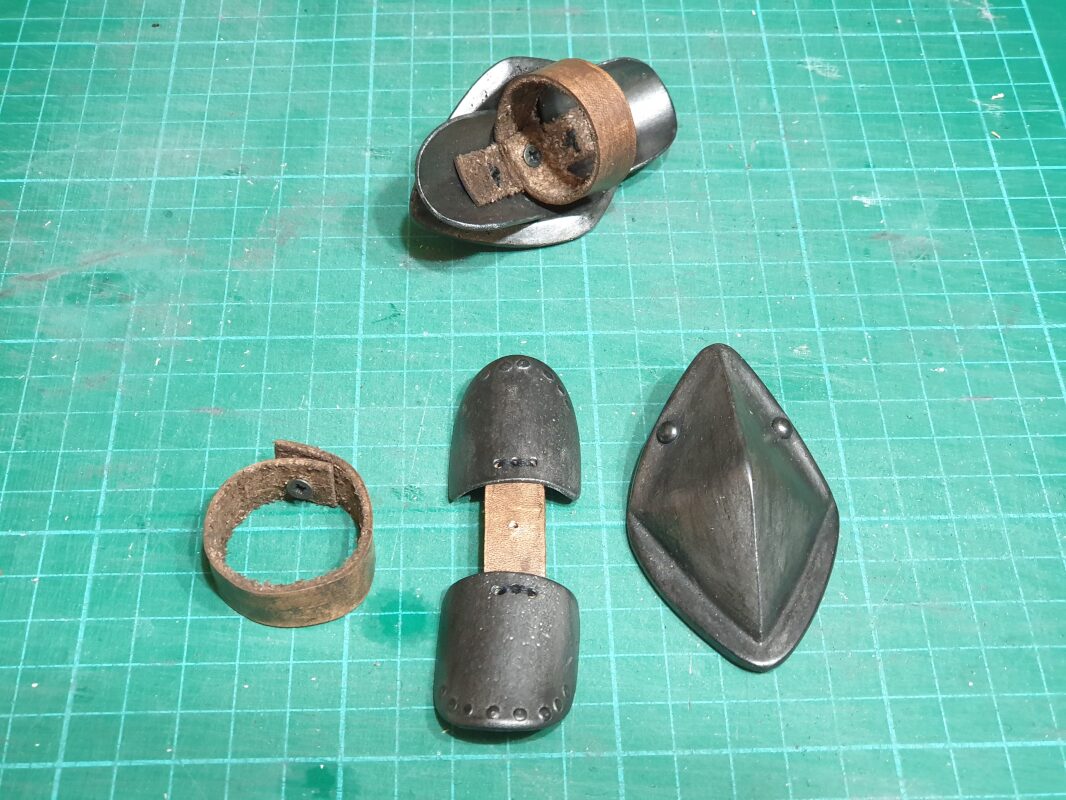
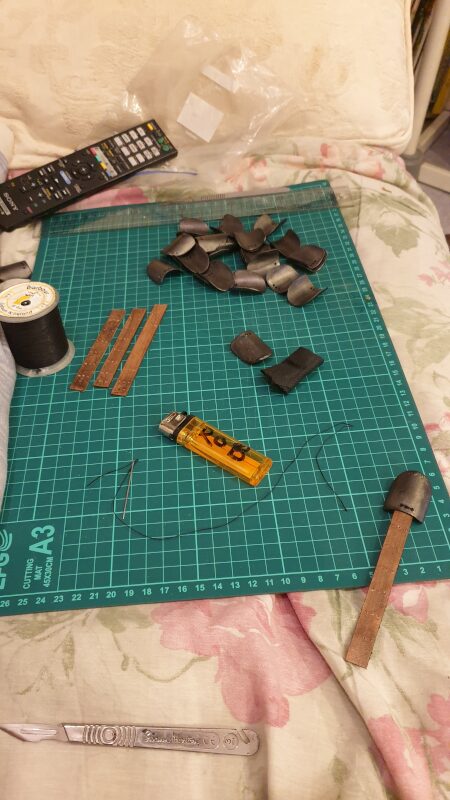
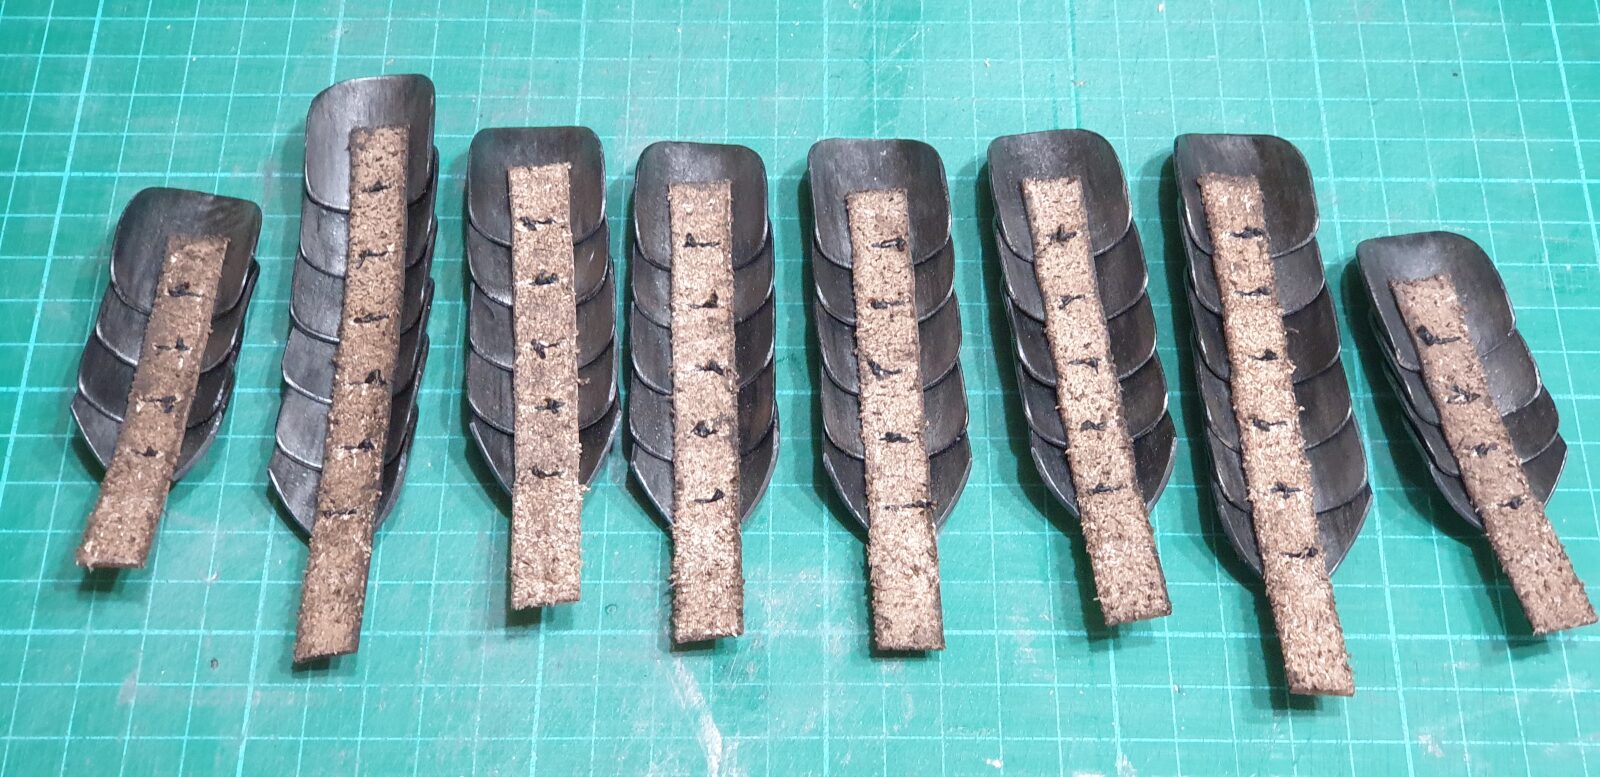
_004_lbx.jpg) So over the next 10 weeks I worked away, from making the parts out of heat-formed plastic sheets to make mouldable forms, which I then made silicone moulds of so I could replicate them in plastic resin. Even then starting out with ready-moulded resin parts, it was still a huge amount of work to make each hand, and not something I relished doing regardless of how much I was charging. Various metal pieces had to be made from scratch , such as the brass & leather arm brace, the vambrace handle, and the finger pistons. Once the first arm was completed, I then made the fixings for a further five arms, so I had them ready made for future orders to cut down on the workload. I sold two more arms in December 2014, one going to a fan in Ireland and the second to the USA. The fourth also went to the USA in September 2015, then the last two arms were made in May 2020 in my newly completed home workshop; one kept for myself (I didn't own one myself before this) and the final sent to a fan in Taiwan.
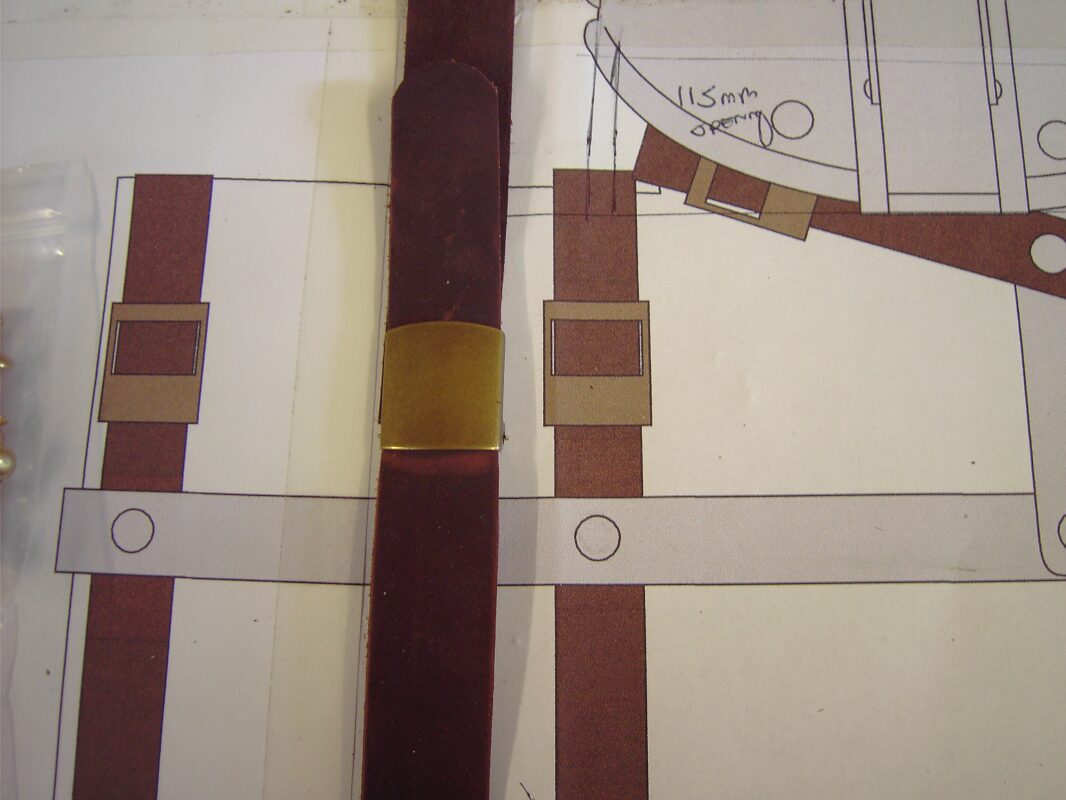
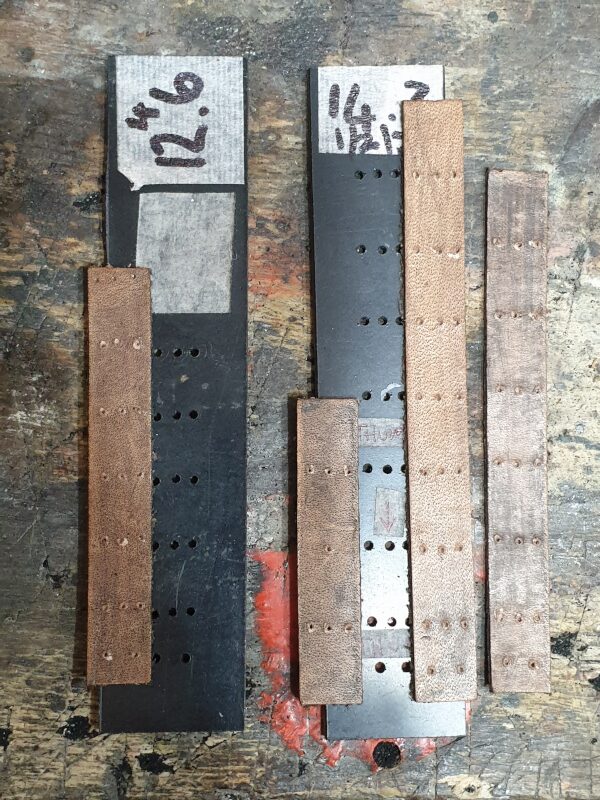
So over the next 10 weeks I worked away, from making the parts out of heat-formed plastic sheets to make mouldable forms, which I then made silicone moulds of so I could replicate them in plastic resin. Even then starting out with ready-moulded resin parts, it was still a huge amount of work to make each hand, and not something I relished doing regardless of how much I was charging. Various metal pieces had to be made from scratch , such as the brass & leather arm brace, the vambrace handle, and the finger pistons. Once the first arm was completed, I then made the fixings for a further five arms, so I had them ready made for future orders to cut down on the workload. I sold two more arms in December 2014, one going to a fan in Ireland and the second to the USA. The fourth also went to the USA in September 2015, then the last two arms were made in May 2020 in my newly completed home workshop; one kept for myself (I didn't own one myself before this) and the final sent to a fan in Taiwan.
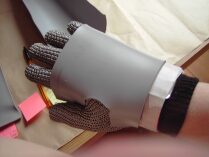
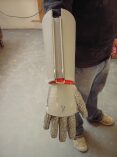
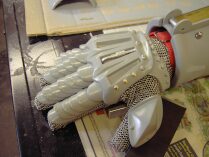
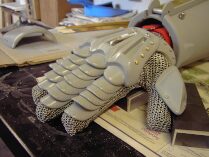
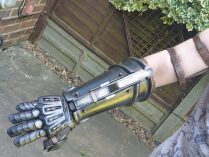
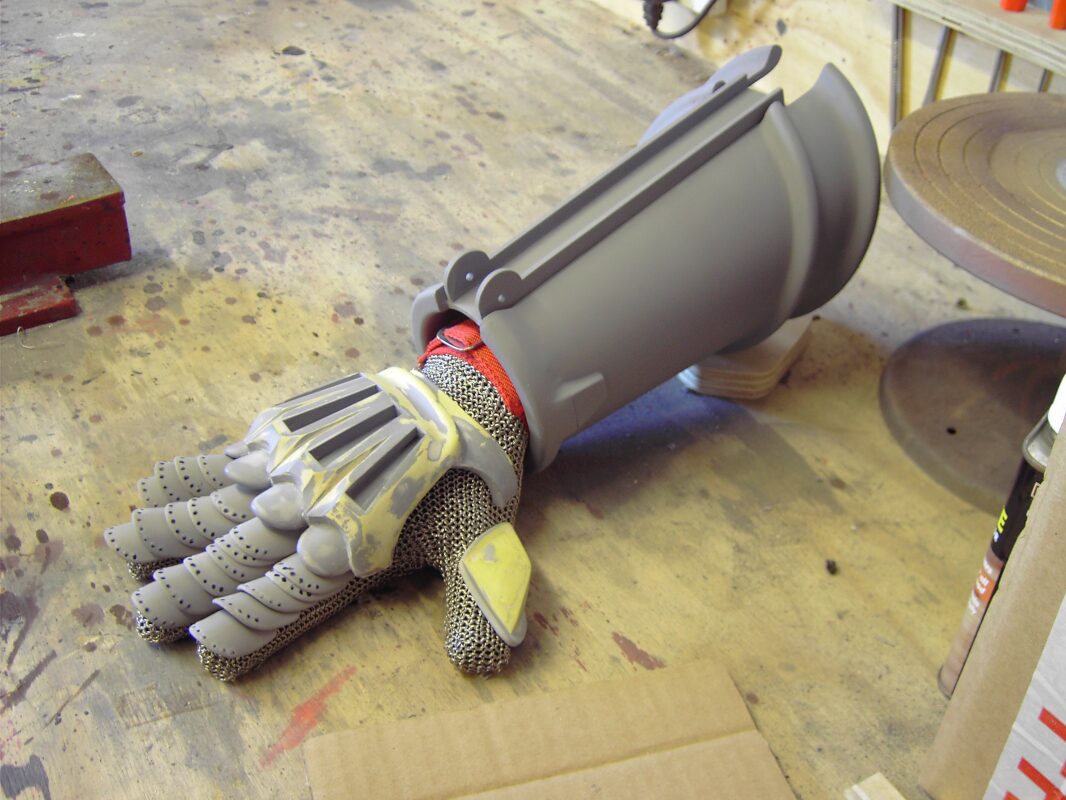
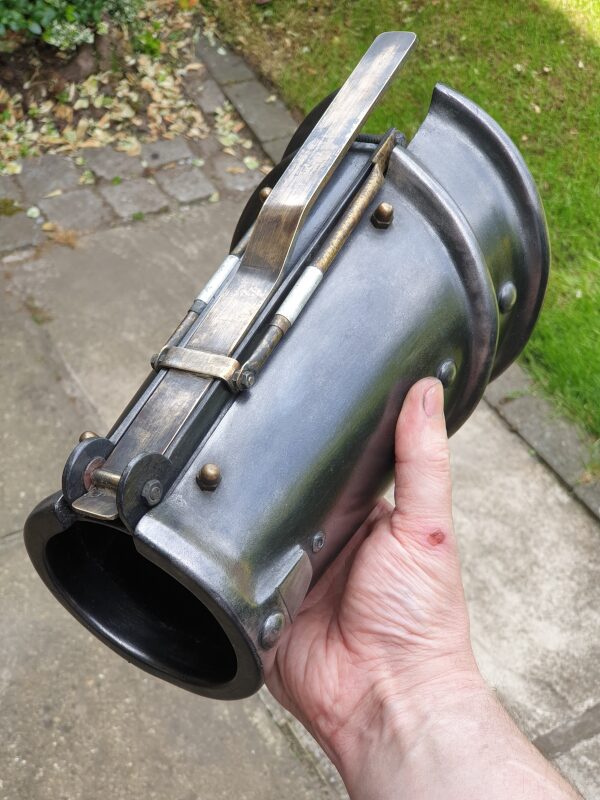
As the continuity on the screen original varies from shot to shot (especially as it's being constructed), the overall design is somewhat an amalgamation pulling together various details seen over the film, rather than an exact match to one particular version. It goes without saying that the finished version is a non-working prop, in-so-much that it can be worn over someone's arm, but it's not mechanised on it's own. It can only be worn right-handed, and I never made a left-handed version. The overall length with the brass/leather arm frame out straight was 660mm or 26", and the total weight, just 1.5kg or 3.5lb.
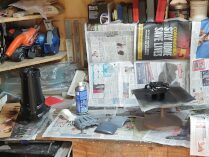
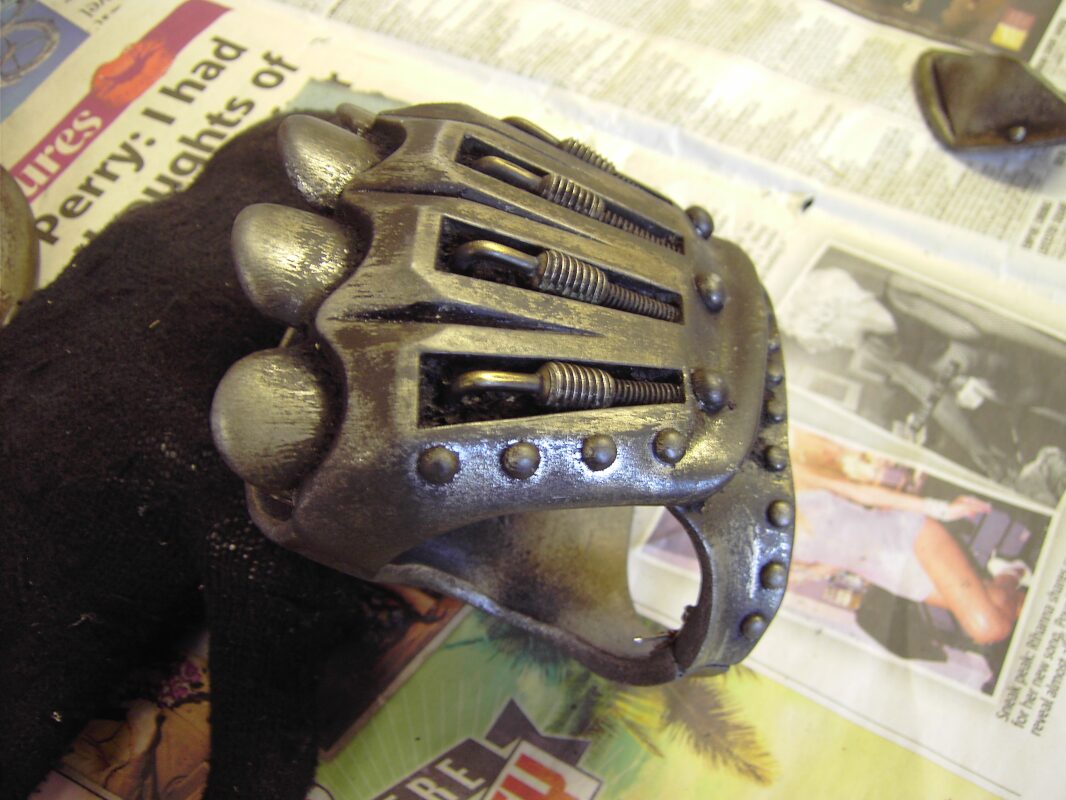
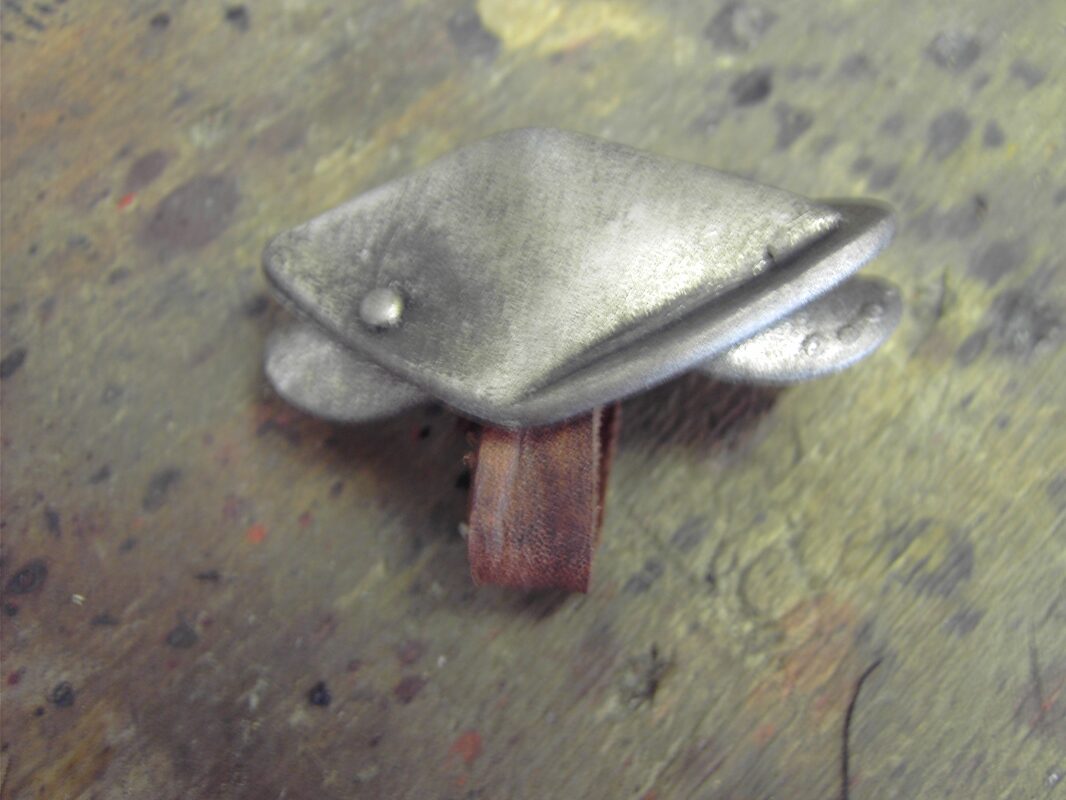
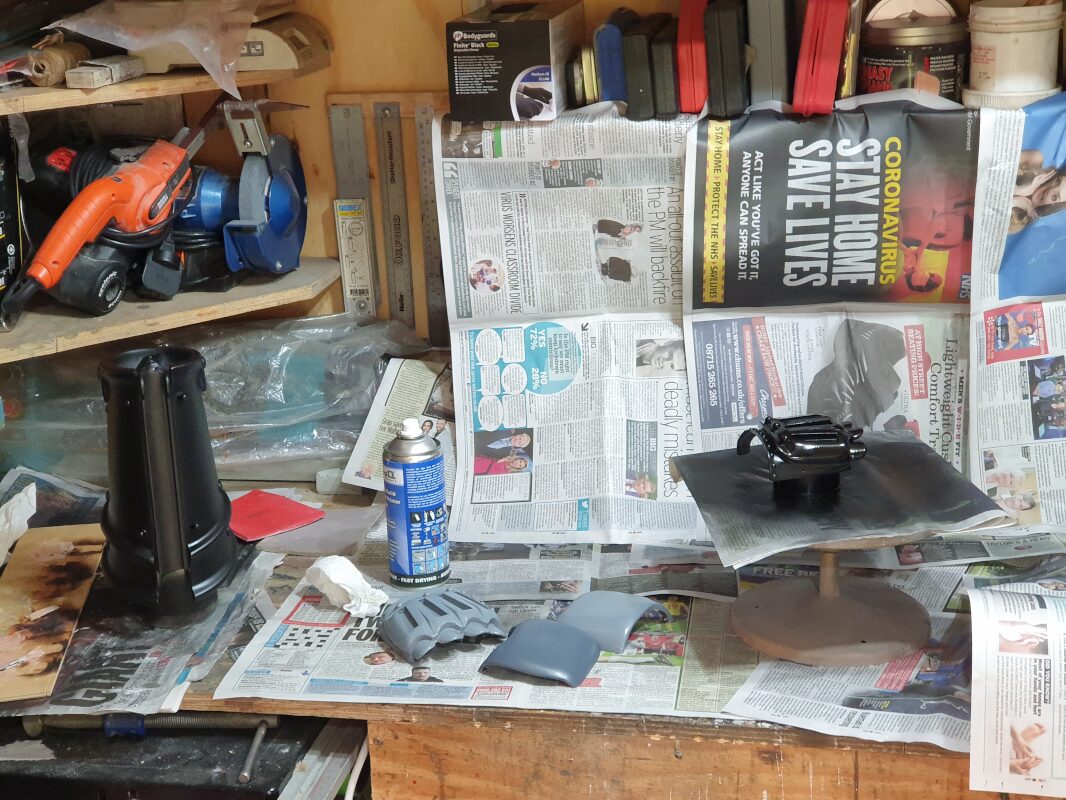
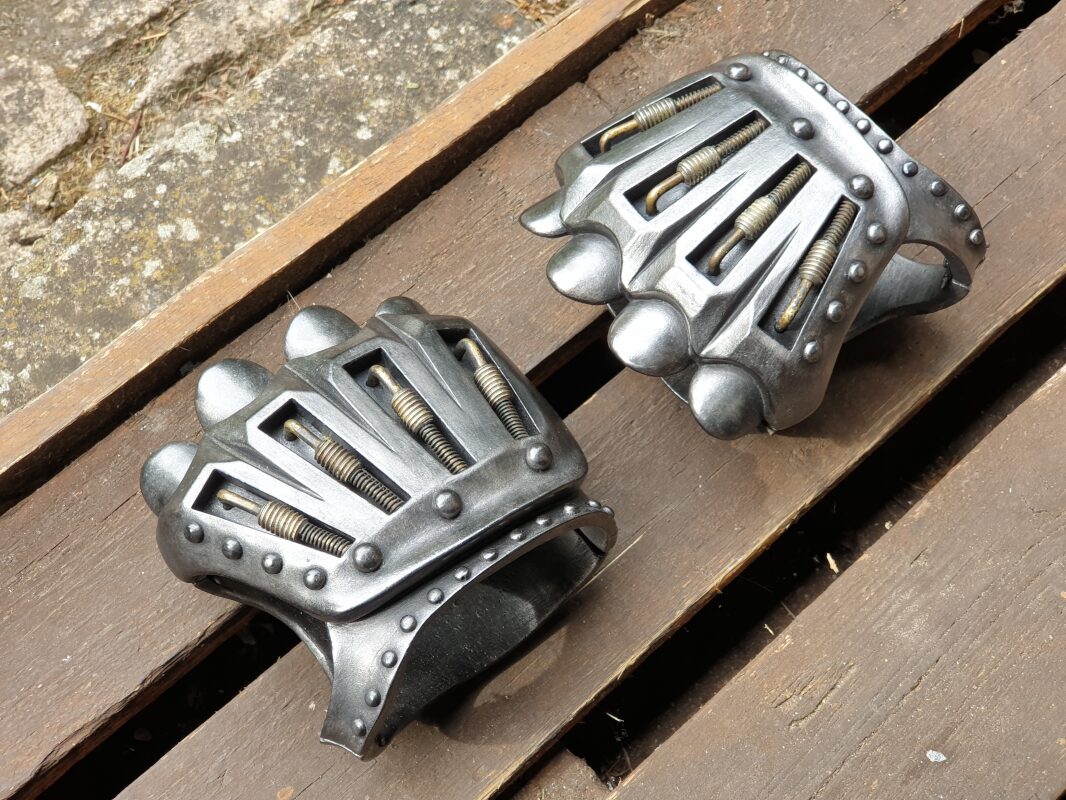
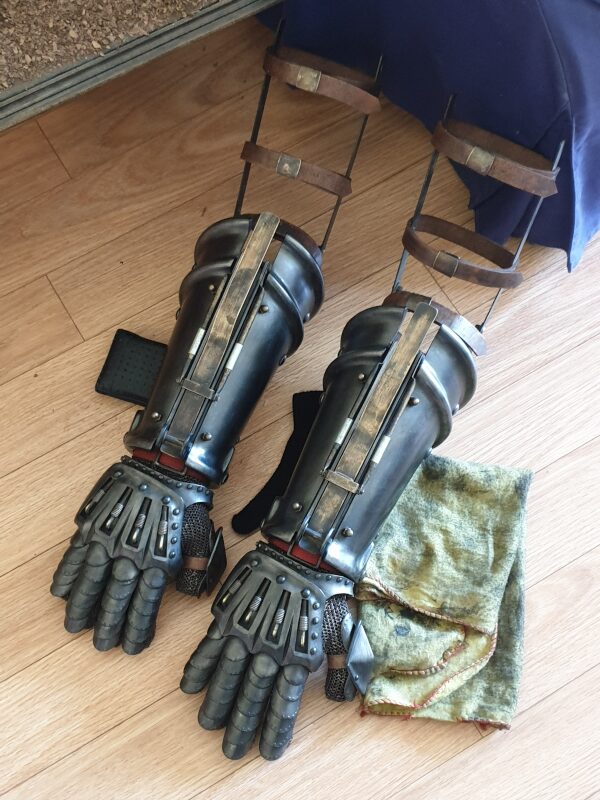
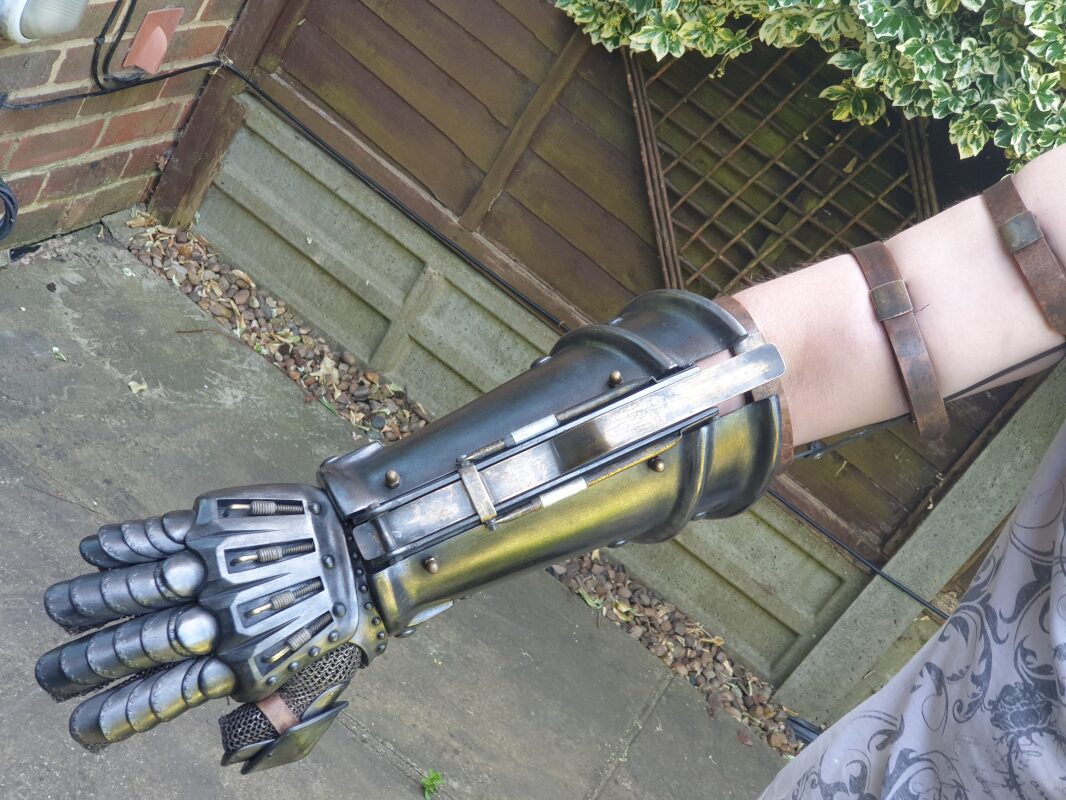 One thing I was never happy with for the first four arms, was the metal paint effect. That involved spraying each plastic piece with primer, then silver paint, then aging using water based paints, sprays, and dirt/grime effects. Wherever there was friction between two plastic pieces, the paint would wear over time, especially around the finger plates. I had experimented with cold metal casting, but found it tarnished and became dull quite quickly, quite apart from how much extra work in finishing it would involve. It wasn't until the final two arms, that I worked out something far more hard-wearing and realistic. I felt able to leave the last two arms looking much 'cleaner', than the previous four, as they now looked more like proper metal. You can read a write-up of that newer process Here. You can also read up the chemical ageing process I used for all the real metal parts Here.
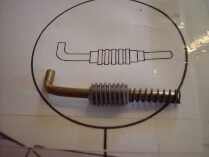
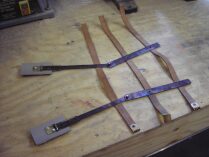
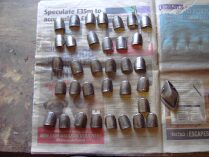
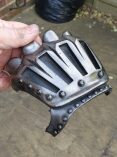
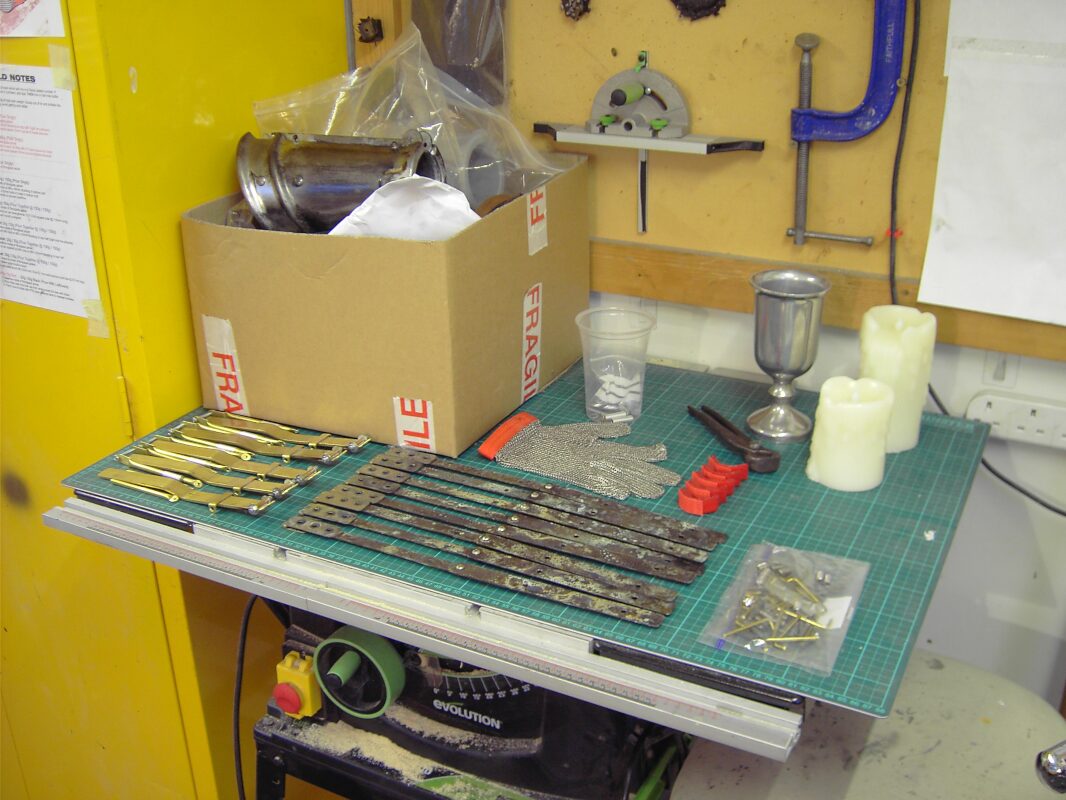
As of writing in 2021, I still have the moulds in storage, but it would be a major undertaking to make any more arms. The five sets of fixings I made back in 2014 have been used up, which would mean a lot more work next time round. The crank handle alone, is made up of 25 metal parts; measured, cut, heated/bent, drilled, soldered/glued & bolted together, then aged.
Prototyping The First Mechanical Arm (June to August 2014)
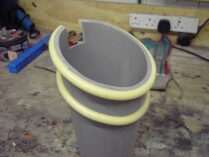
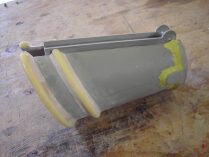
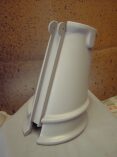
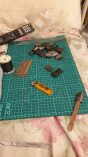
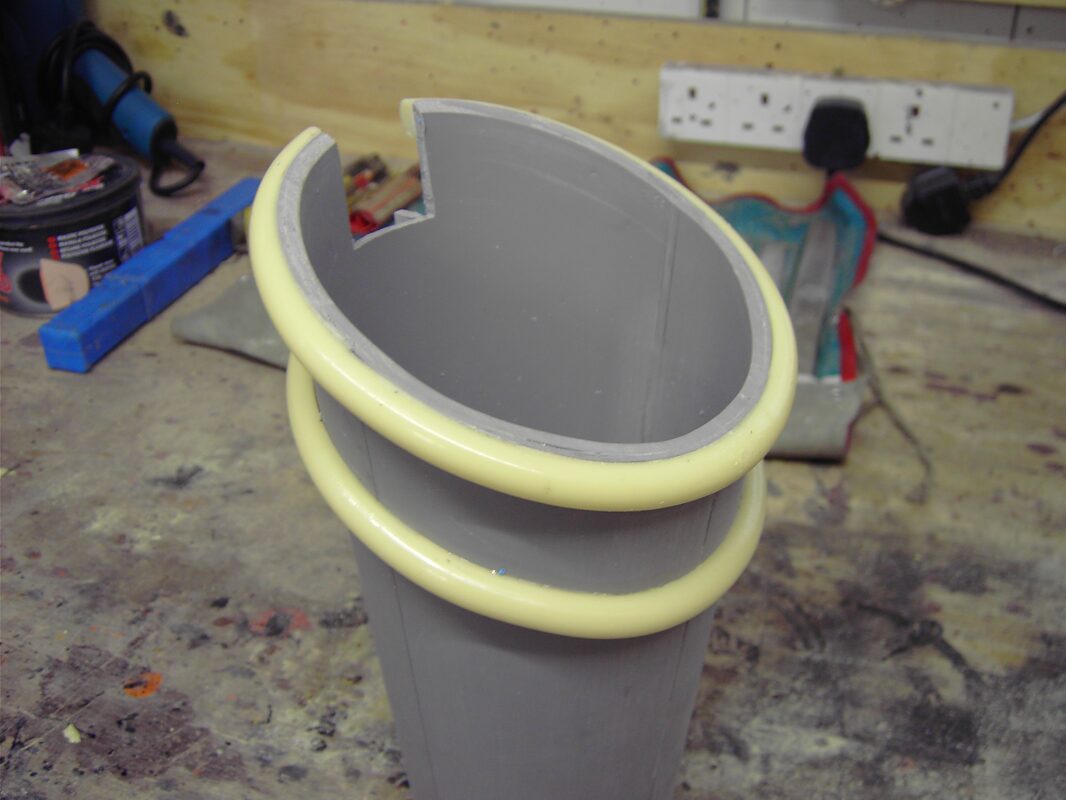
Below you can see a gallery of in-progress project photos, which you can click to enlarge. They are presented in chronological order and were taken at various intervals over the eight week make.
 001 001 |
|
 002 002 |
|
 003 003 |
| |
 004 004 |
|
 005 005 |
|
 006 006 |
| |
 007 007 |
|
 008 008 |
|
 009 009 |
| |
 010 010 |
|
 011 011 |
|
 012 012 |
| |
 013 013 |
|
 014 014 |
|
 015 015 |
| |
 016 016 |
|
 017 017 |
|
 018 018 |
| |
 019 019 |
|
 020 020 |
|
 021 021 |
| |
 022 022 |
|
 023 023 |
|
 024 024 |
| |
 025 025 |
|
 026 026 |
|
 027 027 |
| |
 028 028 |
|
 029 029 |
|
 030 030 |
| |
 031 031 |
|
 032 032 |
|
 033 033 |
| |
 034 034 |
|
 035 035 |
|
 036 036 |
| |
 037 037 |
|
 038 038 |
|
 039 039 |
| |
 040 040 |
|
 041 041 |
|
 042 042 |
| |
 043 043 |
|
 044 044 |
|
 045 045 |
| |
 046 046 |
|
 047 047 |
|
 048 048 |
| |
 049 049 |
|
 050 050 |
|
 051 051 |
| |
 052 052 |
|
 053 053 |
|
 054 054 |
| |
 055 055 |
|
 056 056 |
|
 057 057 |
| |
 058 058 |
|
 059 059 |
|
 060 060 |
| |
 061 061 |
|
 062 062 |
|
 063 063 |
| |
 064 064 |
|
 065 065 |
|
 066 066 |
| |
 067 067 |
|
 068 068 |
|
 069 069 |
| |
 070 070 |
|
 071 071 |
|
 072 072 |
| |
 073 073 |
|
 074 074 |
|
 075 075 |
| |
 076 076 |
|
 077 077 |
|
 078 078 |
| |
 079 079 |
|
 080 080 |
|
 081 081 |
| |
 082 082 |
|
 083 083 |
|
 084 084 |
| |
 085 085 |
|
 086 086 |
|
 087 087 |
| |
 088 088 |
|
 089 089 |
|
 090 090 |
| |
 091 091 |
|
 092 092 |
|
 093 093 |
| |
 094 094 |
|
 095 095 |
|
 096 096 |
| |
 097 097 |
|
 098 098 |
|
 099 099 |
| |
 100 100 |
|
 101 101 |
|
 102 102 |
| |
 103 103 |
|
 104 104 |
|
 105 105 |
| |
 106 106 |
|
 107 107 |
|
 108 108 |
| |
 109 109 |
|
 110 110 |
|
 111 111 |
Craig Warner, UK (August 2014)
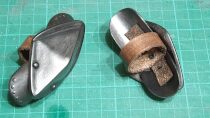
The first completed mechanical arm, bought by Craig from the UK. It took eight weeks to make from scratch, but I was pretty happy with the final result, plus I now had moulds to replicate all the plastic parts to make more arms. Craig also ordered a display case for his arm, ten months later in June 2015.
_001.jpg) 001 001 |
|
_002.jpg) 002 002 |
|
_003.jpg) 003 003 |
| |
_004.jpg) 004 004 |
|
_005.jpg) 005 005 |
|
_006.jpg) 006 006 |
| |
_007.jpg) 007 007 |
|
_008.jpg) 008 008 |
|
_009.jpg) 009 009 |
Bríann O'Connor, Ireland (December 2014)
This second arm went to Ireland. Bríann also bought a Cabin model chainsaw the year before, in 2013. That chainsaw was a replacement for a previous 'Medieval' chainsaw bought in November 2006 bought as a Christmas present for his brother, which was later damaged.
Dennis Carter Jnr, USA (December 2014)
This was made for Dennis Carter Jnr in the USA. Dennis has a huge Evil Dead collection with some really rare pieces, so it's nice to have my replica now as part of that.
Tony Cortez, USA (September 2015)
This was the final mechanical arm I made before closing EvilDeadChainsaws.com in 2015, for a customer in the USA. I put the moulds and all the other assorted related items into storage after this.
The Final Two Mechanical Arms (April to May 2020)
In February 2020, I moved house and in March was able to outfit my own home workshop for the first time since 2009. I had one customer who had been asking about getting a mechanical arm for a few years. I finally decided to take the last two sets of fixtures and fittings and make two last mechanical arms. While that customer wasn't in a financial position to buy it at that time, I offered it online and it was snapped up by a customer in Taiwan. Here you can see a gallery of in-progress photos. They are presented in chronological order and were taken at various intervals over the four week make.
 001 001 |
|
 002 002 |
|
 003 003 |
| |
 004 004 |
|
 005 005 |
|
 006 006 |
| |
 007 007 |
|
 008 008 |
|
 009 009 |
| |
 010 010 |
|
 011 011 |
|
 012 012 |
| |
 013 013 |
|
 014 014 |
|
 015 015 |
| |
 016 016 |
|
 017 017 |
|
 018 018 |
| |
 019 019 |
|
 020 020 |
|
 021 021 |
| |
 022 022 |
|
 023 023 |
|
 024 024 |
| |
 025 025 |
|
 026 026 |
|
 027 027 |
| |
 028 028 |
|
 029 029 |
|
 030 030 |
Min Chung, Taiwan (May 2020)
The final mechanical arm, created for a customer in Taiwan. You can see the difference in the paint finish on the below arm, to the examples above. It's far more hard-wearing and wont wear as the pieces rub together, plus it looks more like real metal.
_001.jpg) 001 001 |
|
_002.jpg) 002 002 |
|
_003.jpg) 003 003 |
| |
_004.jpg) 004 004 |
|
_005.jpg) 005 005 |
|
_006.jpg) 006 006 |
| |
_007.jpg) 007 007 |
|
_008.jpg) 008 008 |
|
_009.jpg) 009 009 |
| |
_010.jpg) 010 010 |
|
_011.jpg) 011 011 |
|
_012.jpg) 012 012 |
| |
_013.jpg) 013 013 |
|
_014.jpg) 014 014 |
|
_015.jpg) 015 015 |
| |
_016.jpg) 016 016 |
|
_017.jpg) 017 017 |
|
_018.jpg) 018 018 |
| |
_019.jpg) 019 019 |
|
_020.jpg) 020 020 |
|
_021.jpg) 021 021 |
If anyone out there wants to make their own mechanical arm replica, you should be able to source all the materials I used from either eBay or local stores, and you can download the high resolution Army Of Darkness Blu-Ray screenshots, original prop photos, and the PDF plans I worked from, within the ZIP file below.
If anyone has photos of their own mechanical arm replicas, or any Evil Dead related replica items, please email them over so they can be added to this site's Collectables - Props & Replicas Section.
|
|
|


_001_lbx.jpg)
_002_lbx.jpg)
_003_lbx.jpg)
_004_lbx.jpg)
_005_lbx.jpg)
_006_lbx.jpg)
_007_lbx.jpg)
_008_lbx.jpg)
_009_lbx.jpg)
_001_lbx.jpg)
_002_lbx.jpg)
_003_lbx.jpg)
_004_lbx.jpg)
_005_lbx.jpg)
_006_lbx.jpg)
_001_lbx.jpg)
_002_lbx.jpg)
_003_lbx.jpg)
_004_lbx.jpg)
_005_lbx.jpg)
_006_lbx.jpg)
_001_lbx.jpg)
_002_lbx.jpg)
_003_lbx.jpg)
_004_lbx.jpg)
_005_lbx.jpg)
_006_lbx.jpg)


_002_lbx.jpg)
_003_lbx.jpg)
_005_lbx.jpg)
_006_lbx.jpg)
_007_lbx.jpg)
_008_lbx.jpg)
_009_lbx.jpg)
_010_lbx.jpg)
_011_lbx.jpg)
_012_lbx.jpg)
_013_lbx.jpg)
_014_lbx.jpg)
_015_lbx.jpg)
_016_lbx.jpg)
_017_lbx.jpg)
_018_lbx.jpg)
_019_lbx.jpg)
_020_lbx.jpg)
_021_lbx.jpg)